The Nourishing Home

living healthier lives in service to the King!

  • Home
  • About
    • About TNH
    • Contact
  • Meal Planning
  • Health & Wellness
    • Real Food Basics
  • Whole30
  • GF Recipes
    • Whole30
    • Breakfast
    • Lunch
    • Entrées
    • Slow Cooker
    • Soups & Stews
    • Sides & Salads
    • Snacks
    • Desserts
    • Kids in the Kitchen
  • My Cookbook
  • Subscribe

18 Frugal Dips for Outdoor Parties

By Kelly · 5 Comments

Frugal Dips

When it comes to bringing a dish to a pot-luck, I always get stuck on what to bring.  It’s important to me that we bring a healthy dish, since you never know what type of foods will be served at the party.  I’ve been to my fair share of gatherings where my dish was the only vegetable on the table!

Whatever we bring MUST be budget-friendly, since our budget isn’t very big to begin with.  Plus with warmer weather approaching, there’s bound to be more outdoor parties, and the cost of bringing pricey dishes to each party can add up quickly.

Food safety also concerns me, and I don’t want to assume the host has space in the fridge for my dish, so I prefer to bring something that can be served at room temperature.  No heating or cooling required, plus no chance of forgetting that my dish was in the freezer!

Finally, the dish should be something I can make using ingredients I already have in the house.  This way, I’m not tempted to make any last minute trips to the store for convenience-type foods.  This seems to be what usually happens when we get a last-minute invite to an impromptu BBQ party, but those foods are over-priced and full of additives and preservatives making them far from healthy!

This short list seems like a tall order, which is why I struggled for a really long time to come up with a solution!  Then one day it hit me:  Bring a healthy and delicious frugal dip! 

Everyone loves a delicious dip, and they’re the one sure-fire way you can ensure fruits and vegetables will get eaten, especially when it comes to kids.  Even if there is a HUGE mound of dip on a carrot, they’re still eating a carrot!

The best part about dips is that you can create one using the ingredients you already have in your kitchen.  This goes for both the dip AND the dippers!

Here’s a simple process for creating your next perfect pot-luck or outdoor party dish:

  1. Start by taking stock of what you have in the kitchen to serve with your dip.  Lots of carrots?  Plenty of apples?  A little bit of several items?  Got a few minutes to make some crackers?
  2. Then browse the appropriate dip category to match-up a recipe with your dippers.  Browse the ingredients of the recipe to ensure you have everything needed.
  3. Substitute ingredients as needed using the “money saving ideas” at the end of this post.

Use this method the next time you’re invited to a party, and save time and money without sacrificing nutrition!

Favorite Frugal Dips for Outdoor Parties

Apple-Dip

Fruit Dips

Great fruits for dipping:  Apple slices, banana chunks, blueberries, cantaloupe, peeled clementines, grapes, honeydew, kiwi, mango, peaches, pears, pineapple or strawberries.  Fruits that are prone to browning (i.e. apples, bananas, pears, etc.) can be tossed with lemon juice to maintain their pretty appearance.

  • Caramel Apple Dip
  • Chocolate Dip
  • Cream Cheese Fruit Dip
  • Honey-Lime Yogurt Dip

Veggie Dips

Great veggies for dipping:  Asparagus, broccoli, bean pods, bell pepper, carrots, cauliflower, celery, cucumber, radish, tomatoes and zucchini.

  • Avocado Dip
  • Creamy DF Basil Dip
  • Traditional Hummus
  • Creamy Mustard Sauce
  • Super Green Guacamole
  • Homemade Ranch Dressing
  • Confetti Veggie Spread

veggie-dip_600

Homemade Crackers

Here are a few gluten-free/grain-free cracker options that are delicious with any of the above dips!

  • Cheese & Chia Crackers (gluten-free)
  • Multi-seed Crackers (grain-free)
  • Rosemary & Raisin Crackers (grain-free)
  • Simple Herb Crackers (grain-free)
  • Baked Cumin Tortilla Chips  (gluten-free)
  • Homemade Graham Crackers (grain-free)

Additional Money Saving Tips for Dips

Beans:  If you have time, make beans from scratch instead of buying canned beans.  Your savings is 70¢ per can.  If you don’t have garbanzo beans on hand, use white beans instead.  The taste will be only slightly different, yet it will still be healthy and delicious!

Citrus:  Bottled citrus juice (lemon or lime) is a fine substitute for fresh citrus juice if you don’t have the fruit.  The opposite switch works too if you have the fruit, but not the juice.  If you need lemon juice, but only have lime, make the switch!  The slight flavor difference is hardly noticeable in most dishes.

Cream:  Heavy cream can often be substituted with half & half in a 1:1 ratio.  If the dip is thick, cut back on another liquid to maintain consistency.  If you don’t have half & half, try thinning 1/4 cup sour cream with 1-2 Tbsp milk.

Garlic:  Fresh garlic is interchangeable for powdered garlic, and the opposite is true as well. Substitute 1 tsp of garlic powder for 1 garlic clove, minced or crushed.

Mayonnaise:  Sour cream, Greek yogurt and mayonnaise are often interchangeable in recipes.  Use what you have on-hand and add a bit of lemon juice, if the dip needs more tang.

Mustard:  All mustards can be used interchangeably:  brown, yellow, deli, honey or spicy.  The recipe will change slightly in flavor, but you’ll still get that signature mustard tang.

Oils:  If you don’t have an oil but have the seed (ex: you have sesame seeds but no tahini, or flax seeds but no flax seed oil), add 1 Tbsp of the seed to the recipe with 1/2 tsp olive oil and blend as usual.  Another option is to substitute olive oil for the oil called for in the recipe.

Finally, don’t feel pressured to bring a certain amount of any one particular vegetable, or even the typical dipping veggie.  Often, having a mixed/matched variety is the most appealing!

What’s your favorite dip to bring to parties?  Do you prefer a sweet dessert dip with fruit, or a savory dip with veggies?  Share your ideas in the comments below.

Note from Kelly: Don’t miss all of the other great budgeting posts that Tiffany has shared here. Simply click here and keep scrolling through to see her many helpful posts on how to save money on your food budget.

You Might Also Like:

Puppies LOVE Real Food too!
Cinnamon-Walnut Buttons (GF)
Healthy "Caramel" Apple Dip (GF, DF)

Filed Under: Dips/Dressings, Savory, Snacks, Sweet ·

How to Make Dairy & Non-Dairy Greek-Style Yogurt {no straining required}

By Kelly · 51 Comments

This recipe photo tutorial teaches an easier way to achieve thick, creamy dairy and non-dairy Greek-Style Yogurt no straining required. Can you guess the secret?

Thick.creamy.delicious! Three words that definitely describe Greek Yogurt, which is why so many of us are huge fans of this custard-like probiotic treat.

Yet, each time I attempted to make it, I found myself frustrated by the straining process required to achieve its classic thick texture. My frugal tendencies cringed at how much yogurt was wasted in the straining process, and my neat-nick alarms were blaring over the mess of cleaning out the yogurt-laden strainer.

Of course, I don’t want my issues to rain on anyone’s Greek yogurt making parade, so if you love straining yogurt, then don’t let me stop you.

But as for me and my yogurt-devouring family, there just had to be an easier way to achieve a thick, creamy yogurt without all the extra effort and fuss.

Thankfully, my dreams came true as I found out from a few real foodie friends THE SECRET … you can indeed bypass the pain of the strain, thanks to handy dandy plain gelatin.

Basic Dairy and Non-Dairy Recipes for Making Greek-Style Yogurt 

Since this is intended to be a visual step-by-step tutorial, the two recipes below (for dairy and non-dairy Greek-Style Yogurt No Straining Required) provide the list of ingredients and some important instructions, but please do be sure to follow the photo tutorial below for easy step-by-step instructions.

Print
Whole Milk Greek-Style Yogurt

Yield: 1 quart (4 cups) of yogurt

Ingredients

  • 1 quart (4 cups) *pasteurized organic whole milk
  • 1 1/2 teaspoons unflavored gelatin
  • 1/4 cup plain organic Greek yogurt (or 1 yogurt starter packet)

Instructions

    Follow the step-by-step photo tutorial below for detailed instructions. The following is a brief outline for easy printing and reference.
  1. Heat the milk over medium to medium-high heat until it reaches 165 degrees, making sure to stir the milk constantly. Do not allow the milk to come to a boil.
  2. Once the milk comes to temp, turn off the burner and place the pan on a cooler area on the stovetop. Allow milk to cool to 110 degrees. (Or you can use a cold water bath method to more quickly cool the milk – see the photo tutorial for details.)
  3. When milk reaches 110 degrees, thoroughly whisk in the gelatin for about one minute.
  4. Then add the yogurt starter and continue to whisk until thoroughly combined, about one minute.
  5. Place the yogurt mixture into a yogurt maker, or use another reliable incubation method as outlined in the photo tutorial.
  6. Allow yogurt to culture for 8-12 hours, depending on taste preference. The longer you culture, the more tangy the taste. (If making SCD yogurt be sure to culture for 24 hours.) Then give it a good whisking to re-blend, and transfer it to the refrigerator to cool completely. Once chilled, you can transfer the yogurt to individual serving containers, if desired.
  7. Or use your homemade yogurt to make delicious Fruit & Yogurt Parfaits, Yogurt Banana Splits, Fruit-on-the-Bottom Yogurt Cups and Homemade Flavored Yogurt.

Notes

* Be sure to use pasteurized milk only for this recipe. Yogurt experts do not recommend using ultra-pasteurized milk to make yogurt. UHT milk is actually cooked at high temps making it unsuitable for culturing.

Also note: I do not recommend using this recipe to make raw milk yogurt, as it requires a different heating process. See Cultures for Health for details.

P.S. It's normal to see small gelatinous clumps of yellow liquid when using gelatin to thicken yogurt. It is the whey that has separated from the milk solids. Simply use a whisk to gently blend it back into the yogurt.

3.1
https://thenourishinghome.com/2014/03/make-greek-style-yogurt-no-straining-required/

Print
Coconut Milk Greek-Style Yogurt (Dairy Free)

Yield: 3-4 cups of coconut milk yogurt

Ingredients

  • Two 13.5 oz cans pure coconut milk
  • 1 1/2 teaspoons unflavored gelatin
  • 1 packet of non-dairy yogurt starter or 1 good quality probiotic capsule

Instructions

    Follow the step-by-step photo tutorial below for detailed instructions. The following is a brief outline for easy printing and reference.
  1. Heat the coconut milk over medium to medium-high heat until it reaches 115 degrees, making sure to stir the milk constantly. Do not allow the milk to come to a boil.
  2. Once the coconut milk comes to temp, turn off the burner and move the saucepan to a cooler area on the stovetop.
  3. Allow milk to cool to 110 degrees. (This won't take long, since it's such a small temperature difference.) When milk reaches 110 degrees, thoroughly whisk in the gelatin for about one minute. And then add the non-dairy yogurt starter and continue to whisk until thoroughly combined, about one minute.
  4. Place the yogurt mixture into a yogurt maker, or use another reliable incubation method as outlined in the photo tutorial.
  5. Allow yogurt to culture for 10-18 hours. The longer you culture, the more tangy the taste.
  6. Then give it a good whisking to re-blend, and transfer it to the refrigerator to cool completely.
  7. Once chilled, thoroughly whisk the yogurt again to blend it together, since separation commonly occurs. Cover and store in fridge. Or transfer the yogurt to individual serving containers, if desired.
  8. Use your homemade coconut milk yogurt to make delicious Fruit & Yogurt Parfaits, Yogurt Banana Splits, Fruit-on-the-Bottom Yogurt Cups and Homemade Flavored Yogurt.

Notes

Almond Milk Yogurt: Several have asked if this recipe will work with almond milk substituted for the coconut milk. You can substitute with almond milk, but do note that the yogurt will be quite runny without an added starch, such as arrowroot powder or tapioca starch. For details on making almond milk yogurt, I recommend checking out Lexie's Kitchen.

3.1
https://thenourishinghome.com/2014/03/make-greek-style-yogurt-no-straining-required/

Photo Tutorial:
How to Make Greek-Style Yogurt in 5 Easy Steps!

This recipe photo tutorial teaches an easier way to achieve thick, creamy dairy and non-dairy Greek-Style Yogurt no straining required. Can you guess the secret?

Making Greek -Style Yogurt is not only easy, it’s also a great way to save money and avoid the unhealthy additives found in many commercial brands. And if you’re not a fan of straining either, just follow these simple steps below, and you’ll soon be enjoying your own healthy homemade thick-n-creamy Greek-Style Yogurt! Yum!

Here’s What You’ll Need to Get Started!

This recipe photo tutorial teaches an easier way to achieve thick, creamy dairy and non-dairy Greek-Style Yogurt no straining required. Can you guess the secret?

Making homemade yogurt doesn’t require a lot of expensive gadgets, but you will need to purchase a yogurt starter (details below) and a waterproof thermometer, if you don’t already own one.

It’s much more convenient to have a yogurt maker, but it’s not an absolute must. There are several other methods for incubating yogurt, which are outlined below.

Step One: Heating the Milk

This recipe photo tutorial teaches an easier way to achieve thick, creamy dairy and non-dairy Greek-Style Yogurt no straining required. Can you guess the secret?

The temperature you’ll need to heat the milk depends on the type of milk and cultures used. In this post, I am covering how to make whole milk Greek-Style Yogurt using either pasteurized whole milk, or pure coconut milk. If you would like to make raw milk yogurt, I recommend checking out the instructions provided at Cultures for Health for best results.

Heating Whole Milk
In general, you’ll want to heat pasteurized whole milk between 160–165 degrees, if using Greek-style yogurt cultures. Or 180–185 degrees, if using traditional yogurt cultures. (Note: If purchasing a powdered yogurt starter, be sure to follow the instructions provided.)

Heating Coconut Milk
If you’d like to make an easy and tasty non-dairy yogurt, I recommend using pure coconut milk, not “light” coconut milk. I find it to be the most consistent in achieving a thicker coconut milk yogurt with a pleasant tangy flavor. (Note: Do not use coconut milk beverages as they will not work.) Simply heat the pure coconut milk to 115 degrees and then proceed to step two below.

Step Two: Cooling the Milk

This recipe photo tutorial teaches an easier way to achieve thick, creamy dairy and non-dairy Greek-Style Yogurt no straining required. Can you guess the secret?

Whether you’re making dairy or non-dairy yogurt, 110 degrees is the magic number! When the milk reaches 110 degrees, that’s the time you’ll add the gelatin and the starter (see details in step three below).

Time-Saving Tip: A simple method for cooling the milk faster is to create a cold water bath. Simply fill a large stockpot with water until it reaches halfway up the saucepan of hot milk. Then add a little ice. Slowly whisk the milk until it reaches 110 degrees. Then remove the pan of milk from the cold water and move on to step three below. (Note: If using ceramic cookware, it’s important to know that going from one temperature extreme to another may cause it to crack or break. To be safe, transfer the hot milk to a stainless steel saucepan or bowl instead.)

Step Three: Adding the Gelatin and Starter

This recipe photo tutorial teaches an easier way to achieve thick, creamy dairy and non-dairy Greek-Style Yogurt no straining required. Can you guess the secret?

As previously mentioned, gelatin is the secret ingredient to making a thick, custard-like yogurt without the need for messy straining. I personally like Great Lakes brand, because it’s pure gelatin made from grassfed cows. Just add the gelatin to the warm milk and whisk thoroughly for at least one minute. Then, add your starter and whisk again for an additional minute to ensure the mixture is well combined.

Choosing the Right Starter
The term “starter” refers to the live cultures that turn ordinary milk into that thick-n-tangy probiotic treat we all love. You have several options when it comes to yogurt starters. The simplest is to use a good quality, plain organic store-bought Greek-Style yogurt, such as Straus or Wallaby. Just make sure that the Greek yogurt you select as your starter has live and active cultures in it, and does not contain unwanted additives.

Another option is to purchase powdered starters, such as those available at Cultures for Health. If you’re dairy-free, you’ll want to be sure to use a starter that is dairy-free such as Belle & Bella or Cultures for Health’s Vegan Starter. A tip I learned in Danielle’s book Against All Grain is that you can also use a probiotic supplement as a starter for coconut milk yogurt, such as Ultimate Flora.

Does it really matter which starter you choose? Yes. The type of cultures in the starter have an impact on the overall flavor of the yogurt, and the cost of your homemade yogurt too. I found it helpful to experiment a bit by trying different types of cultures, until we found one that we really liked and is budget-friendly.

Of course, once you make your first batch of homemade yogurt, depending upon the cultures used, you can set aside a little of your homemade batch to use as starter for your next one. Keep in mind, it’s important to use your reserved starter within 3-4 days for best results. Additionally, after making several batches of yogurt, you may need to start over with a fresh starter (not from your homemade yogurt). 

Step Four: Culturing Your Yogurt (a.k.a. Incubation)

This recipe photo tutorial teaches an easier way to achieve thick, creamy dairy and non-dairy Greek-Style Yogurt no straining required. Can you guess the secret?

Another important step in the yogurt-making process is incubating the yogurt mixture. The more stable and consistent the temperature remains, the better the taste, texture and culturing of your yogurt.

I personally prefer to use a simple, no-nonsense yogurt maker, since I’m making yogurt at least 1-2 times per week. It was worth the small investment to be able to just pour my yogurt mixture into the yogurt maker, turn it on, set the timer, and go about my day.

However, there are several other incubation methods that can be utilized. The key to each of these methods is ensuring your yogurt mixture remains at a consistent temperature of 110 degrees until it has set, usually about 7-8 hours for whole milk yogurt, and 10-18 hours for coconut milk yogurt.

Step Five: Enjoy!

This recipe photo tutorial teaches an easier way to achieve thick, creamy dairy and non-dairy Greek-Style Yogurt no straining required. Can you guess the secret?

Congratulations! If you’ve followed this recipe tutorial, you’ve just made an incredibly healthy and delicious real food for far less than you would pay for good quality store-bought brands. And there are soooo many ways to enjoy your fresh homemade yogurt.

This recipe photo tutorial teaches an easier way to achieve thick, creamy dairy and non-dairy Greek-Style Yogurt no straining required. Can you guess the secret?
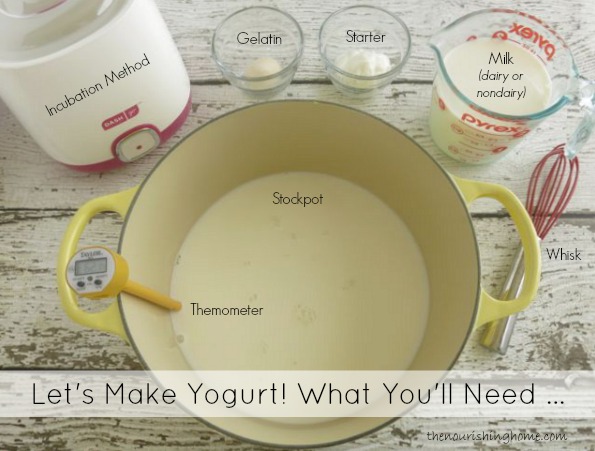
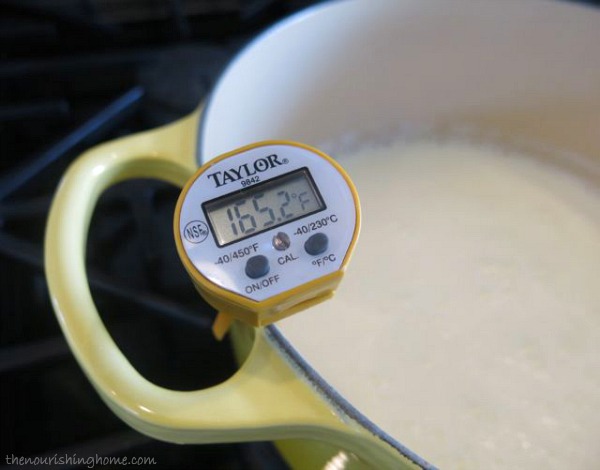
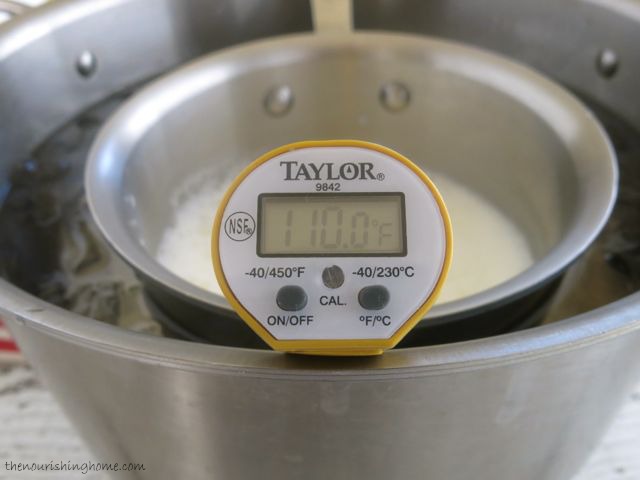
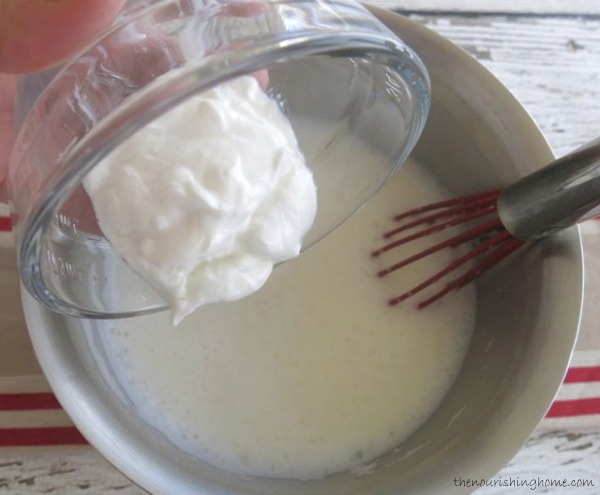
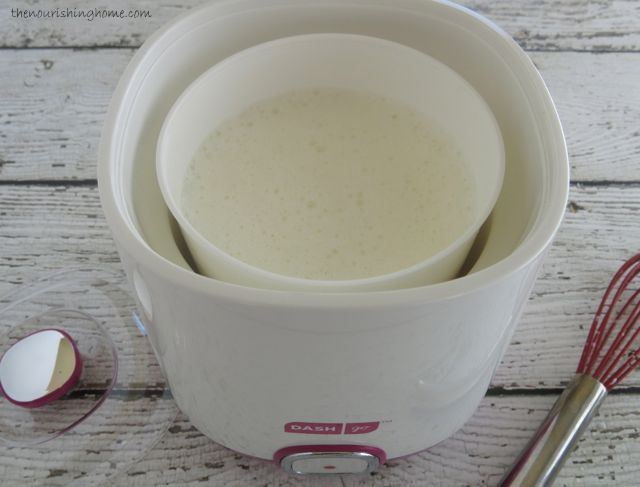
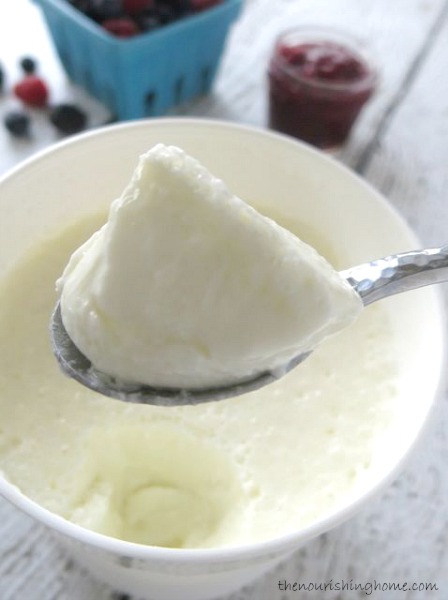
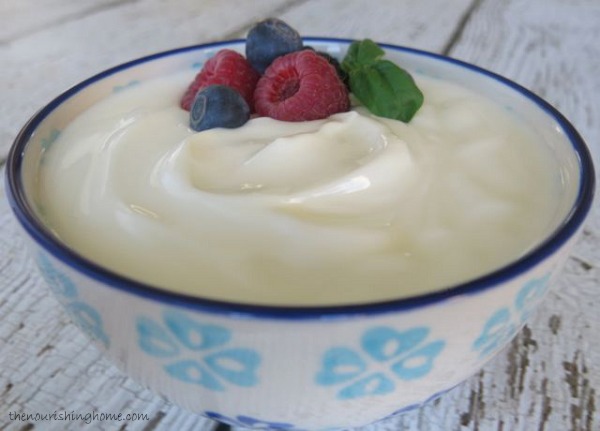
Here are a few of our favorite recipes for enjoying homemade yogurt:
• Fruit & Yogurt Parfaits
• Fruit on the Bottom (and top) Yogurt Cups
• Yogurt Banana Splits
• Peach Crisp Yogurt Cups
• Homemade Flavored Yogurt 

This recipe photo tutorial teaches an easier way to achieve thick, creamy dairy and non-dairy Greek-Style Yogurt no straining required. Can you guess the secret?

What are your favorite ways to enjoy delicious homemade yogurt? 

You Might Also Like:

Almond Flour Blueberry Scones {Grain-Free, Dairy-Free Option}
Healthy "Caramel" Apple Dip (GF, DF)
Easy Summer Berry Yogurt Parfait

Filed Under: Other Breakfast Foods, Sweet ·

How to Make Grain Free Granola {Step-by-Step}

By Kelly · 50 Comments

One crunchy bite is all it takes to become completely smitten with this grain free granola. Its cinnamony flavor and rich vanilla undertones is a delight!

One crunchy bite is all it takes to become completely smitten with this grain free granola. Its slightly sweet cinnamony flavor with rich vanilla undertones combines beautifully with crisp toasted coconut and your favorite fresh or dried fruit. It’s perfect with a splash of almond milk, or as a topping for yogurt parfaits and ice cream.

One crunchy bite is all it takes to become completely smitten with this grain free granola. Its cinnamony flavor and rich vanilla undertones is a delight!

Since going grain-free, I’ve slowly been finding new ways to make old favorites. And since my gluten-free granola is a tough act to follow, it’s been slow going to find a grain-free way to capture the crunchy, yet chewy texture of oats and ensure the formation of sweet cereal clusters. But I was up for the challenge!

Rather than boring you with the details of recipe development, I’ll jump straight to the punchline … Eureka! I’m beaming (and thanking the Lord) for the wonderful victory in achieving a grain free granola that is so close to my soaked oats version that I can now honestly say, I don’t miss those oats at all. And I’m betting you won’t either!

One crunchy bite is all it takes to become completely smitten with this grain free granola. Its cinnamony flavor and rich vanilla undertones is a delight!

Be sure to check out my Step-by-Step Photo Tutorial following the recipe below. I’ll walk you through each step of the process, so you’ll learn just how easy it is to make the best grain free granola ever! (Well, maybe I’m exaggerating just a little, but seriously, it’s REALLY good!)

One crunchy bite is all it takes to become completely smitten with this grain free granola. Its cinnamony flavor and rich vanilla undertones is a delight!

P.S. Just a friendly reminder, that I provide free monthly meal plans over at The Better Mom blog. Each week’s meal plan contains delicious family-friendly GF recipes utilizing a time-saving method to make getting a healthy dinner on the table a snap! I highly recommend you pop over to The Better Mom and download these free meal plans.

One crunchy bite is all it takes to become completely smitten with this grain free granola. Its cinnamony flavor and rich vanilla undertones is a delight!This delightful recipe is just one of more than 100 irresistible grain-free, dairy-free recipes in my new cookbook – Everyday Grain-Free Baking!

From breads, biscuits and muffins to savory snacks and decadent treats, you’ll find step-by-step instructions, beautiful color photographs and helpful tips & tidbits to make all of your GF baking adventures a delicious success!

Click here to get a SNEAK PEEK of the book!

Print
Grain Free Cinnamon Crunch Granola (DF)

Yield: 5-6 cups of granola

Ingredients

    Nut Mixture
  • 1 1/2 cups raw whole almonds
  • 1 cup raw whole cashews
  • 1 cup raw walnut halves
  • 1 tsp sea salt
  • All-Natural Sweetener
  • 1/4 cup *pure coconut butter, softened
  • 1/2 cup honey (I prefer a mild flavor such as sage or clover)
  • 2 tbsp pure vanilla extract
  • 1 tbsp ground cinnamon
  • 1 tsp coconut flour
  • 1/4 tsp sea salt
  • Add-ins
  • 3/4 cup unsweetened coconut flakes
  • Your favorite fresh or dried fruit

Instructions

    Soaking the Nuts
  1. Place the nuts and salt in a large bowl. Cover with warm filtered water so that the water level is at least two inches above the nuts. Cover the bowl with a plate or clean kitchen towel, and allow the nuts to soak 18-24 hours.
  2. When soaking time is completed, drain and rinse nuts. Place on a clean kitchen towel to absorb excess moisture.
  3. Preparing the Sweetener
  4. In a large bowl, whisk together the softened coconut butter and honey until smooth and creamy. Then add the remaining ingredients (vanilla, cinnamon, coconut flour and salt). Whisk until well combined; set aside.
  5. Processing the Nuts
  6. Using a food processor, place a couple of handfuls of the soaked nuts into the processor bowl and pulse to chop the nuts until they are about the size of oats, as shown in photo below. (Do not over-process or you will create nut meal. By using the pulse button, it will be easier for you to achieve a uniform size and ensure you don't over-process the nuts into flour.)
  7. Add the finely chopped nuts to the bowl with the honey mixture. Once all nuts are processed, use a rubber spatula to fold them into the honey mixture until well combined.
  8. Baking the Granola
  9. Preheat oven to 210°F. Line a 12x17-inch rimmed baking sheet with parchment paper.
  10. Spoon grain-free granola mixture onto the parchment-lined baking sheet. Use an angled spatula to evenly spread out the granola across the pan into a thin layer.
  11. Bake granola for two hours at 210°F. Then remove the baking sheet and gently flip over the granola, section by section, Use the top of your spatula to gently separate any large pieces into small cereal clusters.
  12. Return granola to the oven and bake another two hours. Then remove and use the spatula to again turn and gently stir the granola. Sprinkle top with unsweetened coconut flakes.
  13. Return granola to the oven and bake another 30-45 minutes, until coconut is slightly toasted. Turn off the oven. Place baking sheet on the stovetop to cool. After about 5-8 minutes, check the granola for the crunch-factor. If it's crunchy enough for you, allow it to continue cooling. If it isn't crunchy enough, return it to the warm oven and allow it to sit in the warm oven for 20-30 minutes more. Remove from oven and allow the granola to cool again on stovetop 5-8 minutes and again check the crunch-factor.
  14. When granola is crunchy enough for you, allow it to completely cool about 30 minutes. (Please note: The granola will become crunchier the cooler it is.) Then immediately transfer it to mason jars (or other airtight containers). Store in the pantry for up to two weeks or in the fridge or freezer for up to a month.
  15. Enjoy with your favorite mix-ins such as fresh or dried fruit. Or use it as a topping for yogurt parfaits or over ice cream.

Notes

See How It's Done: Remember to check out the photo tutorial following this recipe.

* Coconut Butter Substitution: In anticipation of the question about how to substitute the coconut butter called for in this recipe, you can replace the coconut butter with 3 tbsp of coconut oil (or softened butter), but the results (although tasty) are just not the same, since coconut butter gives the granola a deep rich flavor and provides an especially nice crunch without a heavy coconut taste or oily texture.

So, I really recommend making a small invest in a jar of pure coconut butter. It is truly delicious, which is why you'll be seeing it in many more recipes to come, such as my dairy-free cookie icing.

3.1
https://thenourishinghome.com/2014/03/how-to-make-grain-free-granola/

How to Make Grain Free Granola Step-by-Step

One crunchy bite is all it takes to become completely smitten with this grain free granola. Its cinnamony flavor and rich vanilla undertones is a delight!
1. Soaking the Nuts
Place the nuts and salt in a large bowl. Cover with warm filtered water so that the water level is at least two inches above the nuts. Cover the bowl and soak 18-24 hours.

One crunchy bite is all it takes to become completely smitten with this grain free granola. Its cinnamony flavor and rich vanilla undertones is a delight!
2. Rinsing and Drying the Nuts
When soaking time is completed, drain and rinse nuts. Place on a clean kitchen towel to absorb excess moisture.

One crunchy bite is all it takes to become completely smitten with this grain free granola. Its cinnamony flavor and rich vanilla undertones is a delight!
3. Preparing the Sweetener
In a large bowl, whisk together softened coconut butter and honey until smooth and creamy. Then add the remaining ingredients (vanilla, cinnamon, coconut flour and salt). Whisk until well combined; set aside.

One crunchy bite is all it takes to become completely smitten with this grain free granola. Its cinnamony flavor and rich vanilla undertones is a delight!
4. Processing the Nuts
Using a food processor, place a couple of handfuls of the soaked nuts into the processor bowl and pulse to chop the nuts until they are about the size of oats. (Do not over-process or you will create nut meal.) 

One crunchy bite is all it takes to become completely smitten with this grain free granola. Its cinnamony flavor and rich vanilla undertones is a delight!
5. Blending the Granola
Once all nuts are processed, use a rubber spatula to fold them into the honey mixture until well combined.

One crunchy bite is all it takes to become completely smitten with this grain free granola. Its cinnamony flavor and rich vanilla undertones is a delight!
6. Spreading the Granola on the Baking Sheet
Preheat oven to 210°F. Line a 12×17-inch rimmed baking sheet with parchment paper. Spoon grain-free granola mixture onto the parchment-lined baking sheet. Use an angled spatula to evenly spread out the granola across the pan into a thin layer.

One crunchy bite is all it takes to become completely smitten with this grain free granola. Its cinnamony flavor and rich vanilla undertones is a delight!
7, Baking & Turning the Granola
Bake granola according recipe instructions, gently turning the granola as outlined in the recipe above. Do not over mix, as you simply want to gently divide the mixture into small cereal clusters as shown above.

One crunchy bite is all it takes to become completely smitten with this grain free granola. Its cinnamony flavor and rich vanilla undertones is a delight!
8. Finishing the Granola
Sprinkle top with unsweetened coconut flakes, and continue baking per the recipe instructions above. The granola is ready when the coconut is lightly toasted and the granola reaches desired level of crunchiness.

One crunchy bite is all it takes to become completely smitten with this grain free granola. Its cinnamony flavor and rich vanilla undertones is a delight!

Enjoy with your favorite mix-ins such as fresh or dried fruit and a splash of milk. Absolutely delightful!

Disclosure: Some of the links in this post include affiliate links, providing The Nourishing Home a small percentage of the sale at no additional cost to you. Of course, you are not obligated to use these links to make a purchase, but if you do, it helps to support this site and ministry. Thank you!

You Might Also Like:

Healthy "Caramel" Apple Dip (GF, DF)
Easy Summer Berry Yogurt Parfait
Raw Cookie Dough Bites (GF)

Filed Under: Porridges & Cereals, Sweet ·

  • « Previous Page
  • 1
  • …
  • 3
  • 4
  • 5
  • 6
  • 7
  • …
  • 11
  • Next Page »

My New Cookbook is Here!

Welcome to The Nourishing Home!

I’m so glad you’re here and want you to feel right at home! My heart in creating this blog is to help you by sharing helpful meal planning strategies and nourishing GF recipes that are healthy, easy and delicious with thanksgiving to God! [Read More …]


All content (recipes, photos, posts, etc.) on this site is the creative property of Kelly Smith. You are welcome to share a photo via social media, as long as it contains a link back to the corresponding recipe or post from this site. However, you may not republish a recipe in its entirety in any form. For questions, or for permission to use a photo or recipe, please contact me via email at [email protected]. Thank you!

Please Note: All content (recipes, photos, text, etc.) on this site is the creative property of Kelly Smith of The Nourishing Home. You are welcome to share a photo via social media, as long as it contains a link back to the corresponding recipe from this site. However, re-publishing a recipe in any form is strictly prohibited. Additionally, please refrain from adapting recipes without properly linking back to the original recipe, and keep in mind that simple substitutions do not constitute an adapted or original recipe. For details regarding recipe copyright law, please visit the Food Blog Alliance.
The Nourishing Home is a participant in the Amazon Services LLC Associates Program, an affiliate advertising program designed to provide a means for sites to earn advertising fees by advertising and linking to amazon.com.

Privacy Policy
DMCA.com

Copyright © 2026 · All Rights Reserved · The Nourishing Home · Artwork by Nancy Panaccione · Site Design by Deluxe Designs · Log in