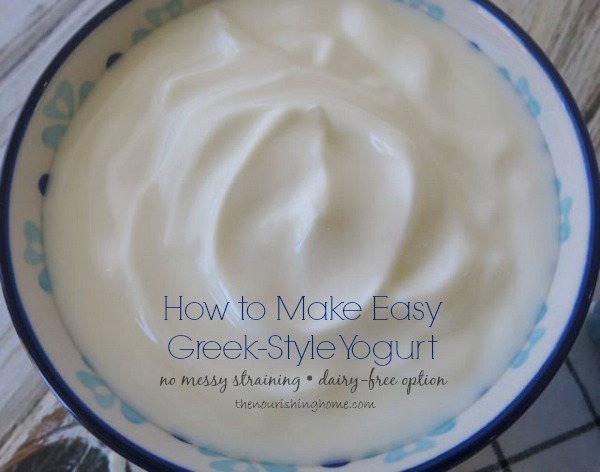
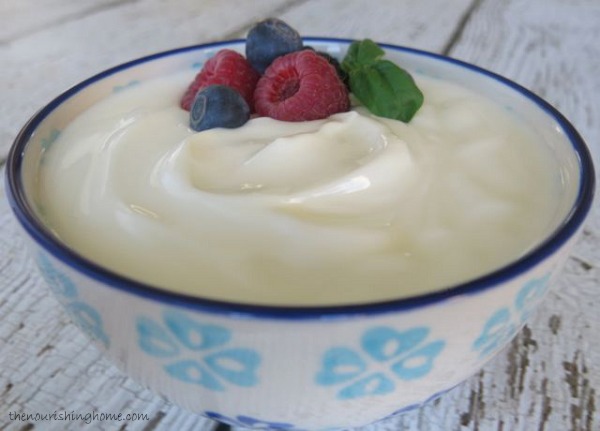
Thick.creamy.delicious! Three words that definitely describe Greek Yogurt, which is why so many of us are huge fans of this custard-like probiotic treat.
Yet, each time I attempted to make it, I found myself frustrated by the straining process required to achieve its classic thick texture. My frugal tendencies cringed at how much yogurt was wasted in the straining process, and my neat-nick alarms were blaring over the mess of cleaning out the yogurt-laden strainer.
Of course, I don’t want my issues to rain on anyone’s Greek yogurt making parade, so if you love straining yogurt, then don’t let me stop you.
But as for me and my yogurt-devouring family, there just had to be an easier way to achieve a thick, creamy yogurt without all the extra effort and fuss.
Thankfully, my dreams came true as I found out from a few real foodie friends THE SECRET … you can indeed bypass the pain of the strain, thanks to handy dandy plain gelatin.
Basic Dairy and Non-Dairy Recipes for Making Greek-Style Yogurt
Since this is intended to be a visual step-by-step tutorial, the two recipes below (for dairy and non-dairy Greek-Style Yogurt No Straining Required) provide the list of ingredients and some important instructions, but please do be sure to follow the photo tutorial below for easy step-by-step instructions.
Ingredients
- 1 quart (4 cups) *pasteurized organic whole milk
- 1 1/2 teaspoons unflavored gelatin
- 1/4 cup plain organic Greek yogurt (or 1 yogurt starter packet)
Instructions
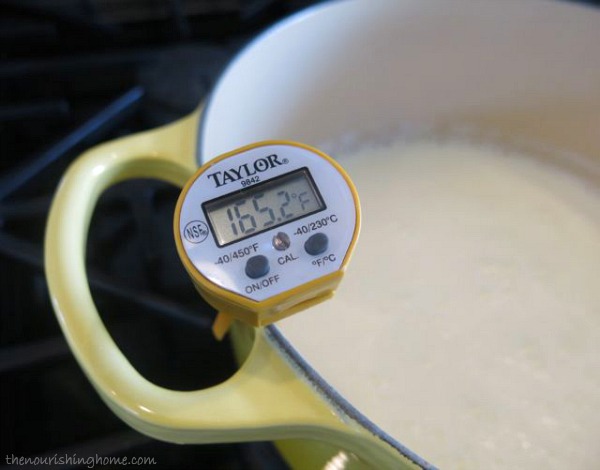
- Heat the milk over medium to medium-high heat until it reaches 165 degrees, making sure to stir the milk constantly. Do not allow the milk to come to a boil.
- Once the milk comes to temp, turn off the burner and place the pan on a cooler area on the stovetop. Allow milk to cool to 110 degrees. (Or you can use a cold water bath method to more quickly cool the milk – see the photo tutorial for details.)
- When milk reaches 110 degrees, thoroughly whisk in the gelatin for about one minute.
- Then add the yogurt starter and continue to whisk until thoroughly combined, about one minute.
- Place the yogurt mixture into a yogurt maker, or use another reliable incubation method as outlined in the photo tutorial.
- Allow yogurt to culture for 8-12 hours, depending on taste preference. The longer you culture, the more tangy the taste. (If making SCD yogurt be sure to culture for 24 hours.) Then give it a good whisking to re-blend, and transfer it to the refrigerator to cool completely. Once chilled, you can transfer the yogurt to individual serving containers, if desired.
- Or use your homemade yogurt to make delicious Fruit & Yogurt Parfaits, Yogurt Banana Splits, Fruit-on-the-Bottom Yogurt Cups and Homemade Flavored Yogurt.
Notes
* Be sure to use pasteurized milk only for this recipe. Yogurt experts do not recommend using ultra-pasteurized milk to make yogurt. UHT milk is actually cooked at high temps making it unsuitable for culturing.
Also note: I do not recommend using this recipe to make raw milk yogurt, as it requires a different heating process. See Cultures for Health for details.
P.S. It's normal to see small gelatinous clumps of yellow liquid when using gelatin to thicken yogurt. It is the whey that has separated from the milk solids. Simply use a whisk to gently blend it back into the yogurt.
Ingredients
- Two 13.5 oz cans pure coconut milk
- 1 1/2 teaspoons unflavored gelatin
- 1 packet of non-dairy yogurt starter or 1 good quality probiotic capsule
Instructions
- Heat the coconut milk over medium to medium-high heat until it reaches 115 degrees, making sure to stir the milk constantly. Do not allow the milk to come to a boil.
- Once the coconut milk comes to temp, turn off the burner and move the saucepan to a cooler area on the stovetop.
- Allow milk to cool to 110 degrees. (This won't take long, since it's such a small temperature difference.) When milk reaches 110 degrees, thoroughly whisk in the gelatin for about one minute. And then add the non-dairy yogurt starter and continue to whisk until thoroughly combined, about one minute.
- Place the yogurt mixture into a yogurt maker, or use another reliable incubation method as outlined in the photo tutorial.
- Allow yogurt to culture for 10-18 hours. The longer you culture, the more tangy the taste.
- Then give it a good whisking to re-blend, and transfer it to the refrigerator to cool completely.
- Once chilled, thoroughly whisk the yogurt again to blend it together, since separation commonly occurs. Cover and store in fridge. Or transfer the yogurt to individual serving containers, if desired.
- Use your homemade coconut milk yogurt to make delicious Fruit & Yogurt Parfaits, Yogurt Banana Splits, Fruit-on-the-Bottom Yogurt Cups and Homemade Flavored Yogurt.
Notes
Almond Milk Yogurt: Several have asked if this recipe will work with almond milk substituted for the coconut milk. You can substitute with almond milk, but do note that the yogurt will be quite runny without an added starch, such as arrowroot powder or tapioca starch. For details on making almond milk yogurt, I recommend checking out Lexie's Kitchen.
Photo Tutorial:
How to Make Greek-Style Yogurt in 5 Easy Steps!
Making Greek -Style Yogurt is not only easy, it’s also a great way to save money and avoid the unhealthy additives found in many commercial brands. And if you’re not a fan of straining either, just follow these simple steps below, and you’ll soon be enjoying your own healthy homemade thick-n-creamy Greek-Style Yogurt! Yum!
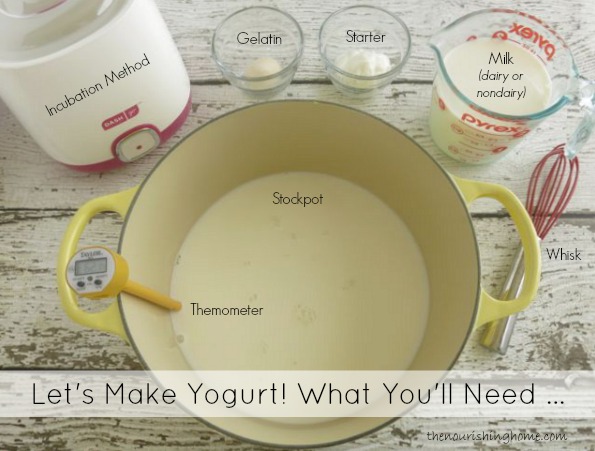
Here’s What You’ll Need to Get Started!
Making homemade yogurt doesn’t require a lot of expensive gadgets, but you will need to purchase a yogurt starter (details below) and a waterproof thermometer, if you don’t already own one.
It’s much more convenient to have a yogurt maker, but it’s not an absolute must. There are several other methods for incubating yogurt, which are outlined below.
Step One: Heating the Milk
The temperature you’ll need to heat the milk depends on the type of milk and cultures used. In this post, I am covering how to make whole milk Greek-Style Yogurt using either pasteurized whole milk, or pure coconut milk. If you would like to make raw milk yogurt, I recommend checking out the instructions provided at Cultures for Health for best results.
Heating Whole Milk
In general, you’ll want to heat pasteurized whole milk between 160–165 degrees, if using Greek-style yogurt cultures. Or 180–185 degrees, if using traditional yogurt cultures. (Note: If purchasing a powdered yogurt starter, be sure to follow the instructions provided.)
Heating Coconut Milk
If you’d like to make an easy and tasty non-dairy yogurt, I recommend using pure coconut milk, not “light” coconut milk. I find it to be the most consistent in achieving a thicker coconut milk yogurt with a pleasant tangy flavor. (Note: Do not use coconut milk beverages as they will not work.) Simply heat the pure coconut milk to 115 degrees and then proceed to step two below.
Step Two: Cooling the Milk
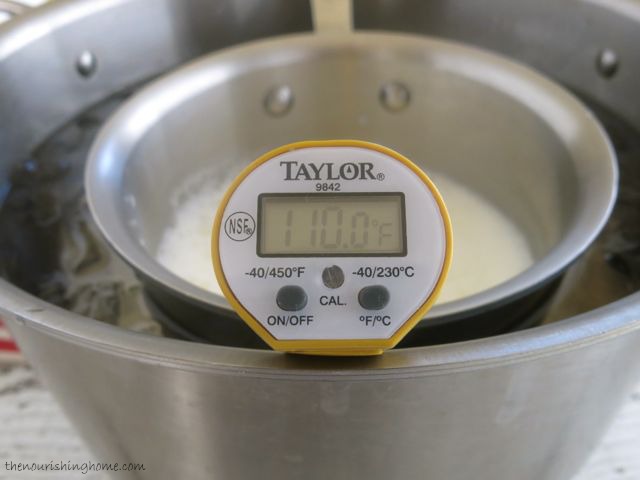
Whether you’re making dairy or non-dairy yogurt, 110 degrees is the magic number! When the milk reaches 110 degrees, that’s the time you’ll add the gelatin and the starter (see details in step three below).
Time-Saving Tip: A simple method for cooling the milk faster is to create a cold water bath. Simply fill a large stockpot with water until it reaches halfway up the saucepan of hot milk. Then add a little ice. Slowly whisk the milk until it reaches 110 degrees. Then remove the pan of milk from the cold water and move on to step three below. (Note: If using ceramic cookware, it’s important to know that going from one temperature extreme to another may cause it to crack or break. To be safe, transfer the hot milk to a stainless steel saucepan or bowl instead.)
Step Three: Adding the Gelatin and Starter
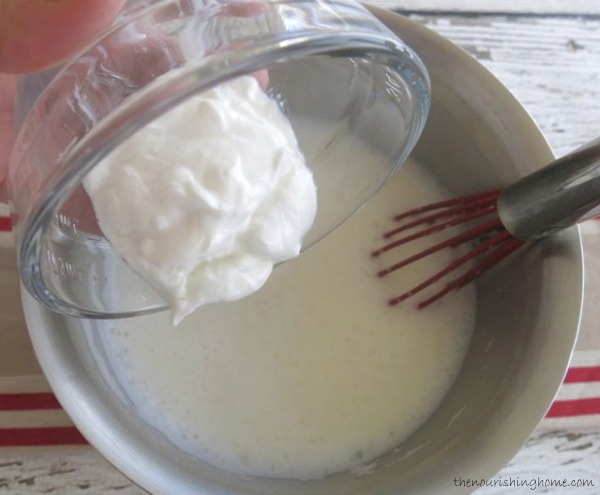
As previously mentioned, gelatin is the secret ingredient to making a thick, custard-like yogurt without the need for messy straining. I personally like Great Lakes brand, because it’s pure gelatin made from grassfed cows. Just add the gelatin to the warm milk and whisk thoroughly for at least one minute. Then, add your starter and whisk again for an additional minute to ensure the mixture is well combined.
Choosing the Right Starter
The term “starter” refers to the live cultures that turn ordinary milk into that thick-n-tangy probiotic treat we all love. You have several options when it comes to yogurt starters. The simplest is to use a good quality, plain organic store-bought Greek-Style yogurt, such as Straus or Wallaby. Just make sure that the Greek yogurt you select as your starter has live and active cultures in it, and does not contain unwanted additives.
Another option is to purchase powdered starters, such as those available at Cultures for Health. If you’re dairy-free, you’ll want to be sure to use a starter that is dairy-free such as Belle & Bella or Cultures for Health’s Vegan Starter. A tip I learned in Danielle’s book Against All Grain is that you can also use a probiotic supplement as a starter for coconut milk yogurt, such as Ultimate Flora.
Does it really matter which starter you choose? Yes. The type of cultures in the starter have an impact on the overall flavor of the yogurt, and the cost of your homemade yogurt too. I found it helpful to experiment a bit by trying different types of cultures, until we found one that we really liked and is budget-friendly.
Of course, once you make your first batch of homemade yogurt, depending upon the cultures used, you can set aside a little of your homemade batch to use as starter for your next one. Keep in mind, it’s important to use your reserved starter within 3-4 days for best results. Additionally, after making several batches of yogurt, you may need to start over with a fresh starter (not from your homemade yogurt).
Step Four: Culturing Your Yogurt (a.k.a. Incubation)
Another important step in the yogurt-making process is incubating the yogurt mixture. The more stable and consistent the temperature remains, the better the taste, texture and culturing of your yogurt.
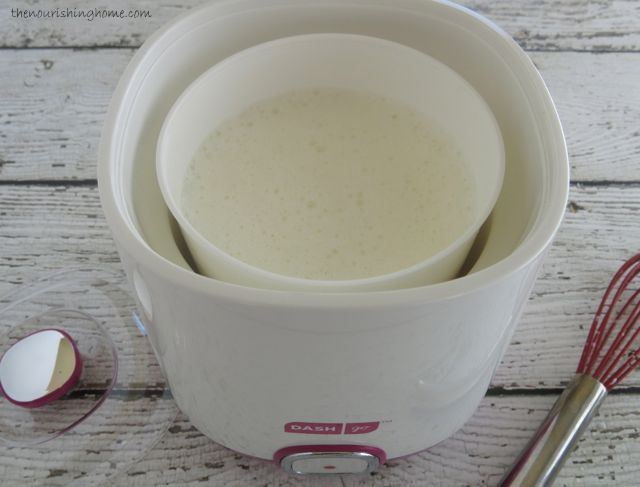
I personally prefer to use a simple, no-nonsense yogurt maker, since I’m making yogurt at least 1-2 times per week. It was worth the small investment to be able to just pour my yogurt mixture into the yogurt maker, turn it on, set the timer, and go about my day.
However, there are several other incubation methods that can be utilized. The key to each of these methods is ensuring your yogurt mixture remains at a consistent temperature of 110 degrees until it has set, usually about 7-8 hours for whole milk yogurt, and 10-18 hours for coconut milk yogurt.
Step Five: Enjoy!
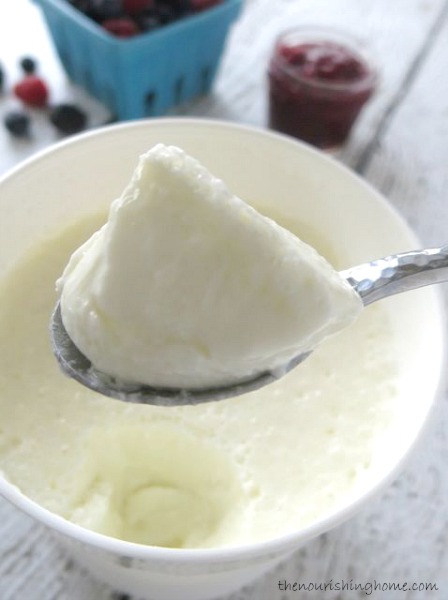
Congratulations! If you’ve followed this recipe tutorial, you’ve just made an incredibly healthy and delicious real food for far less than you would pay for good quality store-bought brands. And there are soooo many ways to enjoy your fresh homemade yogurt.
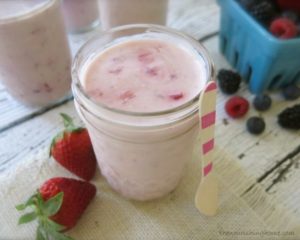 Here are a few of our favorite recipes for enjoying homemade yogurt:
• Fruit & Yogurt Parfaits
• Fruit on the Bottom (and top) Yogurt Cups
• Yogurt Banana Splits
• Peach Crisp Yogurt Cups
• Homemade Flavored Yogurt


Can’t wait to try this! Pinned for later!
Thanks for leaving a note, Karen! I hope you enjoy the recipe! 🙂
Great timing was just wanting to use some extra store bought yogurt to make some from scratch!
So glad this post came to you right on time! 🙂 Blessings, Kelly
This is such a great idea! I’ve been disappointed with the consistency of my homemade yogurt and didn’t want to strain because I felt like it was such a waste! I was actually looking at the ingredients on my Stonyfield and saw that they use pectin and was trying to come up with an idea for that, but gelatin sounds so much easier! Thank you!!!
Btw, I use the cooler/hot water method in a heavy duty (full-size cooler style) insulated lunch box which holds 2 quarts. It works wonderfully. I’ve never had a batch fail on me yet (looks frantically for wood to knock on).
Hi, Lynda. I was pretty excited to learn that a little gelatin helps to make a nice thick yogurt without all the fuss. Hope you enjoy this method too! And yes, the cooler method is a common, reliable method for making yogurt. Again, I just love being able to quickly pour the mix into the yogurt maker for convenience sake. 🙂 But there are certainly other reliable ways to make yogurt without investing in a yogurt maker. 🙂
This may sound like a silly or obvious question, but could one use almond milk? I am not a fan of the way coconut tastes.
Hi, Danielle. It’s a great question. You can use almond milk, but it can result in a very runny yogurt without some extra help in the form of an added starch. Here’s a recipe specifically addressing almond milk yogurt that you may find helpful. Blessings, Kelly 🙂
http://lexieskitchen.com/lexies_kitchen/2011/9/14/almond-milk-yogurt-dairy-free.html
I have made greek style yogurt many times using dried non fat milk–1/4 to 1/2 cup to a quart of whole milk and greek yogurt as starter.
Can I use skim milk?
You can, but I do not recommend skim milk as part of a real food diet. Here’s why:
http://www.naturalnews.com/043942_skim_milk_hog_slop_dairy_industry.html
http://www.drweil.com/drw/u/QAA400919/Rethinking-Saturated-Fat.html
I just wanted to share this because, a real food lifestyle focuses on whole milk and dairy products as your body truly does need good healthy fats. But I always urge everyone to do their own research. These are just two articles to get you started in digging deeper. Blessings, Kelly
I recently found your blog am enjoying it Thanks! I just wanted to say another great way to simply keep yogurt at 110° is to put a small lamp in your oven with a 15 watt lightbulb (higher or lower wattage depending on the outside temps). That way I can heat my milk in quart jars in a water bath, add starter, incubate and store in the frig in the same containers. I just put the jars in the oven with the lamp (prewarmed by turning on the lamp when i begin heating the milk), and go about my day. And since both my budget and my kitchen are tight, this works well for me. Thanks again for a great blog!
Thanks so much for sharing this great tip, Alechia! So glad you’re finding this site helpful! Blessings to you! 🙂 Kelly
Ahhh….GELATIN!!!! Why didn’t I think of this? I can’t wait to try it. Pinning and I will be sharing this on my April highlights post at the end of the month. Great idea!
Thanks, Tara. You are so sweet and I just adore your site! Hugs, Kelly 🙂
Can I use raw cow or goat yogurt starter with the coconut milk? Blessings to you as you continue to share your gift of hospitality with the blogging world!
Hi, Gabie. You can use any dairy-based yogurt starters with coconut milk, the only reason I mentioned dairy-free is because those who are dairy-free for health reasons may not know that most yogurt starters contain dairy. Enjoy! 🙂
Can I somehow use milk kefir or coconut kefir with the gelatin? Like heat the milk with the gelatin then add my grains?
Hi, Erica. I would contact Cultures for Health or another similar company well-versed in kefir grains. I am not certain how kefir grains would react to the addition of gelatin? I would hate for you to harm your grains. Blessings, Kelly
Hi, Kelly! If I want to try using some of the homemade batch for a starter in my next batch, about how much should I set aside? Thank you 🙂 Jen
Hi, Jennifer. I’d set aside the amount you need to make the next batch. So if you’re going to make another quart (4 cups), go ahead and set aside 1/4 cup. But if you’ll be making more set aside whatever amount you’ll need for however many quarts you plan to make. Hopefully, I’m making sense. 🙂
Thanks, Kelly! you made perfect sense. I was also wondering if you could tell me the difference between Great Lakes Gelatin vs. Collagen Hydrolysate? Could the latter be used in making yogurt?
Hi, Jennifer. I am not familiar with Collagen Hydrolysate and how it compares with Great Lakes. I would recommend checking with the manufacturer to determine if it works as a thickening agent for yogurt.
Found you in a Comfy Belly post. Looking forward to reading more.
That’s great to hear. Thank you and welcome! 🙂 Blessings, Kelly
Hi Kelly,
I just got my new dash go maker just like yours. However the manual was not in it. When I put the yogurt into the removable container, do I put the plastic lid on this removable piece first then the incubator cover? Or do I leave the inside cover off? I was bummed I made your recipe yesterday and I had put the inside cover on. It didn’t seem to work cuz it was still all liquid. Figured it must be because I wasn’t suppose to put it on. Maybe it’s just for staring the yogurt? Please advise. Thx!
Hi, Kathy. Personally, I would ship it back and complain the manual wasn’t in it. Did you order from Amazon, they are great about returns. You should have been given a manual if it’s a new unit, so that makes me suspect that perhaps this machine is not brand new?
Anyway, to answer your question, I don’t put the little inner lid on because that lid is for when the yogurt is done, so you can cover it and place it in fridge. Here’s a video on how to use the machine, it’s a slightly different model, but you can see she removes the inner cover and only places the large machine cover on: https://www.youtube.com/watch?v=zAfTPUZrZs0
If you still have trouble, there could be two issues – the machine is not new or has issues (maybe it was a return and thus no manual?) or your yogurt starter is not good. If you’re using store bought yogurt, this can be a common issue, as I’ve had it happen to me before. If the store bought yogurt does not contain a good amount of active cultures, it will not be a strong enough starter and will result in no culturing or little culturing that leaves an off taste.
Hope this helps! Blessings, Kelly
Okay, so tried again without inner cover. Still didn’t work. I guess it could be yogurt maker I bought. I purchased the Bella + Bella non dairy starter on amazon too! Wondering if maybe purchasing on amazon not the best idea. I’m just bummed I can’t get it to work whereas my husband is not well and I’d very much like to make him yogurt. I do notice condensation on the inside cover of maker. Does yours do that? I will return if I must. Sadly disappointed. Thanks for all your help.
Kath
Kathy, are you making coconut milk yogurt? Is that why you’re using non-dairy starter? If so, coconut milk yogurt is thinner in consistency and it does need to be cultured much longer than dairy, which is why I gave the longer time range. It’s important to only use pure canned coconut milk, not light coconut milk or coconut milk beverages. Also, the yogurt must be refrigerated after culturing as that will help it to thicken up a bit. But again, coconut milk yogurt will be runnier – like the consistency of thin yogurt. If you did use the proper milk, and you did refrigerate it and it’s still a liquid, then the problem is definitely either the starter is inactive (perhaps you got a bad batch) or the machine is not maintaining the proper temperature. My suggestion would be to try a different starter (use a store bought coconut milk yogurt if you’re DF) and if it still doesn’t work, then you know it’s the machine and not just that you happened to get a bad batch of starter. I hope this helps. Unfortunately, sometimes bad starter can happen, or again, it may be that you just got unlucky in receiving a defective machine. Hope you have better luck soon! Also hope your husband feels better soon! 🙂
Thanks Kelly!
Okay, so the coconut milk may be the problem! I used the so delicious coconut milk beverage. I shall get the pure coconut milk. They just didn’t carry it in my store. I would guess while foods will carry? Any suggestions? For now, even though it is pretty much liquid, I put in fridge to see what happens. Thanks again for your help!
Kathy
Kathy, that is definitely the issue. Coconut milk beverages do not work for making yogurt. You will definitely see much better results with pure coconut milk. 🙂
I tried to make coconut milk (full fat) yogurt and it didn’t work. I used store bought coconut yogurt as a starter, AND one capsule of probiotics, and it stayed pretty much the same liquidy consistency…any ideas? I didn’t use gelatin this time, but next time I will, shall I double the gelatin for coconut yogurt? Is a yogurt starter superior to using a probiotic, and if so WHY? What is the difference between kefir and yogurt starter?
Also it tastes like fizzy soda milk.. yuck…is that how it is supposed to taste? How will I know if it is bad or not?
Hi, Teresa. If you used full fat canned coconut milk and did not see good results. It could be several things
• inconsistent temperature – are you using a yogurt maker?
• poor quality starter (poor quality yogurt base, or capsule that does not contain right flora for yogurt)
• not using gelatin is an issue because coconut milk yogurt is runny, even with gelatin added
I would recommend using a dairy-free yogurt starter for best results because it’s specifically formulated for making yogurt. As far as Kefir goes, yes it is a different process as kefir grains are used which have a different composition of cultures. I recommend going to Cultures for Health – they are a tremendous resource of free information on yogurt making, kefir making and all things cultured and their products are excellent. I use their starters with great success. Here is a link to their site (this is not an affiliate link): http://www.culturesforhealth.com/cultured-coconut
Hope this helps! Blessings, Kelly 🙂
At the beginning of heating the milk, I leave a little in the measuring cup and add 1T gelatin. Let it bloom a few min and then whisk together. I immediately whisk it into the heating milk and that’s it. No more steps to do later. I also heat the milk to 180, don’t know if that makes a difference with the gelatin first.
I do not ever whisk or stir my yogurt once it’s incubated. That would make it runny. I carefully, gently spoon out servings as we need it. Try to leave it smoothed on top each time you’ve finished serving as the whey pockets won’t develop then either.
I got this method from an old Storeybook pamphlet on Yogurt Making.
Works every time!
And, yes, I incubate 24 hrs to drive the carb count down as much as possible. I dont notice any difference in tartness. Im not a fan of unsweetened yogurt tho so I use a few drops stevia and cinnamon in my custard-cup full. Ive tried it unsweetened tho and it’s like the storebought in tartness I thought.
I forgot to put that it’s 1T gelatin per 1qt of milk. So I’m using twice what you do per qt.
Also—addendum:
Didn’t think about that this was a greek-style yogurt! It’s not true Greek yogurt as the protein content isn’t magnified by straining out the whey so there’s not more solids per cup.
Greek yogurt is super high in protein, like 20g per cup. This still makes just a 7g protein per cup yogurt.
Yes, that’s why I’ve called this “Greek-style” yogurt because as you pointed out, it is not technically Greek yogurt. 🙂 I’ve seen many variations of making thicker yogurt with gelatin and also certain starches like tapioca. This is just my favorite way to make it. Glad you’ve found your magic formula.
I am wondering if I could put gelatin in Villi yogurt starter after the yogurt is made to make it thick? I really like the simplicity of using my Villi starter since you don’t have to heat the milk up but I do have to strain the yogurt to get it a thicker consistency. Anyway just wondering if anyone has tried this with the Villi yogurt starter? Thanks for this info, very interesting.
Hi, Janette. I haven’t dabbled in Villi yogurt. I would definitely shoot an email over to Cultures for Health (since they sell Villi starter) and ask them their thoughts on it? Blessings to you! 🙂 Kelly
Just got my Dash Go and gah, oveheated the coconut milk (140)! Have I ruined it or should I wait and see?
Oh no, it’s fine, just be sure to cool it down to correct temp as noted in recipe, so you don’t kill the live cultures. 🙂 And just to confirm, you’re using pure canned coconut milk, right? Because coconut milk beverages will not work. 🙂
Hi Kelly! Do you know if it’s possible to add some gelatin to the yogurt after it’s chilled if it’s not quite thick enough? My first attempt last week came out great! Today the yogurt was a bit runnier for whatever reason, maybe I used a bit more gelatin last time. Thanks!
Hi, Jennifer. Adding gelatin to cold yogurt won’t allow it to set since gelatin needs heat to activate. So that’s why it’s added to the heated milk before the cultures are added. If you didn’t make any changes to the recipe the second time you made it (in other words you used the same type and amount of milk, and the same cultures, and same amount of incubation time, then it may be that you did add more gelatin the first time around. For future batches, you can add 1/4 tsp extra gelatin and see if that helps, you can also keep increasing the gelatin with each batch you make, until you get to the consistency you prefer. In the meantime, one way to thicken the yogurt you have this time around is to use a coffee filter (or fine cheesecloth) and fine mesh strainer to strain the yogurt. You can read about that process here: http://www.culturesforhealth.com/how-to-strain-whey-cultured-dairy/ I find that a coffee filter works best with coconut milk yogurt since it’s much thinner than whole milk yogurt. I hope this helps! 🙂
Hi Jennifer,, thank you for this awesome recipe I just have one question when I refrigerated the yogurt the next day it had a crust of coconut milk fat and it was hard any suggestions don’t know what I did wrong thank you
Hi, Marcia. I haven’t had that happen before, so that is very interesting. How did it taste? If it wasn’t tangy, perhaps it didn’t culture long enough or the cultures were insufficient or old. It sounds like for some reason the coconut cream separated from the coconut water a bit. It wouldn’t impact the recipe in a harmful way, so you could just use a whisk to whip the cream at the top back into the yogurt. It shouldn’t rise back to the top again after you do this. 🙂
Thank you, I think your right it didn’t culture long enough I’m going to try take it out of the fridge and put it back in the yogurt maker because it tastes tangy but chunky with the coconut fat.
Just a note for those who may be using coconut / almond milk as a cruelty free option, gelatin is made from boiled animal tendons, cartilage and skins. Agar can be used in place of gelatin if you follow a cruelty free / vegan lifestyle 🙂
Thank you for sharing. Although we follow a real food diet that includes ethically raised grassfed animals. I respect your choice to not include animal products in your diet. There’s a recipe here that discusses how to use Agar (or you can use tapioca starch): http://www.thekitchn.com/how-to-make-dairyfree-coconut-yogurt-cooking-lessons-from-the-kitchn-216358 Blessings, Kelly
Hello!
I’m going to give a go to the coconut milk yogurt soon, when I want to make more can I just use some of the previously made yogurt or do I need to add a starter or probiotic every time? Thanks 🙂
Hi, Jessica. Technically, you can use the coconut milk yogurt from a previous batch as a starter, but I’ve had mixed results with it. So I always use a probiotic every time. 🙂