The Nourishing Home

living healthier lives in service to the King!

  • Home
  • About
    • About TNH
    • Contact
  • Meal Planning
  • Health & Wellness
    • Real Food Basics
  • Whole30
  • GF Recipes
    • Whole30
    • Breakfast
    • Lunch
    • Entrées
    • Slow Cooker
    • Soups & Stews
    • Sides & Salads
    • Snacks
    • Desserts
    • Kids in the Kitchen
  • My Cookbook
  • Subscribe

Roasted Chicken Chili (GF, Whole30 option)

By Kelly · 17 Comments

Roasted Chicken Chili (grain-free)
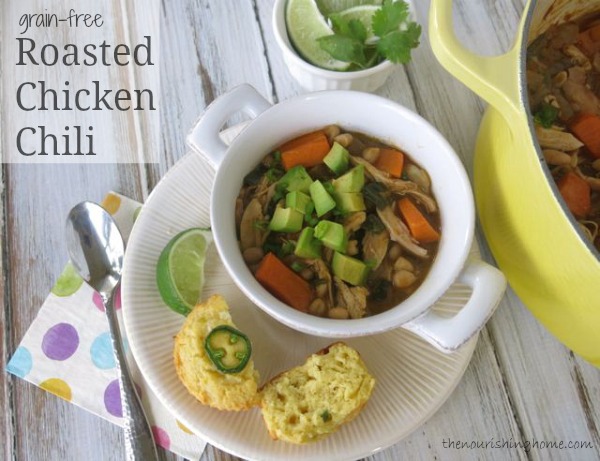
We love us some good chili and this recipe is a tried-n-true favorite! It’s especially great for making use of leftover roasted chicken, or cooked chicken meat from making your own homemade stock. (You can also use leftover roasted turkey as well!)

By the way, if you’re not making homemade stock (i.e. bone broth), can I seriously beg you to give it a try? Please, pretty please! Not only is it far, far superior in taste to any boxed or canned stock on the market, it’s so much more nutritious too!

In fact, homemade bone broth is considered a true super food. The cooking process breaks down bones and connective tissues – including proteins, minerals and fat – that help to heal the body in various ways. One of the greatest benefits is how bone broth promotes digestive health through healing the gut, as well as reducing inflammation and inhibiting infection.

Roasted Chicken Chili (GF)
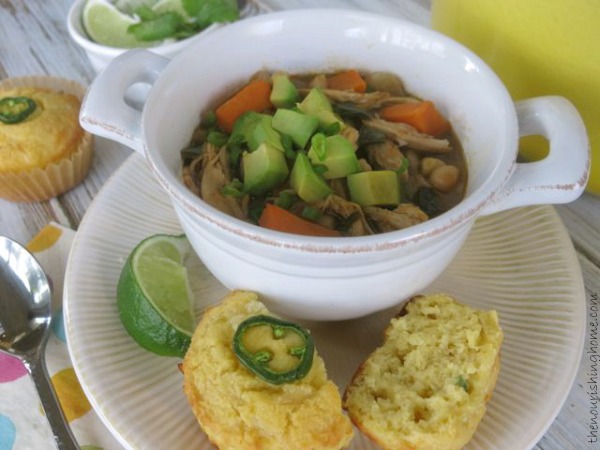
Okay, so back to the recipe … it is SO simple and delicious that I often serve this with a side of Grain-Free Chile-Cheese “Cornbread” as an easy meal for entertaining guests. Cause seriously – who doesn’t love chili? Now, now, don’t comment if you’re a chili-hater, because that will just ruin my delusion that everyone’s a chili fan just like me, right? And likewise for the chili-purists out there, yes, this is more of a chili-style stew, but again, let’s not split hairs, let’s just eat!

Roasted Chicken Chili close up
So, join the fan club and go make some roasted chicken chili! Trust me, your family will be happy you did.

Print
Roasted Chicken Chili (GF, Whole30 option)

Yield: 6 servings

Ingredients

  • 2 tbsp olive oil
  • 1 large yellow onion, diced
  • 1 medium red onion, diced
  • 1 poblano pepper, seeded and diced
  • 1 jalapeno pepper, seeded and diced
  • 1 large sweet potato, peeled and diced (or 3 medium carrots)
  • 1 tbsp chili powder
  • 2 tsp sea salt
  • 3-4 cloves garlic, smashed and diced
  • 4 cups chicken stock (homemade is best!)
  • 2 (15oz) cans white beans, drained (omit for Whole30, see recipe note below)
  • 1 tbsp apple cider vinegar
  • 3 cups shredded roasted chicken (or leftover roasted turkey)
  • Optional Toppings:
  • Sliced limes, diced avocado, green onions and fresh cilantro

Instructions

  1. Add olive oil to Dutch oven (or stock pot) over medium heat. Add the onions and peppers, stirring occasionally, until onions are translucent (about 8-10 minutes).
  2. Next, add the diced sweet potatoes (or carrots), seasonings and chopped garlic. Stir well to combine. Cook about about one minute, until garlic is fragrant.
  3. Then add the chicken stock, beans, apple cider vinegar and shredded chicken.
  4. Bring chili to a boil over high heat and then reduce heat to medium-low and simmer uncovered for 20-25 minutes, until sweet potatoes (or carrots) reach desired tenderness.
  5. Serve with a side of grain-free chile-cheese "cornbread" and your favorite toppings such as diced avocado, green onions and fresh cilantro. Yum!

Notes

Whole30 Recipe Variation: To make this delicious chili Whole30-friendly, simply omit the white beans and add diced zucchini and/or sweet bell pepper instead! (And of course, you'll have to pass on the "cornbread" at least for now. Enjoy!

3.1
https://thenourishinghome.com/2014/03/roasted-chicken-chili-gf/


You Might Also Like:

Chicken Zoodle Pho Bowl {Whole30}
Easy Crockpot Black Bean Soup (GF, DF)
How to Make Slow Cooker Bone Broth

Filed Under: Soups ·

The Secret to a Healthy Grocery Budget: Keeping Your Receipts

By Kelly · 17 Comments

Messy Receipts 2
I’ve been told that I have the memory of an elephant.  Several years ago, a co-worker came up to me and said, “Hey Tiff, do you remember that guy who took that thing into that room in that building? I need his file. Do you know where it is?”

Somehow, my brain knew exactly what she was talking about.

One decade, two pregnancies and a couple of elementary-aged kids later, it’s a good day if I remember to close the lid to the washing machine before walking away – and I have a sneaky feeling I’m not alone!

Keeping a good record of your spending (rather than relying on your memory) is just one reason why it’s so important to keep your receipts from grocery shopping.  Yes, I’m talking about those little pesky pieces of paper that seem to clutter your purse, or make messy piles on the counter. Believe it or not, you need to keep them!  But before we get into that, let’s back up for just a moment.

Why are we talking about grocery receipts in the first place?!

One of the top questions I’m asked is how to live a real food lifestyle on a tight budget? Since this is a personal mission of mine, I’ve written an entire series on creating a grocery budget.  And one of my first recommendations is to set a food budget and start keeping your grocery receipts.

Do you have a grocery budget? Do you need help creating one?
Whether you do or don’t, I encourage you to go through this series and download the 5 pages worth of free printables that are sent to you when you subscribe to the Crumbs weekly newsletter.  They’re designed to walk you through the first couple steps, so they’re perfect for beginners and seasoned budgeters alike!

Receipts Paperclipped

What’s the point of keeping these bits of paper? Glad you asked. Here are just a few reasons …

6 Reasons Why Keeping Your Grocery Receipts Are the Secret to a Healthy Grocery Budget:

1.  We’re called to be good stewards of our finances. 

Regardless of our financial situation, we should all be doing the best we can with our provisions.  That means knowing what you spend, how you spend it and being accountable for it.

2.  You won’t remember what you bought, where you bought it and how much you paid… every time.

Keeping the receipts is the only 100% way to know how much you’re paying for your food.  Our memories won’t always be like an elephant’s, and when you’re trying to seek out the best deal on food, you need to know what you’ve paid in the past and where you can get that price again – or in some cases, where you won’t get a good deal.

3.  Money stops “disappearing” and spending becomes purposeful.

Often times money mysteriously “disappears” at the grocery store, but keeping the receipts holds you accountable for every dollar you spend. In turn, each transaction becomes a purposeful decision.  You’ll be absolutely sure where your money went and why.

4.  In order to work within a budget, you need to know where you stand.

Setting a monthly allowance for groceries is essentially setting a goal.  How will you know if you’re on track to meet your goal if you’re not keeping track?  Consider the person who sets a weight-loss goal.  Don’t they weigh themselves regularly to know whether or not they’re headed in the right direction? Consider your grocery receipts as your weekly “weigh-in” to help keep you on track with staying on budget.

5.  Knowing where you stand is empowering.

When you are fully aware that you only have $20 left in your budget BEFORE you even set foot in the store, the line between “want” versus “need” becomes much clearer, so you’ll make better decisions while shopping and be less likely to overspend.

6.  Knowing where you stand is a powerful motivator to keep going.

It’s not always easy to eat leftovers for the third night in a row, or to devise a dinner plan based solely on a partially empty pantry, but it becomes a bit easier when you know there’s a purpose:  To help you toward meeting your grocery budget goal.

Receipts Paperclipped in Envie
So, now that we understand why keeping our receipts is the secret to a healthy grocery budget, it’s important to learn how to maximize this opportunity to better track our spending!

3 Ways Track Your Spending

1.  Use an online spending tracker or app.

I had quite a bit of fun looking for apps to track spending, but ultimately the one that best suits you will depend on your computer or phone and your personal preferences.  Try searching for “budget app iPhone/Android/Windows” (using just one of the three of course) and you’ll find plenty of options.  Be sure to read the pros and cons to ensure it will do what you want it to, and don’t spend a lot of money on it – if any at all!

2.  Use a spreadsheet.

For those who like to track on their computers, you can’t get any more free or basic than a spreadsheet.  Keep it really simple at first with just four or five columns, one for each week of the month, and enter the amount of money you spent for each trip underneath.  You can add more columns for more data later once you’ve got a good grip on your total monthly spending.

3.  Use a pen and paper.

This is my personal preferred method.  For as long as I’ve had a grocery budget, I’ve written down what I spent and where I spent it in my planner, on the day I went shopping.  Since I always carry my planner with me, it was easy to write it in, and easy to refer to later when planning another shopping trip.

It doesn’t matter which of these methods you choose, but remember they will only work if you actually use them. This means you will have to take a few minutes to enter your totals into your phone or computer or write them down.  Yes, it’s something else “to do,” but it’s the only way to properly get your grocery budget under control!

What do you do with the receipts once you’re done tracking your spending?

First, I recommend adding up your receipts at the end of each week so that you know where you stand for the next week, or even the rest of the month.  Once you’ve done this, keep all the receipts for the month in one envelope and keep the envelope in an easy access location.

At the end of the month, use the receipts to continue the grocery budget process.  When you’re done, paperclip the entire month together and move it into a second envelope.  This envelope doesn’t need to be front and center like the first, but it’s helpful to have receipts from previous months available for reference as you’re going through the budgeting process.

Receipts from previous months can get recycled after about six months, or whatever you decide works best for you.

I’d love to hear your thoughts on this … Do you currently keep your grocery receipts?  What are your favorite ways to track your spending in order to keep your food budget in check?

Note from Kelly: Don’t miss all of the other great budgeting posts that Tiffany has shared here. Simply click here and keep scrolling through to see her many helpful posts on how to save money on your food budget.

You Might Also Like:

Potato Corn Chowder (Gluten-Free)
The Eclectic Leftovers Buffet: A fun family tradition!
Bake-a-Buckle!

Filed Under: Real Food on a Budget, Uncategorized ·

grain-free Chile-Cheese “Cornbread” Muffins

By Kelly · 12 Comments

Grain-Free Chile Cheese Cornbread
Going grain-free doesn’t mean you have to miss out on the delicious addition of cornbread when enjoying your favorite soups, stews and chili. Instead, these slightly sweet and savory grain-free “cornbread” muffins taste so close, you’d almost swear there’s corn in them. But, there isn’t! Yay!

P.S. The secret to these mock-cornbread muffins being such a cheerful yellow hue is the use of real pastured eggs. Their bright orangy-yellow yolks are perfect for enhancing both the eye appeal and most important – the nutritional value of your favorite meals!

Grain-Free Chile Cheese Cornbread close up

Print
Chile-Cheese “Cornbread” Muffins (GF)

Yield: 10 muffins

Ingredients

  • 2 cups blanched almond flour
  • 2 tbsp coconut flour
  • 1 tsp baking powder
  • 1/2 tsp sea salt
  • 1/4 cup butter, melted
  • 2 tsp pure honey
  • 3 large eggs
  • 1/3 cup whole milk yogurt
  • 1/2 tsp apple cider vinegar
  • 3/4 cup shredded grassfed sharp cheddar
  • 1 tbsp finely diced green chiles (or 1-2 tsp seeded and diced jalapeno)
  • Jalapeno slices for garnish

Instructions

  1. Preheat oven to 350 degrees F. Line a 12-cup muffin tin with 10 paper muffin liners.
  2. Slice the jalapeno, making sure to remove the seeds from the slices; set aside.
  3. In a small bowl, add the almond flour, coconut flour, baking powder and salt.
  4. In a large bowl, whisk together the melted butter and honey, until creamy. Then, whisk in the eggs, yogurt and apple cider vinegar, until well combined.
  5. Add the dry ingredients to the wet, whisking to ensure no lumps remain.
  6. Use a rubber spatula to fold in the cheddar cheese and fine-chopped green chiles (or jalapeños). Green chiles are my personal favorite, because they really add a depth of flavor to the muffins. I find these muffins to be a little plain without them – or fine diced jalapeños, if you prefer a little heat instead. Remember, if using jalapeños, "less is more" unless you can withstand the heat.
  7. Evenly distribute the batter among the muffin cups and top with a jalapeno slice for the cute factor.
  8. Bake for approximately 20-25 minutes, until slightly browned around edges and a toothpick inserted in the center comes out clean. Allow muffins to cool in tin about 5 minutes, then serve warm with your favorite soups, stews and chili. Yum!

Notes

Extra muffins can be frozen for a future meal. When ready to use, thaw in fridge overnight and then reheat in toaster oven set at 200 degrees for 8-10 minutes.

3.1
https://thenourishinghome.com/2014/02/chile-cheese-cornbread-muffins-gf/


You Might Also Like:

Simple Healthy Hash Browns {3 Tips for Perfect Hash Browns Every Time!}
Savory Herb Dressing (GF)
Peach Cobbler Donuts (& Muffins!)

Filed Under: Muffins/Breads/Biscuits, Sides ·

  • « Previous Page
  • 1
  • …
  • 56
  • 57
  • 58
  • 59
  • 60
  • …
  • 182
  • Next Page »

My New Cookbook is Here!

Welcome to The Nourishing Home!

I’m so glad you’re here and want you to feel right at home! My heart in creating this blog is to help you by sharing helpful meal planning strategies and nourishing GF recipes that are healthy, easy and delicious with thanksgiving to God! [Read More …]


All content (recipes, photos, posts, etc.) on this site is the creative property of Kelly Smith. You are welcome to share a photo via social media, as long as it contains a link back to the corresponding recipe or post from this site. However, you may not republish a recipe in its entirety in any form. For questions, or for permission to use a photo or recipe, please contact me via email at [email protected]. Thank you!

Please Note: All content (recipes, photos, text, etc.) on this site is the creative property of Kelly Smith of The Nourishing Home. You are welcome to share a photo via social media, as long as it contains a link back to the corresponding recipe from this site. However, re-publishing a recipe in any form is strictly prohibited. Additionally, please refrain from adapting recipes without properly linking back to the original recipe, and keep in mind that simple substitutions do not constitute an adapted or original recipe. For details regarding recipe copyright law, please visit the Food Blog Alliance.
The Nourishing Home is a participant in the Amazon Services LLC Associates Program, an affiliate advertising program designed to provide a means for sites to earn advertising fees by advertising and linking to amazon.com.

Privacy Policy
DMCA.com

Copyright © 2026 · All Rights Reserved · The Nourishing Home · Artwork by Nancy Panaccione · Site Design by Deluxe Designs · Log in