Exciting News: This is just one of a bunch of Whole30 Recipes here at The Nourishing Home. PLUS I’ll be sharing even more Whole30-compliant recipes as we start our next Whole30 Challenge 2016. (P.S. You can join us anytime you’re ready to Jumpstart Your Health with Whole30!)
When it comes to classic breakfast side dishes, I know you may be thinking that a girl with roots in the South should be pretty partial to grits, right? Yet, the fact is, I’ve never been a fan, even when I wasn’t grain-free. (Thankfully my family hasn’t disowned me.)
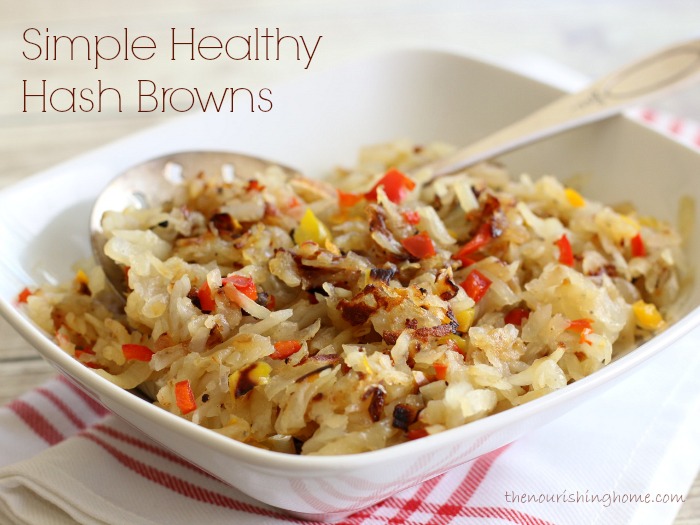
Instead, as you’ve probably guessed from this post – I’m all about breakfast potatoes – homemade hash browns to be exact. Incase you’ve attempting making hash browns in the past, and have been sorely disappointed in their often soggy, gummy texture, I’ve got good news for you! I’m sharing the secrets to hash brown making perfection that will ensure a crisp and delicious result every time!
3 Tips for Ensuring Crisp & Tender Healthy Hash Browns:
1. Proper Potato Prep – Shred potatoes (using a food processor with shred-disc is best, but a box grater will do). Soak shredded potatoes in water to release starches. Thoroughly dry shredded potatoes by pressing between kitchen towels. This is key for crispier results!
2. Seasoning is Your Friend – Be generous in using fine chopped onion and bell pepper, along with sea salt and pepper to turn up the taste!
3. Do Not Disturb! – The process goes like this … Cook undisturbed. Flip potatoes in sections. Cook undisturbed. Flip in sections. Repeat until perfect.
Now, let’s put these top tips into action! My savory recipe below has just three simple ingredients. Yet, combined with a little dash of sea salt and pepper, and a whole lot of love, your family will want to kiss you!

So … make LOTS, because they’re the perfect side dish whether it’s breakfast or dinnertime. Plus, they keep well in the fridge or freezer, and can easily be reheated in a skillet.
P.S. If you’re not fond of white potatoes – no worries – sweet potatoes make unbelievably delicious hash browns too!
Ingredients
- 2 tbsp ghee (or coconut oil)
- 1/4 cup fine diced yellow onion
- 1/3 cup fine diced red bell pepper (or use yellow & red combo)
- 3 medium russet potatoes (or white sweet potatoes - they're less sweet than orange)
- Sea salt and pepper to taste
Instructions
- Dice the onion and pepper first, so that they’re ready to go once you shred the potatoes.
- Then, peel the potatoes (or leave them unpeeled if you'd prefer). Use a box grater or the shredder attachment on your food processor to shred the potatoes.
- Be sure to follow the tips in the post above on how to properly prepare your shredded potatoes.
- Heat a large skillet (preferably cast iron) over medium-high heat. Once hot, add ghee, onion and peppers. Sauté for a minute, then add the shredded potatoes, making sure to evenly distribute across the skillet.
- Allow potatoes to cook undisturbed for a few minutes, then carefully flip section by section. Continue to cook as noted in tips above, until golden brown.
- Transfer to a serving dish and enjoy!
Notes
Leftovers Tip: My kids love it when I make breakfast burritos using leftover hash browns. I just beat a couple of eggs and add them to a hot skillet and scramble the potatoes and eggs together. Then, add the potato-egg mixture to warm tortillas, roll them up and serve with a side of pico de gallo and sliced avocado. If you’re grain-free like me, I highly recommend keeping some of Danielle’s amazing GF tortillas on hand. That way, you can enjoy the burrito fiesta as well!

These look fabulous! I’m making them tomorrow!
Thanks, Shonda! Appreciate your kind words. Let us know how you like them. 🙂
I did try them and they were great! I didn’t peel them since I like peels. But they didn’t crisp up very well even after I cooked them. Do I leave the top on or off the frying pan? They were very tasty for sure.
I don’t cover them and it’s important not to turn them for at least 4 minutes so they can brown at the bottom. They do not crisp like a typical hashbrown, because they are not deep fried. But they will have a few crispy pieces mixed in from browning. 🙂 Glad you enjoyed the recipe! Thanks for taking the time to leave a kind note!
OK! They are so good and I will be making them again because they were easy too.
So glad to hear! Thanks again! 🙂
Hi Kelly, love your website and your recipes. Thank you. Do you have to peel the potatoes? I have read that most of the goodness is just under the skin so I am always reluctant to peel them.
You don’t have to peel them. So if you enjoy potato skins, just grate them skin on. Thanks for your kind words! 🙂 So glad you’re enjoying the recipes and site, Cheronne! 🙂
Tried this recipe and loved it but nevertheless, white potato and onion abed red peppers is still my fav,
Thanks for your kind note. So glad to hear you enjoyed this recipe as well! Blessings, Kelly 🙂
I think my potatoes were probably bigger than yours because my 12″ skillet had kind of a thick layer that didn’t cook all the way through. The veggies were also undetectable (which could be good for some families, of course!). Do you have an approximate weight of potatoes that you typically use? They did taste good, so we plan to make them again!
Hi, Kim. I use medium-size potatoes since I can get a 5 lb. bag of organic medium-size russets for a great price at Trader Joes. So perhaps your potatoes are a bit larger? Now that you know, you can adjust how many potatoes you use next time you make this dish. When making these, it’s also important to let them sit in the pan undisturbed for at least 4 minutes before you turn them over in sections. Then do the same and not disturb them for another 4 minutes. At that point, you can continued to turn them until done. Hope this helps! 🙂
Hi, again, Kim. I just realized I typed “large” potatoes in the recipe list. Duh! That is the issue. I meant to type “medium” – this is now corrected so hopefully this will help others not to run into the same issue you had with too much grated potato. Thank you SO much for taking the time to point this out! You are a blessing! 🙂
Thanks so much for your quick response! That would definitely explain things. 🙂 I appreciate all you do (and so does my husband when we use one of your great recipes, lol)!
You are too kind! I am so glad you and your husband are enjoying the recipes here. Thanks for taking the time to leave a kind note! 🙂
Do you cook the hash browns in a non-stick pan or a cast iron pan?
I use cast iron, but you could use non-stick. 🙂
Hi Kelly,
Can the potatoes be grated the night before to make morning prep faster or will they go bad overnight?
Hi, Paula. The potatoes will turn brown once exposed to air, so it’s best to grate them just prior to frying them. 🙂
I thought so! Thanks for the confirmation. I’ll try this on the weekend when we’re not hurrying out the door for school. My husband is really enjoying the cooked breakfasts on Whole30! (me too 🙂
You are very welcome! Enjoy! 🙂
In over 30 years of cooking fried potatoes as home fries or hashbrowns, I could never get that lovely golden brown crispy coating UNTIL I got a cast iron fry pan. Also, a trick I learned while watching the cook at a local homestyle restaurant — aka ‘greasy spoon diner’ — is to add just a little water at the end to help release the crispy crust.
Thanks for sharing, Barb! Totally agree about the cast iron skillet and I have not heard the secret of the little water at the end. I’m definitely trying that next time I make these. Thanks so much for taking the time to share this tip! Blessings, Kelly 🙂
I followed your recipe with a twist-I added fine chopped organic spinach and one fine chopped habanero pepper. The hash was delicious. I made enough to for another day, thanks for this healthy recipe. I could not believe the quantity of starch/carbohydrate that was at the bottom of the bowl. Great idea, Kelly, soaking hash, removing from water, then drying hash reduced calories from my diet, again, thank you!
Hi, Marcia. So glad you enjoyed the recipe. Love your idea of adding some greens and spicy pepper. Yum! Thank you for taking the time to leave a kind note! 🙂 With blessings, Kelly