The Nourishing Home

living healthier lives in service to the King!

  • Home
  • About
    • About TNH
    • Contact
  • Meal Planning
  • Health & Wellness
    • Real Food Basics
  • Whole30
  • GF Recipes
    • Whole30
    • Breakfast
    • Lunch
    • Entrées
    • Slow Cooker
    • Soups & Stews
    • Sides & Salads
    • Snacks
    • Desserts
    • Kids in the Kitchen
  • My Cookbook
  • Subscribe

Festive Little Gingersnap Cookies

By Kelly · 6 Comments

Homemade holiday gifts made simple & delicious!

GF Gingersnap Cookies

Baking cookies is a cherished holiday tradition that no one should miss out on! And honestly, baking with almond flour is so easy and delicious, it’s perfect for creating amazing holiday treats the whole family will enjoy whether they’re gluten-free or not.

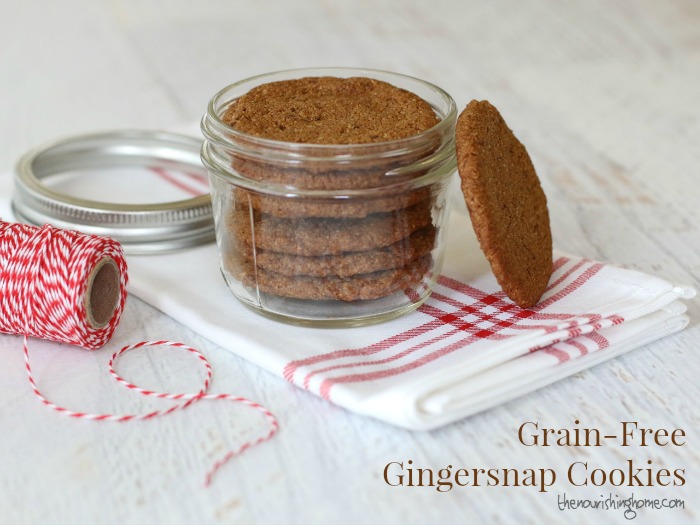
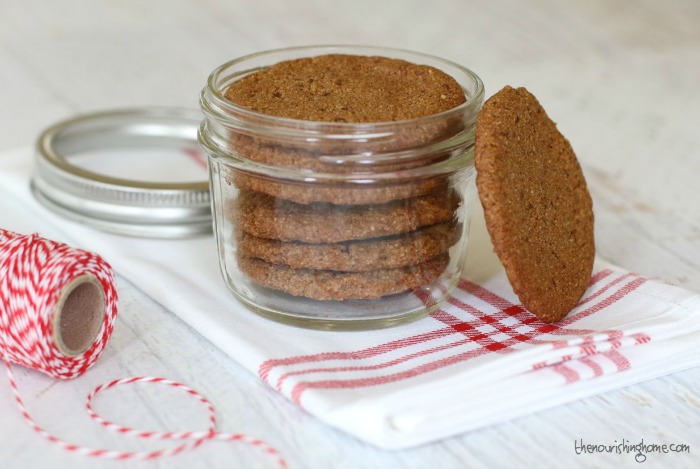
Slightly crispy along the edges with a sweet-n-spicy chewy center, these scrumptious little grain-free gingersnap cookies make a thoughtful holiday gift! I like to stack them in recycled mason jars and dress-them-up with festive ribbons and bows. Of course, I highly recommend baking double batches, because it’s next to impossible to give away these tasty little cookies without enjoying a few yourself!

Gingersnap Cookie CU

Print
Chewy Gingersnap Cookies

Ingredients

  • 1 1/2 cup blanched almond flour
  • 1 teaspoon coconut flour
  • 1/4 teaspoon baking soda
  • 1/4 teaspoon sea salt
  • 2 tablespoons butter, softened (or palm shortening)
  • 2 tablespoons coconut oil
  • 3 tablespoons honey
  • 1 tablespoon unsulfured molasses
  • 1/2 teaspoon vanilla extract
  • 2 teaspoons ground ginger
  • 1/2 teaspoon cinnamon
  • 1/8 teaspoon nutmeg

Instructions

  1. Preheat oven to 350°F. Line a baking sheet with parchment paper. Set aside.
  2. In a small bowl, combine the almond flour, coconut flour, baking soda and salt.
  3. Using a stand mixer or electric hand mixer, mix together the butter (or palm shortening), coconut oil, honey and vanilla until smooth and creamy.
  4. Add the spices and continue mixing until well incorporated, making sure to scrape down the sides of the bowl as needed.
  5. Add the dry ingredients to the wet and mix well to combine. Dough will be sticky.
  6. Drop the dough by rounded tablespoonfuls at least two inches apart onto the parchment-lined baking sheet. Use your fingers to slightly flatten the cookies.
  7. Bake for 8-10 minutes, until slightly golden brown along edges. Allow the cookies to cool on the cookie sheet at least 3-5 minutes, as they will be very soft and crumbly when hot. Then, use a spatula to transfer cookies to a wire rack to finish cooling.
3.1
https://thenourishinghome.com/2015/12/grain-free-gingersnap-cookies/

You Might Also Like:

Grain-Free Gingerbread Cookie Cut-Outs
Dairy Free Sweet Vanilla Icing {Perfect for Cookie Decorating!)
Raw Almond Butter Truffles (GF)

Filed Under: Cookies/Bars/Brownies ·

Easy Mexican-Style Casserole

By Kelly · Leave a Comment

Transform leftover poultry into the perfect weeknight dinner!

This simple grain free Mexican casserole recipe combines the fresh, light flavors of pico de gallo, cilantro and lime with the deep hearty richness of roast chicken, black beans and Mexican-style seasonings. Topped with crunchy plantain chips, and you'll never miss the grains usually found in casseroles!

One of my favorite ways to save time in the kitchen is to Cook Once, Eat Twice or More! That’s why I’m all for making the biggest roast chicken (or turkey) that I can afford (and will fit in my slow cooker or roasting pan). Cooking a big bird means lots of leftovers for making quick-n-easy weeknight dinners like this savory Mexican-Style Casserole!

This simple grain free Mexican casserole recipe combines the fresh, light flavors of pico de gallo, cilantro and lime with the deep hearty richness of roast chicken, black beans and Mexican-style seasonings. Topped with crunchy plantain chips, and you'll never miss the grains usually found in casseroles!

This simple recipe combines the fresh, light flavors of pico de gallo, cilantro and lime with the deep hearty richness of roast chicken (or turkey), black beans and Mexican-style seasonings.

I love topping this easy casserole with crunchy plantain chips, but if you’re not grain-free, feel free to use tortilla chips instead – goodness knows that’s my boys’ favorite!

This simple grain free Mexican casserole recipe combines the fresh, light flavors of pico de gallo, cilantro and lime with the deep hearty richness of roast chicken, black beans and Mexican-style seasonings. Topped with crunchy plantain chips, and you'll never miss the grains usually found in casseroles!

This simple and savory dish is perfect solo, or serve it with a side of Cauli-Rice (or Baja Cilantro Rice) and a big green salad. Yum!

P.S. The lovely linens featured in these photos are courtesy of my friends at Hen House Linens. I just adore their beautiful table linens, and even more so, their mission to make mealtimes special by adding a touch of warmth and beauty to the table.

Print
Grain-Free Mexican-Style Casserole

Yield: serves 4

Ingredients

    Salsa Layer
  • 1 cup pico de gallo
  • 1/3 cup fine chopped fresh cilantro
  • 2 Tbsp minced green chiles
  • 2 Tbsp lime juice
  • Casserole Layer
  • 3 cups shredded roast chicken or turkey
  • 1/2 cup fine-diced yellow onion
  • 1 clove garlic, minced
  • 1 1/2 cups precooked black beans (or one 15oz can drained & rinsed)
  • 3 oz cultured cream cheese
  • 2 tsp Mexican Seasoning Blend
  • 1 tsp sea salt
  • 1/2 tsp freshly ground black pepper
  • Crunchy Topping
  • 1 cup shredded cheddar cheese (preferably grassfed)
  • 2 cups plantain chips

Instructions

  1. Preheat oven to 350°F. Lightly coat a 9x9-inch baking dish with coconut or olive oil. Set aside.
  2. In a medium bowl, combine the salsa layer ingredients (pico de gallo, cilantro, green chiles and lime juice). Set aside.
  3. In a large skillet over medium-high heat, sauté onion in one tablespoon of olive oil until softened (about 2-3 minutes). Add garlic and cook until fragrant (about 1 minute).
  4. Add the shredded roast chicken (or turkey), black beans, cream cheese and seasonings. Stir until cream cheese is melted and ingredients are well combined. Remove skillet from heat.
  5. Evenly distribute the chicken (or turkey) mixture across the bottom of the prepared baking dish.
  6. Drain off excess liquid from the pico de gallo mixture. Then spoon it evenly over the top of the chicken (or turkey) layer.
  7. Sprinkle top of casserole with shredded cheddar and a layer of plantain chips.
  8. Bake casserole until cheese melts (about 20-22 minutes). Serve with Cauli-Rice and a green salad.

Notes

If you're not grain-free, feel free to top this savory casserole with tortilla chips instead, and serve with my famous Baja-Style Rice. Enjoy!

3.1
https://thenourishinghome.com/2015/11/grain-free-mexican-style-casserole/

You Might Also Like:

Turkey Joes (GF)
30 Favorite Whole30 Recipes
Garlic Thyme Chicken {Slow Cooker Recipe}

Filed Under: Poultry ·

Perfect Grain-Free No-Bake Pumpkin Pie

By Kelly · 4 Comments

Discover the secret to no more over-baked grain-free pumpkin pies – ever!

Perfect Pumpkin Pie

The hardest part of making any grain-free pie is not over-baking the crust! That’s because the delicate nut flours often used in grain-free baking are sensitive to high temperatures, as well as prolonged baking times.

In an attempt to compensate, I’ve tried myriad ingredient combinations, handy-dandy pie crust shields, and even freezing the crust before filling and baking it. All of this resulted in the same old problem … an over-baked pie crust.

So what’s a pumpkin pie lovin’ grain-free girl to do?

Like most solutions to a problem, it takes a little thinking outside the box – or in this case – thinking outside the crust!  

Pumpkin Pie Whole Pie

So what’s the secret to a perfect grain-free pumpkin pie every. single. time?

It’s actually really simple! Just bake your favorite grain-free pie crust to absolute perfection; cook this scrumptious pumpkin pie filling on your stovetop; then fill your pie crust, allow it to chill and enjoy!

Pumpkin Pie with Fork

I know it goes against every pumpkin pie making tradition, but trust me, this stovetop method for making a no-bake pumpkin pie is A M A Z I N G! The filling is perfectly smooth, creamy and flavorful! Plus, just six simple ingredients make this easy stovetop method a snap!

P.S. The lovely linens featured in these photos are courtesy of my friends at Hen House Linens. I just adore their beautiful table linens, and even more so, their mission to make mealtimes special by adding a touch of warmth and beauty to the table. 

Print
Perfect Grain-Free Pumpkin Pie

Yield: 1 nine-inch pie

Ingredients

  • 1 cup pure coconut milk
  • 1 1/4 tsp unflavored gelatin, preferably grassfed
  • 1 1/4 cup plain pumpkin puree (canned or homemade)
  • 3/4 cup pure maple syrup
  • 3 large eggs
  • 1 Tbsp pumpkin pie spice blend
  • 1 baked Grain-Free Perfect Pie Crust

Instructions

  1. Prepare and bake one 9-inch grain-free piecrust according to recipe instructions. Set aside to cool.
  2. In a 4-quart saucepan, add the coconut milk. Sprinkle the unflavored gelatin evenly on top of the milk. Allow the gelatin to soften about 5 minutes.
  3. Meanwhile, in a large mixing bowl, whisk together the pumpkin puree, maple syrup, eggs and pumpkin pie spice until smooth and creamy.
  4. Once gelatin has softened, place saucepan over medium heat. Whisk constantly until the milk and gelatin are well combined, and the milk is warmed, but not hot. (About 1-2 minutes.)
  5. Slowly add the pumpkin mixture to the warm milk while whisking to thoroughly combine. Continue stirring the pumpkin pie filling with the whisk until it reaches a gentle simmer.
  6. Once the filling reaches a gentle simmer, whisk continually for 3 full minutes until the filling begins to thicken like custard. Remove pan from heat and allow the filling to cool to room temperature.
  7. Pour cooled pumpkin pie filling into baked piecrust, making sure to not overfill. Use an offset spatula to even out the top. Then transfer to fridge to chill at least 4-6 hours before serving. Slice and enjoy! (For an extra special treat, add a dollop or two of whipped coconut cream on top. Yum!)

Notes

Recipe Variation: You can use this easy stovetop method for making pumpkin pie with any baked pie crust of your choice!

Serving Note: Because almond flour gets very moist the longer it sits, this pie is best when served within two days of baking. Enjoy!

3.1
https://thenourishinghome.com/2015/11/grain-free-pumpkin-pie/

You Might Also Like:

Strawberry Shortcake Pie (GF)
Berry Breakfast Cobbler (GF)
Double Chocolate Cream Pie {DF, GF}

Filed Under: Pies/Tarts ·

  • « Previous Page
  • 1
  • …
  • 20
  • 21
  • 22
  • 23
  • 24
  • …
  • 182
  • Next Page »

My New Cookbook is Here!

Welcome to The Nourishing Home!

I’m so glad you’re here and want you to feel right at home! My heart in creating this blog is to help you by sharing helpful meal planning strategies and nourishing GF recipes that are healthy, easy and delicious with thanksgiving to God! [Read More …]


All content (recipes, photos, posts, etc.) on this site is the creative property of Kelly Smith. You are welcome to share a photo via social media, as long as it contains a link back to the corresponding recipe or post from this site. However, you may not republish a recipe in its entirety in any form. For questions, or for permission to use a photo or recipe, please contact me via email at [email protected]. Thank you!

Please Note: All content (recipes, photos, text, etc.) on this site is the creative property of Kelly Smith of The Nourishing Home. You are welcome to share a photo via social media, as long as it contains a link back to the corresponding recipe from this site. However, re-publishing a recipe in any form is strictly prohibited. Additionally, please refrain from adapting recipes without properly linking back to the original recipe, and keep in mind that simple substitutions do not constitute an adapted or original recipe. For details regarding recipe copyright law, please visit the Food Blog Alliance.
The Nourishing Home is a participant in the Amazon Services LLC Associates Program, an affiliate advertising program designed to provide a means for sites to earn advertising fees by advertising and linking to amazon.com.

Privacy Policy
DMCA.com

Copyright © 2026 · All Rights Reserved · The Nourishing Home · Artwork by Nancy Panaccione · Site Design by Deluxe Designs · Log in