The Nourishing Home

living healthier lives in service to the King!

  • Home
  • About
    • About TNH
    • Contact
  • Meal Planning
  • Health & Wellness
    • Real Food Basics
  • Whole30
  • GF Recipes
    • Whole30
    • Breakfast
    • Lunch
    • Entrées
    • Slow Cooker
    • Soups & Stews
    • Sides & Salads
    • Snacks
    • Desserts
    • Kids in the Kitchen
  • My Cookbook
  • Subscribe

Double Chocolate Cream Pie {DF, GF}

By Kelly · 9 Comments

This delightful double chocolate cream pie will melt in your mouth! No one will ever believe that it's dairy free and grain free!

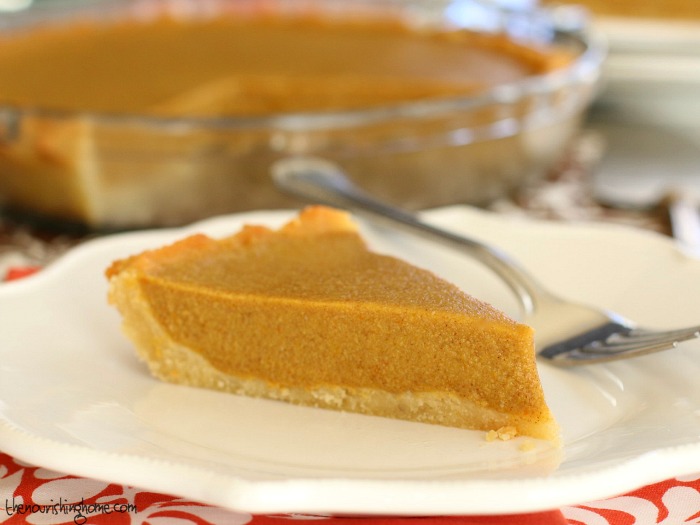
Everyone loves a good story, and food can be a great catalyst for sparking wonderful memories! This creamy dairy-free treat was inspired by my Granny’s famous chocolate cream pie. It was my Dad’s absolute favorite, and so his momma would make it for us every time we visited.

With five boys, my Granny had lots of tales to tell about my Dad and his brothers’ crazy antics and adventures, which made visits to her house a humorous time of fun!

Both my Dad and my Granny have gone on to be with the Lord. So I just had to ensure that these two very dear and cherished people in my life received a loving tribute both in my cookbook and here on the blog. Each time I make this special pie, it’s a wonderful opportunity to recall sweet memories of my family sitting around the table laughing and spending time together.

That’s why encouraging families to share meals together is so important to me – it’s truly one of the best investments you can make in building memories to last a lifetime. It’s those undistracted times around the table where our families can open up and share their lives with one another, and hopefully a lot of laughs too!

This delightful double chocolate cream pie will melt in your mouth! No one will ever believe that it's dairy free and grain free!
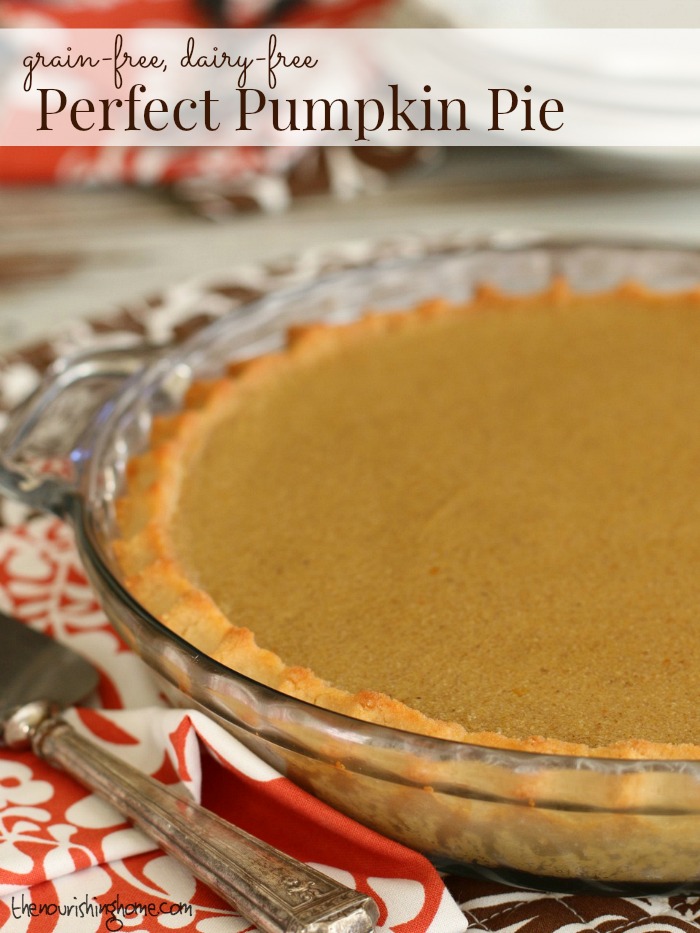
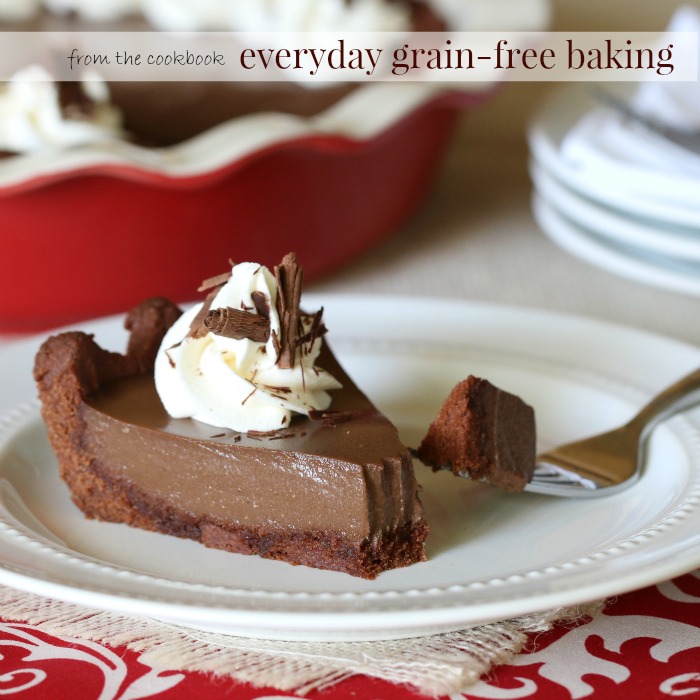
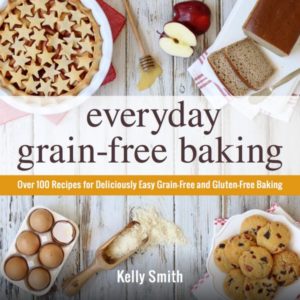
Transforming traditional family-favorite recipes into delicious gluten-free, grain-free creations is what Everyday Grain-Free Baking is all about. This delightful double chocolate cream pie recipe is just one of more than 100 irresistible grain-free, dairy-free recipes in my beautiful cookbook.

From breads, biscuits and muffins to savory snacks and decadent treats, you’ll find step-by-step instructions, beautiful color photographs and helpful tips & tidbits to make all of your GF baking adventures a delicious success! {Get a sneak peek here.}

This delightful double chocolate cream pie will melt in your mouth! No one will ever believe that it's dairy free and grain free!
I hope this simple pie inspires you to gather your family around the table to share lots of sweet memories together as well. Enjoy!

Print
Double Chocolate Cream Pie {DF, GF}

Yield: 8 servings

Ingredients

    Chocolate Pie Crust Ingredients
  • 1 3/4 cups blanched almond flour
  • 3 tablespoons unsweetened cocoa powder
  • 2 tablespoons coconut flour
  • 1/4 teaspoon unflavored grass-fed gelatin
  • 1/4 teaspoon sea salt
  • 5 tablespoons palm shortening
  • 3 tablespoons honey
  • Chocolate Cream Filling Ingredients
  • 2 3/4 cups pure canned coconut milk
  • 2 1/4 teaspoons unflavored grass-fed gelatin
  • 4 large egg yolks
  • 1/3 cup honey
  • 2 teaspoons GF vanilla extract
  • 2/3 cups dairy-free mini chocolate chips
  • 2 tablespoons unsweetened cocoa powder
  • 1/8 teaspoon sea salt

Instructions

  1. Prepare the Chocolate Pie Crust: In a food processor, combine the almond flour, cocoa powder, coconut flour, gelatin and salt. Pulse in the palm shortening. Then add the honey and pulse until a dough ball forms. Carefully remove the dough and shape it into a disk. Wrap in plastic and place it in the fridge to chill for 10-15 minutes.
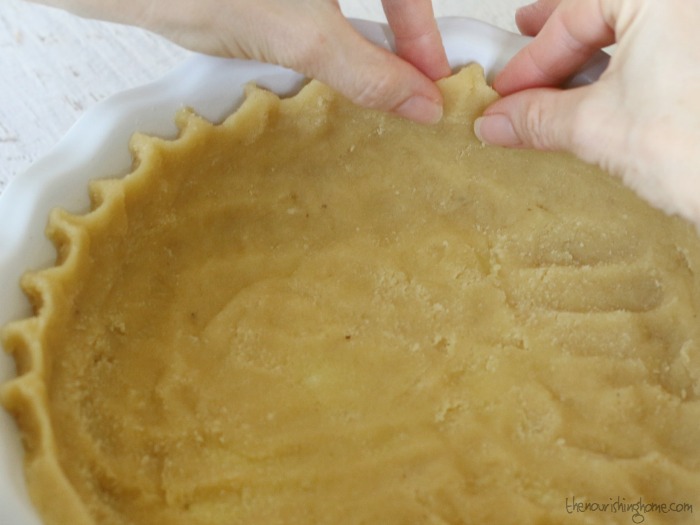
  2. Preheat oven to 325°F. Lightly oil a 9-inch deep-dish pie dish. Once dough is chilled, remove it from the fridge and press the dough evenly along the bottom and sides of the pie dish to form the pie crust. Poke the bottom of the crust with a fork.
  3. Bake 12-14 minutes until crust is rises and is lightly browned along edges. Carefully remove it from the oven and allow the crust to cool completely.
  4. Prepare the Chocolate Cream Filling: In a medium saucepan, add the coconut milk and sprinkle the gelatin on top of the milk. Allow the gelatin to soften about 5-10 minutes. Meanwhile, in a small bowl, whisk together the egg yolks, honey and vanilla. Set aside.
  5. Once gelatin has softened, place saucepan over medium heat. Whisk constantly until the milk and gelatin are well combined and the milk is warmed. Then slowly add 1/2 cup of the warm milk to the yolks, whisking constantly to combine. Slowly pour the yolk mixture into the saucepan and whisk thoroughly.
  6. Add the chocolate chips, cocoa powder and salt, and whisk well to combine. Bring the mixture to a gentle simmer. Once mixture is simmering, whisk for 3-5 minutes until mixture thickens. Then pour the custard through a fine mesh strainer into a shallow dish to cool.
  7. Once cooled, pour the chocolate filling into the cooled pie crust. Place in the refrigerator to set at least 6-8 hours or overnight.
  8. When ready to serve, top with Whipped Coconut Cream and chocolate shavings, if desired. Enjoy!

Notes

If you don't have a deep-dish pie pan, simply pour excess chocolate cream filling into a bowl and refrigerate for a luscious pudding treat!

3.1
https://thenourishinghome.com/2016/03/double-chocolate-cream-pie-df-gf/

You Might Also Like:

Strawberry Shortcake Pie (GF)
Lemon Berry Tart (GF)
A Closer Look at My Journey & Our Favorite Fruit Crisp Recipe!

Filed Under: Pies/Tarts ·

Perfect Grain-Free No-Bake Pumpkin Pie

By Kelly · 4 Comments

Discover the secret to no more over-baked grain-free pumpkin pies – ever!

Perfect Pumpkin Pie

The hardest part of making any grain-free pie is not over-baking the crust! That’s because the delicate nut flours often used in grain-free baking are sensitive to high temperatures, as well as prolonged baking times.

In an attempt to compensate, I’ve tried myriad ingredient combinations, handy-dandy pie crust shields, and even freezing the crust before filling and baking it. All of this resulted in the same old problem … an over-baked pie crust.

So what’s a pumpkin pie lovin’ grain-free girl to do?

Like most solutions to a problem, it takes a little thinking outside the box – or in this case – thinking outside the crust!  

Pumpkin Pie Whole Pie

So what’s the secret to a perfect grain-free pumpkin pie every. single. time?

It’s actually really simple! Just bake your favorite grain-free pie crust to absolute perfection; cook this scrumptious pumpkin pie filling on your stovetop; then fill your pie crust, allow it to chill and enjoy!

Pumpkin Pie with Fork

I know it goes against every pumpkin pie making tradition, but trust me, this stovetop method for making a no-bake pumpkin pie is A M A Z I N G! The filling is perfectly smooth, creamy and flavorful! Plus, just six simple ingredients make this easy stovetop method a snap!

P.S. The lovely linens featured in these photos are courtesy of my friends at Hen House Linens. I just adore their beautiful table linens, and even more so, their mission to make mealtimes special by adding a touch of warmth and beauty to the table. 

Print
Perfect Grain-Free Pumpkin Pie

Yield: 1 nine-inch pie

Ingredients

  • 1 cup pure coconut milk
  • 1 1/4 tsp unflavored gelatin, preferably grassfed
  • 1 1/4 cup plain pumpkin puree (canned or homemade)
  • 3/4 cup pure maple syrup
  • 3 large eggs
  • 1 Tbsp pumpkin pie spice blend
  • 1 baked Grain-Free Perfect Pie Crust

Instructions

  1. Prepare and bake one 9-inch grain-free piecrust according to recipe instructions. Set aside to cool.
  2. In a 4-quart saucepan, add the coconut milk. Sprinkle the unflavored gelatin evenly on top of the milk. Allow the gelatin to soften about 5 minutes.
  3. Meanwhile, in a large mixing bowl, whisk together the pumpkin puree, maple syrup, eggs and pumpkin pie spice until smooth and creamy.
  4. Once gelatin has softened, place saucepan over medium heat. Whisk constantly until the milk and gelatin are well combined, and the milk is warmed, but not hot. (About 1-2 minutes.)
  5. Slowly add the pumpkin mixture to the warm milk while whisking to thoroughly combine. Continue stirring the pumpkin pie filling with the whisk until it reaches a gentle simmer.
  6. Once the filling reaches a gentle simmer, whisk continually for 3 full minutes until the filling begins to thicken like custard. Remove pan from heat and allow the filling to cool to room temperature.
  7. Pour cooled pumpkin pie filling into baked piecrust, making sure to not overfill. Use an offset spatula to even out the top. Then transfer to fridge to chill at least 4-6 hours before serving. Slice and enjoy! (For an extra special treat, add a dollop or two of whipped coconut cream on top. Yum!)

Notes

Recipe Variation: You can use this easy stovetop method for making pumpkin pie with any baked pie crust of your choice!

Serving Note: Because almond flour gets very moist the longer it sits, this pie is best when served within two days of baking. Enjoy!

3.1
https://thenourishinghome.com/2015/11/grain-free-pumpkin-pie/

You Might Also Like:

Hot Apple Crisp (GF)
Strawberry Shortcake Pie (GF)
Double Chocolate Cream Pie {DF, GF}

Filed Under: Pies/Tarts ·

How to Make the Perfect Grain-Free Pie Crust

By Kelly · 19 Comments

This easy-to-make, grain-free pie crust tastes great with whatever delectable filling is your favorite. It's my new favorite!

Pies are such a beloved holiday tradition! And since I’m a firm believer that everyone deserves a great-tasting slice of homemade pie, I’m sharing my tried-n-true, always scrumptious, perfect grain-free pie crust recipe with you, including a helpful photo tutorial below.

Whether you’re a seasoned pie-baking master, or you’ve yet to roll out a flaky crust and fill it full of yumminess, this tasty grain-free, dairy-free pie crust is super simple! And best of all, it tastes great with whatever delectable filling is your favorite. It’s an exclusive recipe from my new cookbook, Everyday Grain-Free Baking.

In fact, I’ve included more than a half-dozen classic pie recipes in Everyday Grain-Free Baking, including my secret method for creating grain-free fruit-filled pies that are absolutely outstanding!

This easy-to-make, grain-free pie crust tastes great with whatever delectable filling is your favorite. It's my new favorite!

My heart in creating Everyday Grain-Free Baking is to transform the everyday comfort foods we each hold dear into delightfully flavorful and satisfying GF creations that are so remarkably similar to traditional gluten-based foods that everyone will enjoy these recipes, whether or not they’re living a GF lifestyle.

Finding recipes that will work for everyone that actually taste AMAZING is what Everyday Grain-Free Baking is all about! So if you haven’t already, I encourage you to grab a copy today and rediscover the joy of baking everyday favorites your whole family will love!

(P.S. It also makes a great gift for your gluten-free, grain-free friends!)

Print
Perfect Grain-Free Pie Crust (GF, DF)

Yield: 1 nine-inch pie crust

Recipe courtesy of Everyday Grain-Free Baking Cookbook

Ingredients

  • 2 1/4 cups blanched almond flour
  • 1 Tbsp coconut flour
  • 1/4 tsp unflavored gelatin, preferably grassfed
  • 1/4 tsp sea salt
  • 3 Tbsp palm shortening
  • 1 Tbsp honey
  • 1 large egg white

Instructions

  1. In a food processor, combine the almond flour, coconut flour, gelatin and salt. Pulse in the palm shortening, until it’s well incorporated. If you don’t have a food processor, use a pastry cutter (or two knifes) to cut the shortening into the flour.
  2. Add the honey and egg white and pulse until a dough ball forms.
  3. Carefully remove the dough and shape it into a disk. Wrap in plastic and place it in the fridge to chill for 20-30 minutes.
  4. Preheat oven to 325°F. Lightly oil a 9-inch pie dish with palm shortening.
  5. Once dough is chilled, remove it from the fridge and place it into the prepared pie dish.
  6. As shown in the photos below, starting with the sides of the dish, break off small strips of dough and press them along the edge of the dish to form a sturdy crust. (This will help keep your filling in place when you slice the baked pie.) Press the remaining dough evenly along the bottom of the dish to connect the bottom and sides together. Poke the bottom of the crust with a fork.
  7. Bake 12-14 minutes until crust is golden brown. Allow the crust to cool and then fill it as desired.
3.1
https://thenourishinghome.com/2015/11/grain-free-pie-crust-recipe/

How to Make the Perfect Grain-Free Pie Crust

This easy-to-make, grain-free pie crust tastes great with whatever delectable filling is your favorite. It's my new favorite!

Step One: Shape the Crust
My simple method for an evenly baked, sturdy pie crust is to break off even pieces of the dough and press them along the sides of the dish. Place the remaining dough in the center. Start by building a nice thick and even crust along the sides of the dish. (This will help keep your filling in place when you slice the baked pie.) Then, press the remaining dough evenly along the bottom of the dish to connect the bottom and sides together.

This easy-to-make, grain-free pie crust tastes great with whatever delectable filling is your favorite. It's my new favorite!

Step Two: Add a Decorative Touch
A perfect pie crust should be pretty – pretty easy that is! I learned this simple technique for creating a decorative pie crust from my Grandma. Use your index fingers and thumbs as shown in the photo above to gently pinch the edges to create a scalloped pattern. Another simple method is to use a fork to press the crust gently against the side of the dish to create a decorative striped pattern.

This easy-to-make, grain-free pie crust tastes great with whatever delectable filling is your favorite. It's my new favorite!

Step Three: Bake, Fill & Enjoy!
Of course, the best part is enjoying your perfect grain-free pie crust with any number of your favorite fillings. And guess what, I have a secret for you … You don’t have to put up with over-baked grain-free pie crusts to enjoy classic desserts like pumpkin pie! I’ve got a simple method for making perfectly scrumptious pumpkin pie with a light flaky grain-free crust. What’s the secret? Pop over to my Perfect Pumpkin Pie recipe to get the delicious details!

You Might Also Like:

Naturally Sweetened Apple Pie Filling {and delicious ways to use it!}
Lemon Berry Tart (GF)
Strawberry Shortcake Pie (GF)

Filed Under: Pies/Tarts ·

  • 1
  • 2
  • 3
  • Next Page »

My New Cookbook is Here!

Welcome to The Nourishing Home!

I’m so glad you’re here and want you to feel right at home! My heart in creating this blog is to help you by sharing helpful meal planning strategies and nourishing GF recipes that are healthy, easy and delicious with thanksgiving to God! [Read More …]


All content (recipes, photos, posts, etc.) on this site is the creative property of Kelly Smith. You are welcome to share a photo via social media, as long as it contains a link back to the corresponding recipe or post from this site. However, you may not republish a recipe in its entirety in any form. For questions, or for permission to use a photo or recipe, please contact me via email at [email protected]. Thank you!

Please Note: All content (recipes, photos, text, etc.) on this site is the creative property of Kelly Smith of The Nourishing Home. You are welcome to share a photo via social media, as long as it contains a link back to the corresponding recipe from this site. However, re-publishing a recipe in any form is strictly prohibited. Additionally, please refrain from adapting recipes without properly linking back to the original recipe, and keep in mind that simple substitutions do not constitute an adapted or original recipe. For details regarding recipe copyright law, please visit the Food Blog Alliance.
The Nourishing Home is a participant in the Amazon Services LLC Associates Program, an affiliate advertising program designed to provide a means for sites to earn advertising fees by advertising and linking to amazon.com.

Privacy Policy
DMCA.com

Copyright © 2025 · All Rights Reserved · The Nourishing Home · Artwork by Nancy Panaccione · Site Design by Deluxe Designs · Log in