The Nourishing Home

living healthier lives in service to the King!

  • Home
  • About
    • About TNH
    • Contact
  • Meal Planning
  • Health & Wellness
    • Real Food Basics
  • Whole30
  • GF Recipes
    • Whole30
    • Breakfast
    • Lunch
    • Entrées
    • Slow Cooker
    • Soups & Stews
    • Sides & Salads
    • Snacks
    • Desserts
    • Kids in the Kitchen
  • My Cookbook
  • Subscribe

Sweet Vanilla Glaze (GF, DF)

By Kelly · 2 Comments

Cranberry Orange Cake

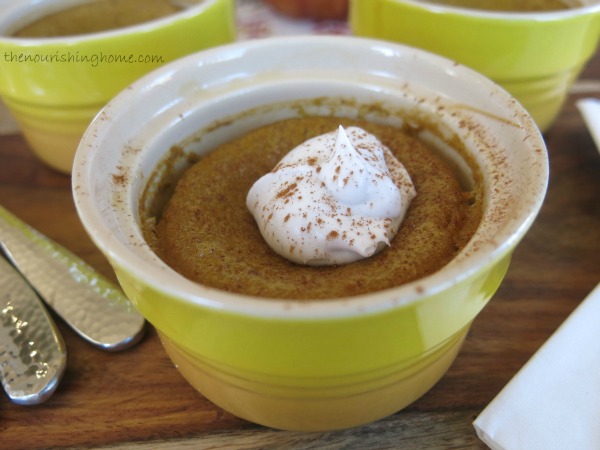
This easy-to-make dairy-free glaze is the perfect addition to your favorite cakes, quick breads and muffins. It not only adds a hint of sweet vanilla goodness, but also provides lots of eye appeal too. With just a little swirl of this delicious glaze, you can magically transform any baked good into a party-perfect treat! Yum!

Looking for a delicious dairy-free cookie icing that won’t run or spread? Be sure to check out my special Sweet Vanilla Icing recipe – perfect for decorating your favorite home-baked cookies!

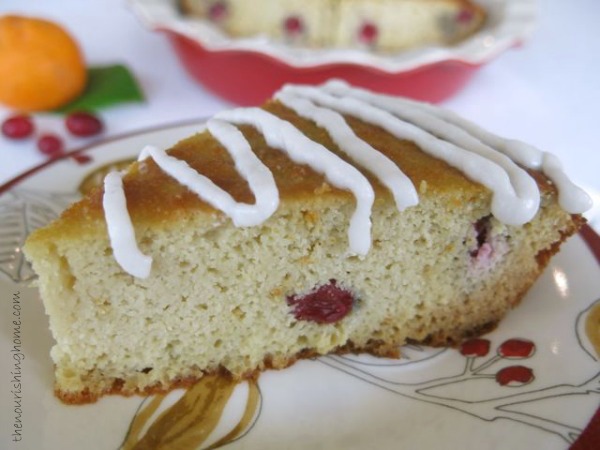
P.S. The Cranberry Orange Coconut Flour Cake shown above is a special guest recipe I shared at Honeyville Farms blog. It’s just one of the many baked goods that tastes even better with a little swirl of this delightful vanilla glaze.

Print
Sweet Vanilla Glaze (GF, DF)

Yield: 1/2 cup of icing

Ingredients

  • 1/2 cup unsweetened coconut cream (see instructions below)
  • 1 tbsp, plus 1 tsp raw honey
  • 2 tsp coconut oil
  • 1/2 tsp pure vanilla extract

Instructions

  1. Place one can of unsweetened coconut milk into the fridge for at least 1-2 hours. By chilling the can of coconut milk, the coconut cream will rise to the top of the can.
  2. Measure out 1/2 cup of coconut cream; reserve remainder for another use.
  3. In a medium bowl, using an electric mixer, blend together the honey, coconut oil and vanilla, until well combined and creamy.
  4. Then, mix in the coconut cream until thoroughly combined and mixture is light and fluffy.
  5. Transfer glaze to a pastry bag or small ziplock-style baggie. Twist bag to move the glaze into one corner of the bag (the tip) and secure it with a rubberband.
  6. Refrigerate glaze at least 1-2 hours, or may be stored in the fridge 1-2 days.
  7. When ready to use, snip the tip of the bag and begin swirling.
  8. This delicious glaze adds the perfect decorative touch to cakes, cookies, quick breads and muffins. Enjoy!
3.1
https://thenourishinghome.com/2013/12/dairy-free-vanilla-glaze-gf-df/

You Might Also Like:

Spiced Holiday Nuts {Easy & Delicious Homemade Gift-in-a-Jar}
Easy Chocolate Ganache Icing (DF Option)
Summertime Favorite: Grilled Peaches & Cream (GF)

Filed Under: Other Desserts ·

Special Recipe from Nourishing Cookies for a Healthy Holiday Cookbook

By Kelly · 6 Comments

Nourishing Cookies

One of my dear friends, Diana Bauman from My Humble Kitchen, just released a wonderful holiday cookbook – *Nourishing Cookies for a Healthy Holiday – featuring her family’s favorite whole-grain, naturally-sweetened cookie recipes.

And although I’m living a grain-free life, as I know many of you are as well, I just had to share this gorgeous book for two simple reasons …

First, for those of you here who aren’t grain-free and are either just starting out on your real food journey, or are tried-n-true veterans who are looking for some amazing delicious whole-grain holiday cookie recipes that taste great without compromising good nutrition, this book is for you! Second, many of you who are grain-free may have friends and family who are not. Guess what? Diana’s book is a beautiful way to share how holiday baking can be delicious, fun and nourishing.

nourishingcookies_coverimgIn typical fashion, I’ve also talked Diana into allowing me to share a fabulous recipe with you – a traditional honey-sweetened Spanish candy called Turrón – as a small taste of the delicious surprises that await you and your family in this beautiful whole-grain holiday baking book. Of course, I must admit that I hand-picked this particular recipe not only because it’s one of the two grain-free recipes in the book, but moreso because it represents a special family tradition for Diana and her family. And I believe building and celebrating family traditions is one of the cornerstones of creating special holiday memories that last a lifetime!

Print
Turrón de Navidad (GF, DF)

Yield: 2 dozen candies

Turrón de Navidad is a traditional sticky, chewy candy made with three simple ingredients. This delectable recipe is just one of the many holiday treats featured in Nourishing Cookies for a Healthy Holiday.

Ingredients

  • 1 3/4 cup roasted almond slivers
  • 1 1/2 cups pure honey
  • 3 egg whites

Instructions

  1. Roast the almonds at 375F for 10 minutes mixing them up halfway through.
  2. In a medium sized saucepan over medium heat; gently bring the honey to a slow boil. Once it starts to boil, turn the heat off, and set aside.
  3. Whip the egg whites to a thick glossy meringue. Carefully, fold the meringue into the honey.
  4. Once the meringue has been folded into the honey, bring the mixture back up to medium heat constantly stirring
  5. for 15-20 minutes. The meringue honey mixture will soon increase in volume. As you keep stirring, it will condense itself until a thick caramel has formed. Also, the color will slowly change from a light brown to a deep burnt orange. The bottom of the mixture may start to burn a bit which is okay. It adds depth in flavor. *To test if your mixture is thick enough, add a bit to a plate and immediately place in the refrigerator. After a minute or so, if it hardens, your mixture is ready.
  6. Once the honey mixture has thickened, add the roasted almonds and mix through.
  7. Quickly pour the turron mixture into a parchment paper lined dish, 11” x 7”. Immediately, place another piece of parchment paper directly on top of the mixture which will allow you to press it down and prevent anything from sticking to it.
  8. Cool in the refrigerator for 2-3 hours before slicing and serving. YUM!
3.1
https://thenourishinghome.com/2013/11/nourishing-cookies-for-a-healthy-holiday/

P.S. Join Diana for an amazing 25 Day Grace Filled Journey to Real Food! It all starts in January!! And I couldn’t be more excited to be a part of the incredible journey she has in store for us!

*Disclosure: If you opt to purchase using the affiliate links in this post, a small portion of the sale goes to support The Nourishing Home at no additional cost to you. There is no obligation to purchase, but if you do, you are helping to support the free resources, meal plans and recipes here at The Nourishing Home. Thank you!

You Might Also Like:

Fabulous Fruit-Filled Crepes (GF)
Yogurt Banana Split Parfaits (GF)
15 Fabulous Ways to Enjoy Dried Strawberries

Filed Under: Other Desserts ·

Creamy Pumpkin Pie Custard (DF, GF)

By Kelly · 8 Comments

Creamy Pumpkin Custard
Pumpkin pie is the quintessential Thanksgiving dessert. And as much as we adore pumpkin pie around here, sometimes it’s nice to have a lighter option, especially after a more-than-filling Thanksgiving feast!

This easy-to-make, dairy-free custard rises up beautifully like a soufflé and is just as light and fluffy in texture as well. It boasts all the fabulous flavors of creamy pumpkin pie without the heaviness of a crust. Top with a dollop of whipped coconut cream and a sprinkling of cinnamon for even bigger smiles!

(some of the links below are *aff.links)

Print
Creamy Pumpkin Pie Custard (DF, GF)

Yield: 5-6 servings

Ingredients

  • 1 1/2 cups pure unsweetened coconut milk
  • 1/3 cup pure honey (I prefer sage honey due to its mild flavor]
  • 3 large eggs
  • 3/4 cup pumpkin puree (not pumpkin pie mix)
  • 1 tsp pumpkin pie spice
  • 1/4 tsp ground cinnamon
  • 1/4 tsp ground ginger
  • 1/4 tsp salt
  • 1 tsp pure vanilla extract
  • 2 tsp coconut flour

Instructions

  1. Preheat oven to 350°.
  2. In a large bowl, whisk together coconut milk and honey until well combined.
  3. Next, whisk in the eggs, pumpkin, pumpkin pie spice, salt and vanilla. Add the coconut flour and continue to whisk until well combined.
  4. Evenly distribute the custard into 5-6 small ramekins, making sure to leave at least a half-inch or more of space from the top of each cup.
  5. Place the ramekins on a baking sheet and carefully transfer to the oven.
  6. Bake for 30-35 minutes, until they rise up and set in middle (a slight jiggle in the center is fine, as the custard will continue to set a bit as it cools).
  7. Carefully remove the custard cups from the oven and transfer to a wire rack to cool.
  8. Lightly dust tops with a sprinkling of cinnamon. Serve warm with a dollop of whipped coconut cream, if desired.

Notes

Here's a trick I use to ensure my coconut milk is well combined, especially in the wintertime when the temperatures are cooler and canned coconut milk often separates as a result.

Heat some water in a small saucepan, until it just starts to steam (not boil). Turn off the heat, and add the unopened can(s) of pure unsweetened coconut milk to the pan of warm water. Allow it to sit a few minutes to warm the milk. Next, shake the can thoroughly, then open it. The milk will now be well combined and ready to use in your favorite dairy-free recipes.

3.1
https://thenourishinghome.com/2013/11/creamy-pumpkin-custard-df-gf/

follow-me-on-pinterest-button

*Disclosure: If you opt to purchase using the affiliate links in this post, a small portion of the sale goes to support The Nourishing Home at no additional cost to you. There is no obligation to purchase, but if you do, you are helping to support the free resources, meal plans and recipes here at The Nourishing Home. Thank you!

You Might Also Like:

Sweet Vanilla Glaze (GF, DF)
Spicy Tropical Fruit Skewers {Grilled}
Creamy Custard with Summer Berries (GF, DF Option)

Filed Under: Other Desserts ·

  • « Previous Page
  • 1
  • …
  • 9
  • 10
  • 11
  • 12
  • 13
  • …
  • 27
  • Next Page »

My New Cookbook is Here!

Welcome to The Nourishing Home!

I’m so glad you’re here and want you to feel right at home! My heart in creating this blog is to help you by sharing helpful meal planning strategies and nourishing GF recipes that are healthy, easy and delicious with thanksgiving to God! [Read More …]


All content (recipes, photos, posts, etc.) on this site is the creative property of Kelly Smith. You are welcome to share a photo via social media, as long as it contains a link back to the corresponding recipe or post from this site. However, you may not republish a recipe in its entirety in any form. For questions, or for permission to use a photo or recipe, please contact me via email at [email protected]. Thank you!

Please Note: All content (recipes, photos, text, etc.) on this site is the creative property of Kelly Smith of The Nourishing Home. You are welcome to share a photo via social media, as long as it contains a link back to the corresponding recipe from this site. However, re-publishing a recipe in any form is strictly prohibited. Additionally, please refrain from adapting recipes without properly linking back to the original recipe, and keep in mind that simple substitutions do not constitute an adapted or original recipe. For details regarding recipe copyright law, please visit the Food Blog Alliance.
The Nourishing Home is a participant in the Amazon Services LLC Associates Program, an affiliate advertising program designed to provide a means for sites to earn advertising fees by advertising and linking to amazon.com.

Privacy Policy
DMCA.com

Copyright © 2026 · All Rights Reserved · The Nourishing Home · Artwork by Nancy Panaccione · Site Design by Deluxe Designs · Log in