The Nourishing Home

living healthier lives in service to the King!

  • Home
  • About
    • About TNH
    • Contact
  • Meal Planning
  • Health & Wellness
    • Real Food Basics
  • Whole30
  • GF Recipes
    • Whole30
    • Breakfast
    • Lunch
    • Entrées
    • Slow Cooker
    • Soups & Stews
    • Sides & Salads
    • Snacks
    • Desserts
    • Kids in the Kitchen
  • My Cookbook
  • Subscribe

A Closer Look at My Journey & Our Favorite Fruit Crisp Recipe!

By Kelly · 7 Comments

I’m honored to be a special guest of Michelle over at her wonderful allergy-friendly blog The Willing Cook. She’s so graciously allowed me to share my personal journey with you  – a path marked by God’s grace in leading me to a real food lifestyle that has resulted in a closer walk with Christ and positive health changes that have enable me to better serve Him, my family, my church and YOU!

If you’ve been curious about why I do what I do in providing free recipes, meal plans and resources for healthy real food living, then I encourage you to pop over today and check out my exclusive interview with The Willing Cook.

Of course, I couldn’t just pop over for a visit and pour out my heart without bringing something healthy and scrumptious to share as well. So, I’m happily sharing my favorite fruit crisp recipe, featuring glorious fresh summer peaches!

Growing up in the South, one of the highlights of summer was enjoying fresh seasonal peaches – so sweet and juicy! My affinity for these little fuzzy treats hasn’t changed, and so now I like to buy a couple of crates of ripe organic peaches each summer, so I can slice and freeze them for use all year long.

So in addition to this personal interview, I’m also sharing my special Berry Peachy Crisp recipe. It can be made using either fresh ripe peaches, or frozen ones. The addition of sweet and tangy raspberries really complements the mellow flavor of peaches, making this an extra special treat!

Joyfully Serving Him, Kelly


This post was featured at Living Well Wednesdays.

You Might Also Like:

Double Chocolate Cream Pie {DF, GF}
Naturally Sweetened Apple Pie Filling {and delicious ways to use it!}
Perfect Grain-Free No-Bake Pumpkin Pie

Filed Under: Godly Womanhood, Pies/Tarts ·

5 Tips to Make Lunch Packing Easier!

By Kelly · 41 Comments

If you’re already breaking out in a cold sweat just thinking about back-to-school lunch packing, boy-oh-boy, do I have a treat for you! My sweet friend Laura over at MOMables is here to share her top five tips for making lunch packing a simpler process.

Laura is an expert on all things lunch and spends much time in teaching busy parents how to make wholesome school lunches in 10 minutes or less. So whether you’re packing a lunch for 1 or 10, I know you’ll appreciate her time-saving tips and inspiring ideas below!

(Please note: Some of the links in this post are affiliate links, which help to support the free resources, recipes and meal plans here at The Nourishing Home. See *note below for details.)

5 Tips to Simplify Lunch Packing

by Laura Fuentes

Back-to-school season is upon us and that means getting organized as families, so we can meet the challenges of homework, after school activities, club meetings, household duties, cooking meals, and of course … school lunches.

If the thought of getting it all done overwhelms you, don’t worry; you are not alone.  Many of us struggle with this time of the year because it means that the fun and free-for-all-summer is over and our early morning devotional time is now shared with making sure our children are clothed, fed and ready for school.

Every parent I know, wants to pack a wholesome school lunch for their kids, but packing them daily can be a challenge. Many get started making wholesome lunches every day, but then run out of steam and ideas after a few weeks.  The good news is packing a wholesome lunch doesn’t have to be difficult. Fresh is always best… and it can also be easy! All it takes is a little preparation and know-how to get a smooth routine in place.

Here are five of my favorite tips to simplify the lunch packing process:

  1. Plan ahead. Putting together a full family meal plan, even for lunches, ahead of time is the ultimate time saver. It’s much easier to pull out the ingredients and assemble a quick lunch, when you already know what to make! Repurposing dinner leftovers into something delicious for lunch is simple when you have a plan. No one likes to stand in front of the fridge with that deer-in-headlights feeling daily. Making the most of leftovers is easy when you know what you’ll need for the week. Having pasta for dinner on Monday night? Boil extra noodles and plan for a pasta lunch on Wednesday. It’s really that easy!
  2. Keep it simple. When I develop our menus for MOMables, my goal is to provide nutritious lunches that take 10 minutes or less to assemble. Don’t have time to make intricate butterfly-shaped quesadillas? Me either. Opt for minimal fresh ingredients, few steps, easy assembly and forget the rest. Many lunch cookbooks and bento websites have great ideas, but the intricate shapes and numerous ingredients can be discouraging. Use a simple sandwich cutter, if you want to get fancy, but leave out anything that requires special gadgets, elaborate ingredients, processed foods and lengthy recipes.
    P.S.  I’m often asked how to beat the lunch-rut, when it seems like your kiddo only eats one or two things. (Their staple foods, if you will.) Here’s a MOMables tip: Write a list of the things they do eat. Then, incorporate those items in different ways (with some other healthy ingredients), until little by little you are adding one new thing at a time.)
  3. Have the right gear. By packing lunches in *reusable, divided containers everything has its own place, which makes it easy to see what items your lunch may be lacking. If you get into the routine of packing your fruits and vegetables in the smaller sections, you can more easily see what may be lacking to provide a complete meal. Re-usable containers are also better for the environment than the waste created by disposable baggies. One re-usable container can replace the need for 4-6 disposable baggies each day! A small thermos is also a great tool to have on hand.  You can pack leftover soups, pasta and warm dishes without needing to reheat.  Purchasing a quality *leak-proof thermos gives you many more options and the ability to “think outside the sandwich.”
  4. Prep ahead. Slicing and dicing fresh vegetables can seem time consuming when you’re trying to hurry and pack lunches during late nights or rushed mornings. A great time to prep them is when you get home from the market – simply take a few minutes to clean and cut what you’ll need for the week ahead. This way, you’ll have servings of fruit and veggies ready to grab-n-go when lunch packing. This will also save you money, because buying those items pre-cut can be expensive. You’re also less likely to find that “mystery fruit” stinking up the back of your refrigerator that never got used and now have to throw away. Remember: A few minutes of your time = savings in your pocket book.
  5. Pack a few days at a time. Sounds crazy, but it’s actually very easy.  I take one hour on Sunday nights to boil pasta, cook rice or make anything that is not part of my dinner meal plan for the week ahead. I use these to repurpose dinner leftovers for lunch. I pack Monday, Tuesday and Wednesday in containers and label or color code the box to its owner.  We have thermos Thursday and pizza or leftover Fridays. This makes packing a wholesome lunch simple, efficient and time saving.

Lunchbox Love Collage
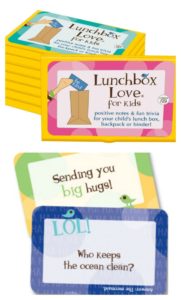
P.S. I’ve got a fun way to say I Love You! These little Lunchbox Love Notes are absolutely precious, and are such a heartfelt way to let your kids know how much you love and care about them.

Whether you have preschoolers, elementary age kids or teens, SayPlease.com has an amazing line of “love notes” for kids of all ages, even adults. The notes include an inspiring message along with cool trivia and funny jokes.

I love putting these thoughtful little notes into my boys’ lunchboxes, because I know it makes them feel loved and special!


IMG_6827-Version-2–Laura Fuentes shows parents how to make fresh school lunches over at MOMables™.  A wife, mother of three and a lunch enthusiast, Laura insists on healthy, wholesome food for her family. On her personal blog, Super Glue Mom, she writes about managing motherhood on a deadline. She’s also a food contributor and recipe developer to numerous sites, and helps busy parents overcome the difficulties of cooking real food in a hurry. You can find Laura on Twitter and on Facebook and MOMables on Twitter, Facebook and Pinterest.

*Disclosure: If you opt to purchase using any of the affiliate links in this post, a small portion of the sale goes to support The Nourishing Home at no additional cost to you. There is no obligation to purchase, but if you do, you are helping to support the free resources, meal plans and recipes here at The Nourishing Home. Thank you!

You Might Also Like:

Sale ends today …
Bringing Healthy Living to Neighbors Across the Globe!
Soaked Cinnamon Crumb Cake & Cupcakes

Filed Under: Uncategorized · Tagged: healthy lunch packing, lunch packing tips

Super Summer Sale! Honeyville Blanched Almond Flour as low as $3.87 per pound!

By Kelly · 4 Comments

From muffins, cakes and cookies to pies, biscuits and crackers – the ideas are endless for creating nutritious and delicious recipes using blanched almond flour and coconut flour!

My wonderful friends at Honeyville Farms are at it again – providing 15% off your ENTIRE order now through Tuesday, August 14, 2012.

Simply enter coupon code SPLASH during checkout.

So if you’ve been tossing around the idea of doing your own Test Kitchen Showdown with their high quality blanched almond flour, now’s the time to order!

Honeyville’s 5-lb bag of blanched almond flour (or 5-lb bag of coconut flour) is just $25.49 with the coupon code (which equates to $5.10 per pound). And if you use blanched almond flour a couple of times a week or more, I recommend purchasing the *bulk size (25lbs) for $96.89 with coupon code. That’s just $3.87 per pound!

As most of you know, blanched almond flour and coconut flour are two of my favorite GF staples! Both are quite easy to work with and make the most delicious light, fluffy baked goods. Even more important, they are much more nutritious compared to typical GF flour blends that consist mainly of starches such as rice, tapioca and potato. Blanched almond flour and coconut flour are both low in carbohydrates and are high in protein and dietary fiber, as well as contain many beneficial nutrients.

*Tip: If you decide to save big and purchase the 25-lb size like I do, simply repackage it into your own 5-lb containers or ziplock-style bags and place one in your pantry and the rest in the freezer. Blanched almond flour will stay fresh in an airtight container in the pantry for about 6-8 weeks and will stay fresh in an airtight container in the freezer for up to six months.


You Might Also Like:

Homemade Soaked Tortillas (GF Options)
Wishing You a Merry Christmas & Happy New Year!
Get Organized to Eat Healthier! {Special Guest Post}

Filed Under: Uncategorized ·

  • « Previous Page
  • 1
  • …
  • 118
  • 119
  • 120
  • 121
  • 122
  • …
  • 182
  • Next Page »

My New Cookbook is Here!

Welcome to The Nourishing Home!

I’m so glad you’re here and want you to feel right at home! My heart in creating this blog is to help you by sharing helpful meal planning strategies and nourishing GF recipes that are healthy, easy and delicious with thanksgiving to God! [Read More …]


All content (recipes, photos, posts, etc.) on this site is the creative property of Kelly Smith. You are welcome to share a photo via social media, as long as it contains a link back to the corresponding recipe or post from this site. However, you may not republish a recipe in its entirety in any form. For questions, or for permission to use a photo or recipe, please contact me via email at [email protected]. Thank you!

Please Note: All content (recipes, photos, text, etc.) on this site is the creative property of Kelly Smith of The Nourishing Home. You are welcome to share a photo via social media, as long as it contains a link back to the corresponding recipe from this site. However, re-publishing a recipe in any form is strictly prohibited. Additionally, please refrain from adapting recipes without properly linking back to the original recipe, and keep in mind that simple substitutions do not constitute an adapted or original recipe. For details regarding recipe copyright law, please visit the Food Blog Alliance.
The Nourishing Home is a participant in the Amazon Services LLC Associates Program, an affiliate advertising program designed to provide a means for sites to earn advertising fees by advertising and linking to amazon.com.

Privacy Policy
DMCA.com

Copyright © 2026 · All Rights Reserved · The Nourishing Home · Artwork by Nancy Panaccione · Site Design by Deluxe Designs · Log in