The Nourishing Home

living healthier lives in service to the King!

  • Home
  • About
    • About TNH
    • Contact
  • Meal Planning
  • Health & Wellness
    • Real Food Basics
  • Whole30
  • GF Recipes
    • Whole30
    • Breakfast
    • Lunch
    • Entrées
    • Slow Cooker
    • Soups & Stews
    • Sides & Salads
    • Snacks
    • Desserts
    • Kids in the Kitchen
  • My Cookbook
  • Subscribe

Spelt Buttermilk Biscuits (and Scones!)

By Kelly · 12 Comments


There’s nothing like a good hot-outta-the-oven biscuit! And a good biscuit goes beyond breakfast – they’re also the perfect side to a nice hot bowl of soup, or with roasted chicken and gravy.

By using almond flour and whole *sprouted spelt flour, instead of refined white flour, this recipe allows your family to enjoy all the deliciousness of a true Southern-style buttermilk biscuit with increased nutritional value in every bite! A definite win-win!

Biscuit Scone

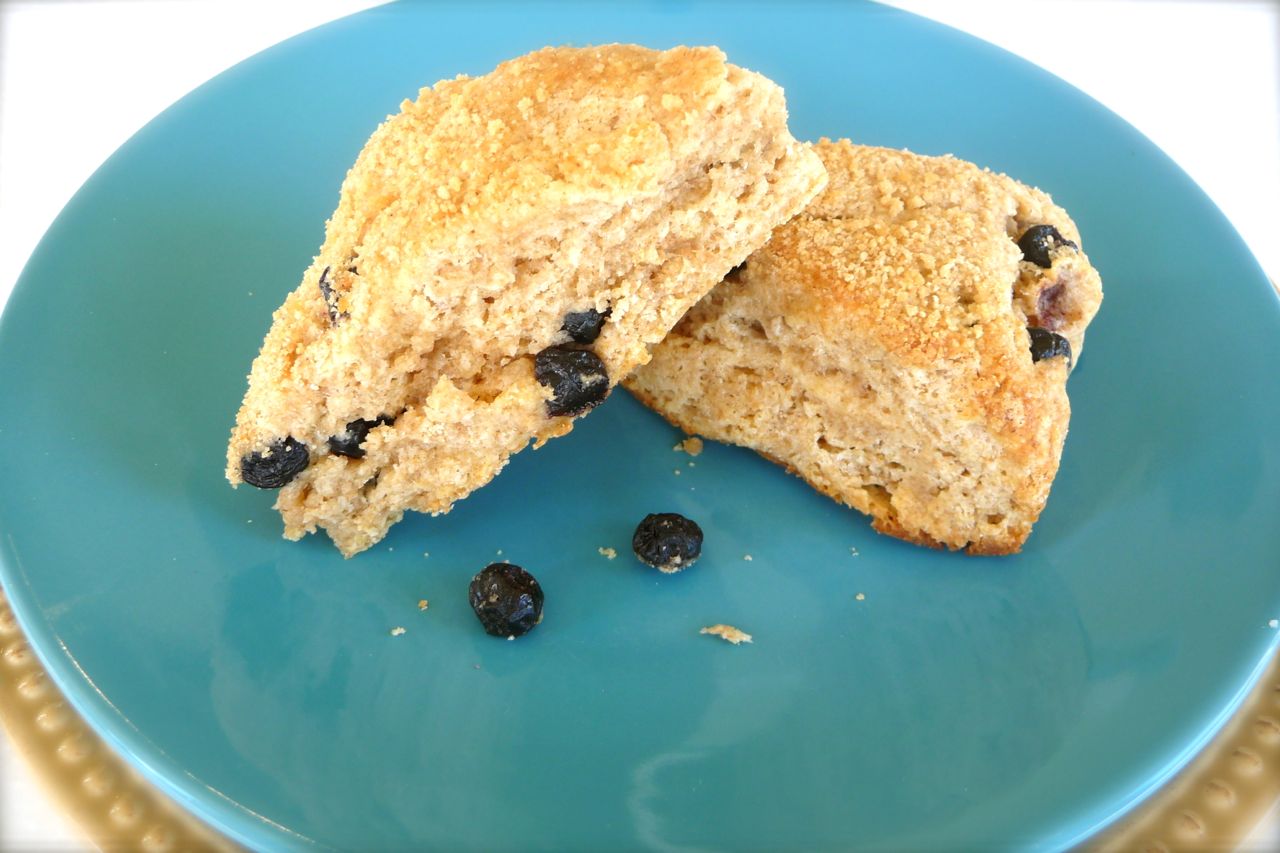
Another bonus! … As shown above, you can easily use this same recipe to create scrumptious scones! YUM!

*Note: You can use regular whole spelt flour in this recipe in place of sprouted spelt and your biscuits will still turn out great! However, I recommend and use organic sprouted spelt flour for recipes in which soaking just doesn’t yield a good end product. Sprouted flour contains a tremendous amount of beneficial nutrients. For more information, click here.

Biscuit Making 101:

Grandma’s tips to me were to cut my butter into very small pieces and add to the flour for easier incorporation into the flour.

Use a good, sturdy pastry blender to cut in butter as shown. Butter pieces should be no larger than the size of a green pea.

Gently knead the dough a few times. It should not be too moist, but should hold together well, after kneading.

Slightly flour top of dough and roll out to one-inch thick and cut out. Gather scrap dough and knead together and repeat.

Biscuit Heart
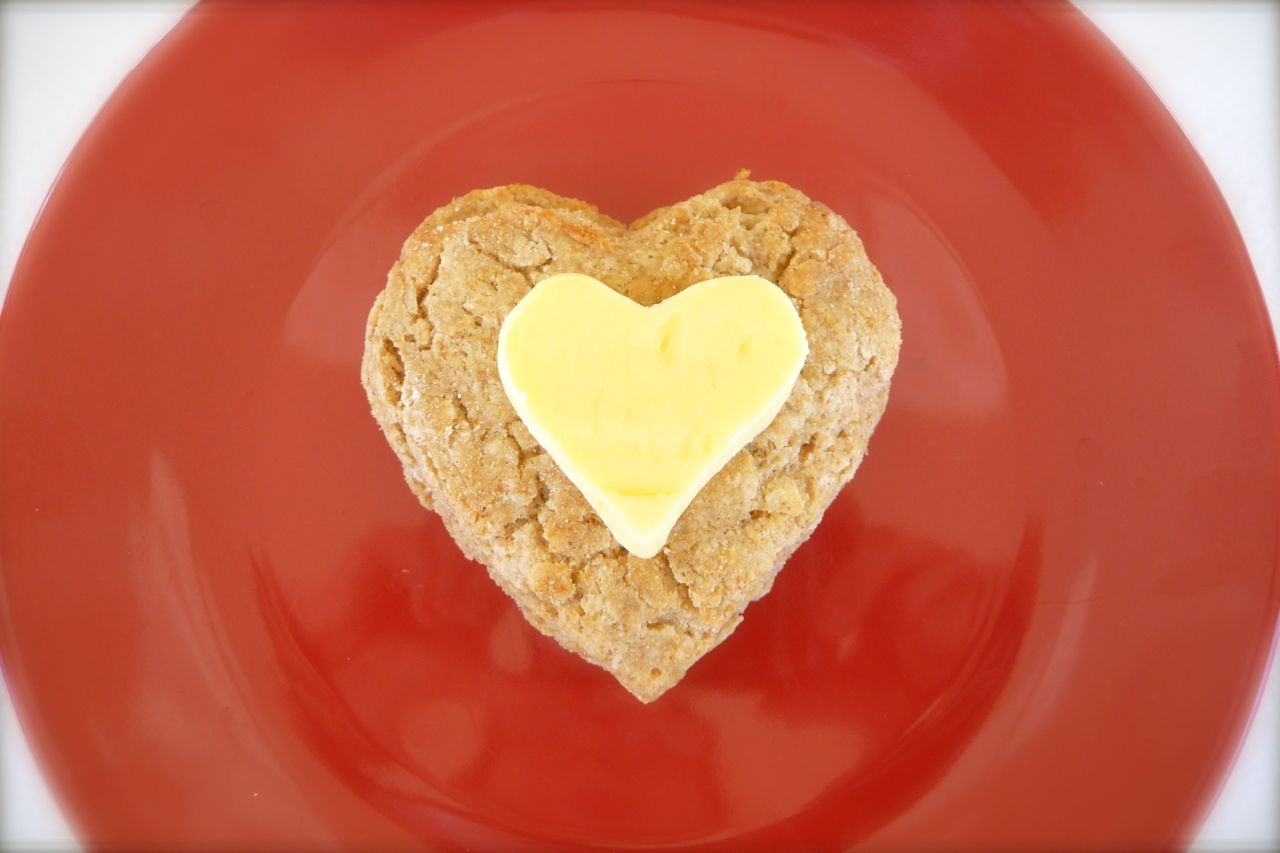
A simple heart-shaped cookie cutter is all it takes to make these sweet Honey-Butter Biscuits Made with LOVE!

Print
Spelt Buttermilk Biscuits (or Scones!)

Yield: 6 three-inch round biscuits

Spelt Buttermilk Biscuits (or Scones!)

Ingredients

  • 1 1/2 cups organic whole spelt flour (I use sprouted spelt flour)
  • 1/2 cup blanched almond flour
  • 1 tbsp aluminum-free baking powder
  • 1/2 tsp sea salt
  • 5 tbsp butter, cold
  • 2/3 cup cultured organic buttermilk (or plain organic Kefir)
  • If Making Scones: 1/3 cup dried fruit, such as currants or blueberries

Instructions

  1. Preheat the oven to 450 degrees. In a large bowl, stir together the flours, baking powder and salt. Using a pastry blender, cut in the butter until butter mixes with flour and resembles coarse crumbs no larger than the size of a green pea. (If making scones, fold dried fruit into the flour mixture.)
  2. Gradually and slowly stir in the buttermilk until dough begins to pull away from the sides of the bowl. (You may need to adjust the amount of milk depending on the flour used. You do not want the dough to be too moist, or when baked, it will not rise properly and will be crumbly.)
  3. Dust a large sheet of parchment paper with spelt flour. Using your hands, gather dough together in bowl and knead 3-4 times in the bowl (just enough to combine). Pick up dough ball and place on parchment and flatten slightly.
  4. To Make Biscuits: Lightly dust top of flattened dough and gently roll out to one-inch thick (that's the height of most biscuit cutters). Cut biscuits using a biscuit cutter and place on a baking sheet lined with parchment paper.
  5. To Make Scones: Using your hands, shape dough into a square at least one-inch thick. Cut dough in half twice to form four smaller squares. Then cut each of the four small squares in half diagonally to form 8 small triangles. Sprinkle the top of the scones with your favorite unrefined sugar of choice, if desired. Using a spatula, gently place each scone on a baking sheet lined with parchment paper.
  6. Bake about 10 minutes, until the edges begin to turn slightly golden. Serve hot-outta-the-oven with cultured raw butter and raw honey! Be prepared for squeals of delight!
3.1
https://thenourishinghome.com/2012/03/spelt-buttermilk-biscuits/

follow-me-on-pinterest-button

You Might Also Like:

Happy New Year Sale! Honeyville Blanched Almond Flour as low as $4.25 a pound!
Breaking Down The Walls ...
A Simple Mother’s Day Brunch Menu (GF)

Filed Under: Uncategorized ·

24-hour Power Muffins

By Kelly · 33 Comments


Pictured above: Soaked blueberry, strawberry and banana-walnut Power Muffins! Mmmm!!!

Discover the secret of soaking your grains for increased digestibility, nutrition and flavor! This delicious muffin recipe is a great way to get started. Also check out How to Soak Grains for Optimal Nutrition.

Print
24-hour Power Muffins

24-hour Power Muffins

Ingredients

    Step One: Soaking
  • 2 cups plain organic Kefir (or cultured buttermilk)
  • 1/2 cup pure honey (I prefer sage honey due to its mild flavor)
  • 3 tbsp pure organic maple syrup
  • 1 1/2 cups organic whole Spelt flour
  • 1 1/2 cups organic whole Kamut flour
  • Step Two: Baking
  • 2 eggs, lightly beaten
  • 2 tsp baking soda
  • 1/4 tsp aluminum-free baking powder
  • 1 tsp vanilla extract
  • 1/4 cup (4 tbsp) melted butter
  • 1/4 tsp Celtic sea salt
  • 3 tbsp ground flaxseed

Instructions

    Step One:
  1. Add kefir, honey and maple syrup to a large ceramic (or glass) mixing bowl and whisk to thoroughly combine. Using a spoon, stir in spelt and kamut flours, until well blended. (Mixture will resemble a very sticky dough.) Cover the bowl and place it in a warm area of your kitchen for 24 hours.
  2. Step Two:
  3. Once soaking time is completed, preheat oven to 325 degrees. Blend in remaining ingredients with large wire whisk. Batter will be very thick and sticky and it will take some effort to combine. Spoon batter into lined muffin tins until about 3/4 full. Bake approximately 25-28 minutes, or until lightly browned on top and toothpick comes out clean. Makes 24 muffins. Enjoy!

Notes

Power Muffin Add-ins:

• Blueberry muffins: Add fresh blueberries, per “secret” tip below

• Strawberry muffins: Add diced strawberries, per “secret” tip below

• Mixed Berry muffins: Add a combo of your favorite berries (like blueberry, strawberry & raspberry)

• Banana-Nut muffins: Add chopped walnuts and diced banana, per “secret” tip below (optional: chocolate chips or carob chips)

Secret to adding fruit to muffin batter: When your batter is ready, line your muffins tins with paper liners (or well-oil them with coconut or olive oil). Place one heaping spoonful of batter into each muffin cup. Then add your chopped fruit or whole blueberries on top of the batter. Cover with another heaping spoonful of batter. Then add more fruit to the top. Bake as directed above. This process results in the fruit not all sinking to the bottom of the muffin and also helps the muffin batter cook through more thoroughly.

More delicious options:

• Cranberry-Nut Power Muffins: Simply add 1 1/2 tsp of ground cinnamon to the above recipe (after soaking). Place one heaping spoonful of batter into each muffin cup. Then add a sprinkling of dried cranberries and chopped pecans (or walnuts) on top of the batter. Cover with another heaping spoonful of batter. Then add more dried cranberries and nuts to the top. Bake as directed above.

• Apple Pie Power Muffins: Simply add 1 1/2 tsp of ground cinnamon to the above recipe (after soaking). Place one heaping spoonful of batter into each muffin cup. Then add a sprinkling of finely diced apple, raisins and chopped walnuts on top of the batter. Cover with another heaping spoonful of batter. Then add more finely diced apple, raisins and nuts to the top. Bake as directed above.

• Almond Poppy Muffins: Replace the vanilla extract in the above recipe with 1 1/8 tsp of pure almond extract instead. Fold in 2 tbsp of poppy seeds and 1/2 cup of sliced almonds. Fill each muffin cup 2/3 full. Add a sprinkling of sliced almonds to the top. Bake as directed above.

3.1
https://thenourishinghome.com/2012/03/24-hour-power-muffins/

You Might Also Like:

Sweet Memories Chocolate Cream Pie
Meals Made Simple: Photo Tour & Book Review
Make Your Own Enchilada Sauce (GF, DF)

Filed Under: Uncategorized ·

Banana Nut Bread

By Kelly · Leave a Comment


So easy to make and so incredibly moist and delicious, this soaked version of banana-nut bread is made with healthy real food ingredients and just a touch of natural sweeteners. Enjoy!

Print
Banana Nut Bread

Banana Nut Bread

Ingredients

    Step One: Soaking
  • 1 cup organic whole spelt flour
  • 1 cup organic kamut flour
  • 1 1/4 cup plain whole milk kefir (or cultured buttermilk)
  • 1/4 cup pure honey (I prefer sage honey due to its mild flavor)
  • 2 tbsp rapadura (or sucanat)
  • Step Two: Baking
  • 2 medium-to-large overripe bananas, mashed
  • 2 tbsp butter, melted
  • 2 large eggs
  • 1 tsp pure vanilla extract
  • 1 tsp baking soda
  • 1/2 tsp sea salt
  • 1/2 cup chopped crispy walnuts (or pecans)
  • Optional: 1/4 cup fair trade 65% cacao chocolate chips, or carob chips

Instructions

    Step One:
  1. In a large bowl, whisk together kefir, honey and rapadura. Mix in flours until well combined. (Mixture will resemble sticky dough.) Cover the bowl and place it in a warm area of your kitchen for 12-24 hours.
  2. Step Two:
  3. Once soaking time is completed, preheat oven to 350 degrees. In a medium bowl, mash banana, and then whisk in butter, eggs, vanilla, baking soda and salt. Add the banana mixture to the soaked flour mixture and whisk well, until thoroughly combined. The soaking process yields a very thick batter and will take some effort to combine. Don’t worry, your patience and effort in mixing will be richly rewarded!
  4. Next, fold in the nuts and chocolate chips, if using. *Pour the batter into a well-oiled 9x5-inch loaf pan. (Coconut oil works great in keeping bread from sticking to the pan, but you can also use olive oil or butter.)
  5. *Important Tip: Be sure when pouring the batter into your loaf pan, that there is at least one-inch of clearance from the top of the batter to the top of the loaf pan. This quick bread rises at least an inch while baking, so it will spill over the sides of the loaf pan, if you don’t leave at least one-inch of space for it to rise in the pan during the baking process.
  6. Bake for 30 minutes at 350 degrees. Then, lower oven temp to 325 degrees and continue baking for an additional 30 minutes, until bread is a rich brown color and a knife inserted in the center comes out clean. Remove from oven and allow to cool for at least 15 minutes in the pan.
  7. Using a knife, gently loosen the bread from the sides of the loaf pan and place a large plate over the top and invert it to turn bread out upside down onto the plate. Allow to cool an additional 5 minutes, then simply use your hands to gently lift the bread and turn it right side up onto the plate before slicing. Enjoy!
3.1
https://thenourishinghome.com/2012/03/banana-nut-bread/

You Might Also Like:

You're invited to attend Kombucha 101
6 Tips for Managing Food Allergies & Intolerances on a Budget
Baked Apple Oatmeal (Gluten-Free)

Filed Under: Uncategorized ·

  • « Previous Page
  • 1
  • …
  • 35
  • 36
  • 37
  • 38
  • 39
  • …
  • 44
  • Next Page »

My New Cookbook is Here!

Welcome to The Nourishing Home!

I’m so glad you’re here and want you to feel right at home! My heart in creating this blog is to help you by sharing helpful meal planning strategies and nourishing GF recipes that are healthy, easy and delicious with thanksgiving to God! [Read More …]


All content (recipes, photos, posts, etc.) on this site is the creative property of Kelly Smith. You are welcome to share a photo via social media, as long as it contains a link back to the corresponding recipe or post from this site. However, you may not republish a recipe in its entirety in any form. For questions, or for permission to use a photo or recipe, please contact me via email at [email protected]. Thank you!

Please Note: All content (recipes, photos, text, etc.) on this site is the creative property of Kelly Smith of The Nourishing Home. You are welcome to share a photo via social media, as long as it contains a link back to the corresponding recipe from this site. However, re-publishing a recipe in any form is strictly prohibited. Additionally, please refrain from adapting recipes without properly linking back to the original recipe, and keep in mind that simple substitutions do not constitute an adapted or original recipe. For details regarding recipe copyright law, please visit the Food Blog Alliance.
The Nourishing Home is a participant in the Amazon Services LLC Associates Program, an affiliate advertising program designed to provide a means for sites to earn advertising fees by advertising and linking to amazon.com.

Privacy Policy
DMCA.com

Copyright © 2026 · All Rights Reserved · The Nourishing Home · Artwork by Nancy Panaccione · Site Design by Deluxe Designs · Log in