The Nourishing Home

living healthier lives in service to the King!

  • Home
  • About
    • About TNH
    • Contact
  • Meal Planning
  • Health & Wellness
    • Real Food Basics
  • Whole30
  • GF Recipes
    • Whole30
    • Breakfast
    • Lunch
    • Entrées
    • Slow Cooker
    • Soups & Stews
    • Sides & Salads
    • Snacks
    • Desserts
    • Kids in the Kitchen
  • My Cookbook
  • Subscribe

BLT Quiche Tartlets

By Kelly · Leave a Comment

These adorable little BLT Quiche Tartlets may be small, but they're packed with hearty flavor and a good dose of whole food nutrition!

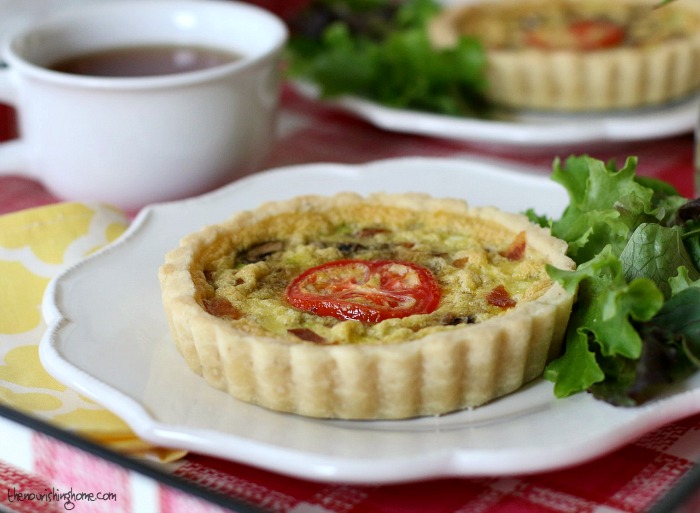
Living in a house full of men of varying ages, it’s not often that I make “girly” food. And honestly, I hardly think quiche qualifies as girly? (Real men eat quiche, right?) But I will admit that these adorable little BLT Quiche Tartlets are so pretty and elegant, they do belie the fact that they’re packed with hearty, satisfying flavor!

Whether it’s breakfast in bed, Sunday morning brunch, or just a light dinner, these tasty mini-quiches are so easy and versatile. That’s because you can use virtually any veggies and meats you have on hand, making them a delicious way to use up leftovers. And, if they’re a bit “too girly,” you can always make one large “manly” quiche instead (see recipe instructions below).

These adorable little BLT Quiche Tartlets may be small, but they're packed with hearty flavor and a good dose of whole food nutrition!

The first step in making a tasty quiche is to create a light and tender crust to hold of all of your delicious, nutritious ingredients. This grain-free version uses the Perfect Grain-Free Pie Crust recipe from my latest cookbook, Everyday Grain-Free Baking. (You can either use this crust to make four mini-quiches as shown here, or create one large 9-inch quiche, if you prefer.)

These adorable little BLT Quiche Tartlets may be small, but they're packed with hearty flavor and a good dose of whole food nutrition!

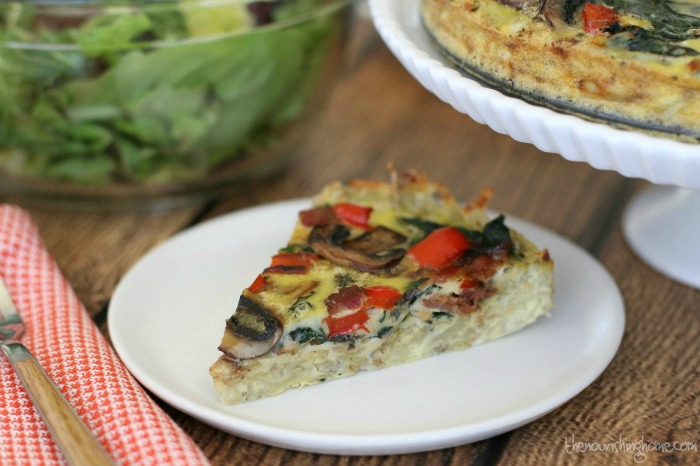
Even though these little quiches are pretty and elegant, they’re also quite tasty and filling. Although, as delectable as they are, it’s quite possible that you may find it hard to eat just one! (I know we do!)

Print
BLT Quiche Tartlets (grain-free, dairy-free option)

Yield: 4 tartlets (or one 9-inch tart)

Ingredients

    Quiche Tartlets
  • 1 Grain-Free Pie Crust dough, chilled (see recipe instructions)
  • 5 large eggs
  • 3 tablespoons coconut milk (or milk of your choice)
  • 1/2 teaspoon sea salt
  • 1/4 teaspoon fresh ground black pepper
  • 1/4 teaspoon dried basil
  • Toppings
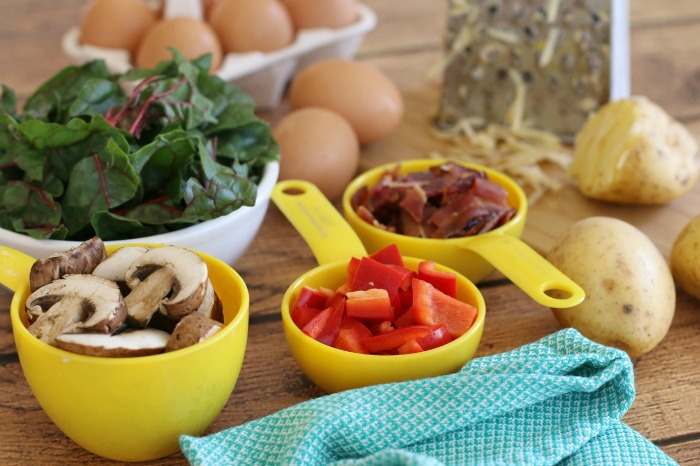
  • 1/4 cup leftover sauteed greens (or fresh spinach)
  • 3-4 slices cooked bacon, fine chopped
  • 2 green onions, sliced thin
  • 4-5 small cremini mushrooms, fine diced
  • 1 small plum tomato, sliced thin
  • Optional: 1/4 cup shredded sharp cheddar

Instructions

  1. Prepare the Grain-Free Pie Crust dough according to the recipe, except OMIT the honey called for in the recipe and replace it with one additional tablespoon of palm shortening instead.
  2. Preheat oven to 325°F. Divide the chilled pie crust dough into four dough balls of even size. Place each dough ball into a 4-inch mini-tartlet pan. (If you’d like to make one large quiche in a 9-inch tart pan, see recipe note below.)
  3. Press the dough evenly up the sides and along the bottom of the mini-tart pans. Poke bottom of crust with a fork. Place the tartlet pans on a baking sheet and carefully transfer to preheated oven. Bake for five minutes, just until the crust begins to puff up a bit. Remove from oven and allow to cool a bit on the stovetop. (Do not remove the tartlets from the baking sheet.)
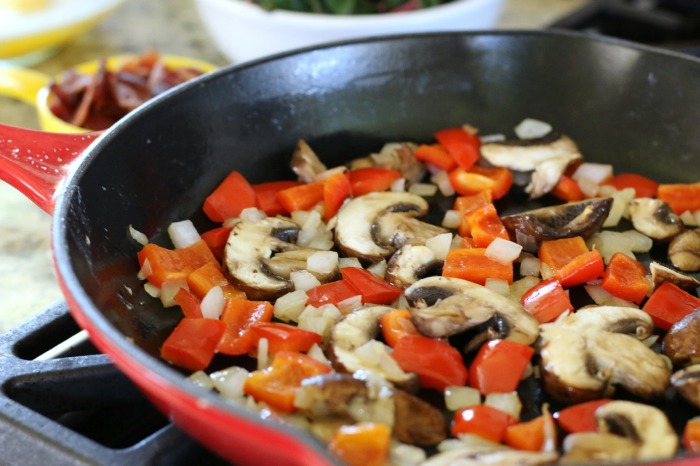
  4. Meanwhile, add the greens (or spinach), bacon, green onion and mushrooms into a small bowl, tossing well to combine. (Remember, you can substitute any of these veggies with whatever you leftovers you have on hand, or prefer. You can also substitute the bacon with crumbled sausage or omit the meat altogether to create a veggie quiche.)
  5. Evenly divide the veggie mixture among the four mini-tartlet crusts. Then, place the eggs, milk and seasonings into a blender. Blend on low, just until combined. Evenly divide the filling among the four mini-tartlet crusts, making sure to not overfill. (Depending on the depth of the pans, you may have extra egg mixture leftover.)
  6. Add a sprinkle of shredded cheddar, if desired. Top with a slice of tomato.
  7. Carefully place the tartlets back into the oven to bake at 325°F for 20-25 minutes until center is set.
  8. Remove from oven and allow tartlets to cool about 3-5 minutes, until pans are cool enough to touch. Remove tartlets from the pans and place on a bed of salad greens tossed with a just a touch of healthy salad dressing of your choice.

Notes

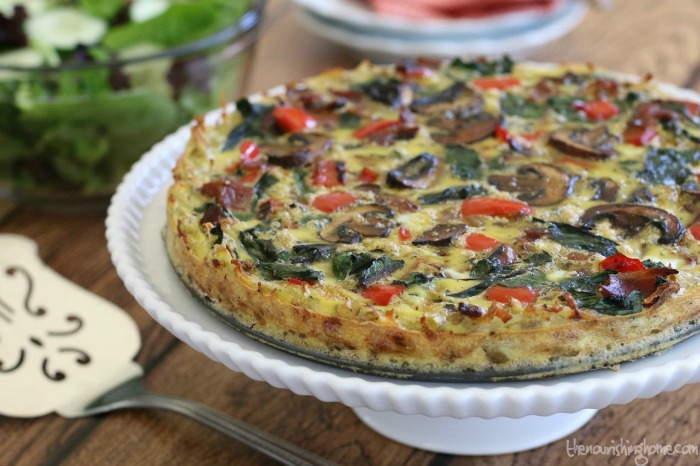
Recipe Variation: To make one large quiche, use a 9-inch tart pan. Increase eggs to 6 and increase coconut milk to 1/4 cup. Following remaining recipe instructions, making sure to add all of the veggies first, before pouring in the egg mixture. Be sure not to overfill. Pre-bake crust as noted in recipe instructions, increasing time to 8 minutes. Also increase quiche bake time to 25-35 minutes, until center of filling is set.

3.1
https://thenourishinghome.com/2016/09/blt-quiche-tartlets/

You Might Also Like:

Turkey Salad Boats {or Chicken Salad Boats}
Apricot-Apple Chicken Salad (GF)
Test Kitchen Showdown: Which Lunch Box Food Storage System is Right for Your Family?

Filed Under: Egg Dishes, Lunch ·

How to Make The Perfect Omelette

By Kelly · 4 Comments

Make the perfect omelette with these three simple steps. You'll be ensured that your omelette is a success each and every time! And once you’ve mastered the technique, as long as you have a few eggs on hand you’ll always be able to whip up a quick, healthy meal perfect for breakfast, lunch or dinner!

It’s day one of our Whole30 challenge, so I decided to kick it off with one of my favorite breakfasts. In my humble opinion, there are few breakfasts as beautiful and delicious as a French-style omelette with a savory center bursting from the seams. And although they may look a bit complicated, they’re surprisingly easy and quick to make (less than two minutes to be exact)!

To help you achieve omelette-making perfection, I’m sharing three simple steps to ensure your omelette is a success each and every time! And once you’ve mastered the technique, as long as you have a few eggs on hand you’ll always be able to whip up a quick, healthy meal perfect for breakfast, lunch or dinner!

First Things First! As with any cooking session, it’s important to remember your Mise en Place. Having all of your ingredients ready to go before you get started helps to ensure everything comes together beautifully.

To make this delicious Bacon, Avocado and Tomato Omelette, I precooked the bacon and cut it into small strips. Then, I seeded and sliced half of a tomato and a fourth of an avocado. However, you can use whatever ingredients you prefer. Other great fillings include: sautéed mushrooms and crumbled breakfast sausage, leftover grilled veggies, or simply a sprinkling of fresh herbs.

How to Make The Perfect Omelette in 3 Simple Steps

Once you’ve gathered your ingredients, follow the three easy steps below. And in just a couple of minutes, you’ll enjoy a light, fluffy omelette that’s chock full of your favorite healthy fillings. Yum!

Make the perfect omelette with these three simple steps. You'll be ensured that your omelette is a success each and every time! And once you’ve mastered the technique, as long as you have a few eggs on hand you’ll always be able to whip up a quick, healthy meal perfect for breakfast, lunch or dinner!

Step 1: It all starts with a well-oiled plan
Whisk two eggs together with a teaspoon of water and a little salt and pepper until well combined. Heat an 8-inch skillet over medium-high heat until hot. Melt the ghee in the pan (or butter or coconut oil). It should sizzle, otherwise the pan is not hot enough. Tilt the skillet and gently swirl the pan around in a circle so the ghee evenly coats the bottom and sides of the pan.

Step 2: Make waves with your eggs
Add the whisked eggs to the skillet, tilting the pan so the eggs cover the entire bottom of the pan. Use a spatula to gently push the eggs from the edges toward the center of the skillet. As you do, tilt the pan a bit, so the uncooked eggs flow into the open spaces. You’ll notice waves beginning to form in your omelette.

Step 3: Fill, flip and enjoy!
The omelette is done cooking when the bottom is set, and the top still looks a bit undercooked (as shown in photo). Although the omelette may seem a bit underdone, remember that it will continue cooking off the heat. So now’s the time to add your fillings. Then, fold the omelette in half and gently slide it out of the pan onto a plate. Enjoy!

Make the perfect omelette with these three simple steps. You'll be ensured that your omelette is a success each and every time! And once you’ve mastered the technique, as long as you have a few eggs on hand you’ll always be able to whip up a quick, healthy meal perfect for breakfast, lunch or dinner!

You Might Also Like:

How to Make Simple Seasoned Cauliflower Rice
Simply Savory Baked Eggs (GF)
Herb-Stuffed Roasted Spatchcock Turkey

Filed Under: Egg Dishes, Whole30 ·

Veggie Quiche with Hash Brown Crust

By Kelly · 25 Comments

This Veggie Quiche with Hash Brown Crust is a unique and savory combination that the whole family will enjoy whether they're gluten-free or not!

Exciting News: This is just one of a bunch of Whole30 Recipes here at The Nourishing Home. PLUS I’ll be sharing even more Whole30-compliant recipes as we start our next Whole30 Challenge January 2016. (P.S. You can join us anytime you’re ready to Jumpstart Your Health with Whole30!)

I couldn’t be more excited to share this flavorful and hearty veggie quiche! The tasty hash brown crust adds such a unique twist to this savory creation that I had a hard time deciding what to call it …

Should I call it a frittata since it really tastes more like a frittata than it does a quiche? Or should I call it a quiche, because technically speaking, the preparation method more closely resembles a quiche?

Honestly, no matter what you decide to call this delightful egg dish, there’s one word I think we can all agree best describes it – yummy!

This Veggie Quiche with Hash Brown Crust is a unique and savory combination that the whole family will enjoy whether they're gluten-free or not!

As with any recipe, one of the keys to easy, quick and successful preparation is to remember your “mise en place.” By pre-chopping and gathering all of your ingredients prior to putting the recipe together, you’ll be able to focus your attention fully on the most critical aspect of what makes a meal a success – cooking!

This Veggie Quiche with Hash Brown Crust is a unique and savory combination that the whole family will enjoy whether they're gluten-free or not!

The highlight of this savory quiche recipe is an easy hash brown crust, which makes a tasty gluten-free/grain-free option that everyone will enjoy whether they’re GF or not.

And it’s highly versatile too! You can use yukon gold potatoes or sweet potatoes with equal success – although I do recommend white sweet potatoes, since they’re less sweet than the orange variety.

This Veggie Quiche with Hash Brown Crust is a unique and savory combination that the whole family will enjoy whether they're gluten-free or not!

Although I love saving time in the kitchen, you’ll notice I’ve added the extra step of sautéing the veggies first before adding them to the egg custard – why? Because you just can’t beat the deep, rich flavor that sautéed veggies add, especially when it comes to egg dishes. Another delicious option is to use leftover grilled veggies, just be sure to keep the proportion of veggies to egg custard similar to the recipe and you can’t go wrong!

This Veggie Quiche with Hash Brown Crust is a unique and savory combination that the whole family will enjoy whether they're gluten-free or not!

Quiche isn’t just for breakfast or brunch – it also makes a wonderful light summer dinner served with a mesclun greens salad and a side of fresh fruit.

And trust me, leftovers are even better! The flavors in this hearty Veggie Quiche with Hash Brown Crust meld and deepen, making this quiche an absolute favorite for breakfast or lunch the next day! (I’ve often been caught eating it cold straight from the fridge. Yum!)

Time-Saving Tip: Double the fun! Why make one when you can make two – one to serve now and one to refrigerate and serve as a quick breakfast or lunch during busy weekdays.

This Veggie Quiche with Hash Brown Crust is a unique and savory combination that the whole family will enjoy whether they're gluten-free or not!

Print
Veggie Quiche with Hash Brown Crust (GF, DF)

Yield: 6 servings

Ingredients

  • 3 cups tightly-packed shredded yukon gold potatoes (or white sweet potatoes)
  • 3/4 cup fine diced yellow onion, divided
  • 1/2 cup diced red bell pepper
  • 1 cup sliced cremini mushrooms
  • 2 cups chopped swiss chard (or kale)
  • 1/2 cup precooked Whole30-compliant bacon (or sausage)
  • 8 large pastured eggs
  • 1/4 cup almond milk (or coconut milk)
  • 1/2 tsp dried basil
  • 1/4 tsp garlic powder
  • sea salt and fresh ground pepper to taste
  • ghee or coconut oil

Instructions

  1. Preheat oven to 400°F. Use ghee, coconut oil or palm shortening to generously grease a tight-fitting 9-inch springform pan, or 9-inch deep dish pie plate. (If your springform pan does not fit together tightly, you may want to tightly wrap the outside of the pan with a large sheet of foil to help catch leaks, or use a deep dish pie plate instead.)
  2. Using a box grater, shred the potatoes (if using sweet potatoes, peel first). Rinse the shredded potatoes in a strainer; then press the shredded potato between a large layer of paper towels (or kitchen towels) to absorb excess moisture.
  3. In a large bowl, add the shredded potatoes, 1/2 cup of fine diced yellow onion, 2 tablespoons of melted ghee or coconut oil and 1/2 – 3/4 teaspoon sea salt. Toss until combined.
  4. Firmly press the shredded potato mixture evenly along the bottom of the prepared springform pan, making sure to press the potatoes up the sides of the pan at least one inch.
  5. Bake crust for 15-18 minutes, until set. Then place on stove top to cool. Reduce oven temperature to 350°F.
  6. While crust is baking, in a medium skillet over medium-high heat, add 1 tablespoon of ghee or coconut oil. Sauté together the remaining 1/4 cup of yellow onion, red pepper and mushrooms for 4-5 minutes until veggies are softened. (If substituting with extra veggies instead of meat, sauté them with this onion mixture.)
  7. Next, add the swiss chard and stir until greens are wilted (about 2-3 minutes). Mix in the crumbled bacon or sausage, if using. Remove skillet from heat. Season with sea salt and pepper. Set aside.
  8. Wipe clean the large bowl used for the potatoes. Then add the eggs, milk, basil, garlic powder, 1/2 teaspoon of sea salt and 1/4 teaspoon ground black pepper. Whisk until eggs are slightly frothy.
  9. Add the veggie mixture to the bottom of the hash brown crust. Then, gently pour the egg custard over the top of the veggie mixture.
  10. Place the springform pan on a large baking sheet (to catch any leaks) and place in preheated oven. (If you're using a pie dish, it's not necessary to use the baking sheet.)
  11. Bake at 350°F for 25 minutes until quiche is set. Remove from oven and allow to sit 3-5 minutes. Then gently loosen sides of quiche by running a knife along the side of the pan.
  12. Remove springform pan and place on a serving platter. Serve with your favorite green salad and fresh sliced fruit. Enjoy!
3.1
https://thenourishinghome.com/2015/06/veggie-quiche-with-hash-brown-crust/

You Might Also Like:

How to Spiralize ... it's easy, delicious and nutritious!
Chicken Zoodle Pho Bowl {Whole30}
Creamy Turkey Veggie Soup (Whole30, GF, DF)

Filed Under: Egg Dishes, Whole30 ·

  • 1
  • 2
  • 3
  • 4
  • Next Page »

My New Cookbook is Here!

Welcome to The Nourishing Home!

I’m so glad you’re here and want you to feel right at home! My heart in creating this blog is to help you by sharing helpful meal planning strategies and nourishing GF recipes that are healthy, easy and delicious with thanksgiving to God! [Read More …]


All content (recipes, photos, posts, etc.) on this site is the creative property of Kelly Smith. You are welcome to share a photo via social media, as long as it contains a link back to the corresponding recipe or post from this site. However, you may not republish a recipe in its entirety in any form. For questions, or for permission to use a photo or recipe, please contact me via email at [email protected]. Thank you!

Please Note: All content (recipes, photos, text, etc.) on this site is the creative property of Kelly Smith of The Nourishing Home. You are welcome to share a photo via social media, as long as it contains a link back to the corresponding recipe from this site. However, re-publishing a recipe in any form is strictly prohibited. Additionally, please refrain from adapting recipes without properly linking back to the original recipe, and keep in mind that simple substitutions do not constitute an adapted or original recipe. For details regarding recipe copyright law, please visit the Food Blog Alliance.
The Nourishing Home is a participant in the Amazon Services LLC Associates Program, an affiliate advertising program designed to provide a means for sites to earn advertising fees by advertising and linking to amazon.com.

Privacy Policy
DMCA.com

Copyright © 2025 · All Rights Reserved · The Nourishing Home · Artwork by Nancy Panaccione · Site Design by Deluxe Designs · Log in