The Nourishing Home

living healthier lives in service to the King!

  • Home
  • About
    • About TNH
    • Contact
  • Meal Planning
  • Health & Wellness
    • Real Food Basics
  • Whole30
  • GF Recipes
    • Whole30
    • Breakfast
    • Lunch
    • Entrées
    • Slow Cooker
    • Soups & Stews
    • Sides & Salads
    • Snacks
    • Desserts
    • Kids in the Kitchen
  • My Cookbook
  • Subscribe

Baja-Style Cilantro Rice

By Kelly · 18 Comments

Cilantro Baja Style Rice

Some of the more popular Mexican-style restaurants have their own unique versions of this simple, yet flavorful rice dish, which tends to be a well-kept secret when you start to inquire about the ingredients.

Now I don’t claim to be an ace detective here, but I do enjoy unmasking the subtle spices in popular dishes and recreating them into real food favorites.

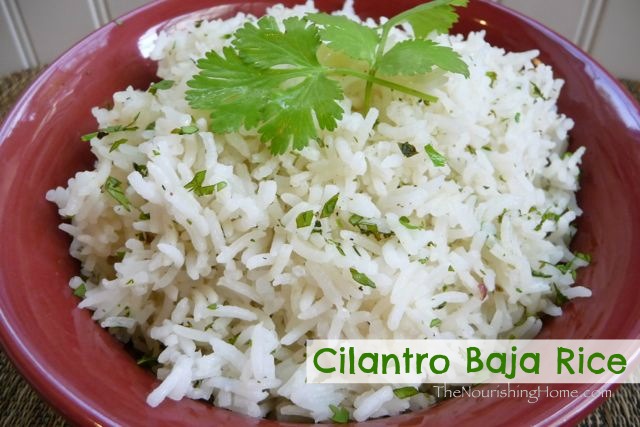
I think you’ll find this easy recipe to be a delicious replica of one of the more popular Baja style rice dishes out there – without any of the unhealthy ingredients, of course! It makes the perfect side to just about any Mexican-themed meal, as well as pairs nicely with many Asian-inspired dishes as well.

And in case you’re wondering about the health benefits of white rice, I highly recommend this article on brown vs. white rice. For those who can tolerate grains, it’s not a health-compromise to enjoy a homemade white rice dish on occasion. In fact, it may actually be easier on your gut than brown rice, especially if prepared using homemade bone broth.

Plus, unlike brown rice, milled rice (white rice) does not require soaking. That’s because the outer bran/germ layer as been removed, which contains the highest levels of phytic acid. So for some, white rice may actually be easier to digest. Of course, this may not be the case for those who are grain sensitive and are therefore following a grain-free diet.

Print
Baja-Style Cilantro Rice (Gluten-Free)

Yield: 5-6 servings

Ingredients

  • 2 tbsp butter
  • 1/2 tsp dried parsley
  • 1/2 tsp sea salt
  • 1/2 tsp onion powder
  • 1/2 tsp garlic powder
  • 1/4 tsp freshly ground black pepper
  • 2 cups of white basmati rice
  • 2 cups of homemade bone broth
  • 1 cup of filtered water
  • 2-3 tbsp of minced fresh cilantro

Instructions

  1. In a medium saucepan, over medium heat, melt the butter and add all the seasons. Stir well to combine.
  2. Add the rice and stir well, making sure all of the rice is well coated with the butter-seasoning mixture. Cook the rice, stirring constantly for about 2-3 minutes.
  3. Then, increase the heat to high and add the bone broth and water. Once the rice comes to a gentle boil, cover the saucepan and reduce the heat to low/simmer. (I know it’s tough to resist, but don't peek under the lid.)
  4. Allow rice to cook about 15 minutes. Then turn off the burner and remove the pan from the heat.
  5. Let the rice sit, covered, for an additional 5 minutes. (Again, try not to peek under the lid, or you’ll allow the steam to escape.)
  6. Then, remove the lid and add the minced cilantro. Fluff the rice with a fork to separate the grains and distribute the cilantro throughout the rice. (You can also create a delicious Veggie Confetti Style Rice by adding an assortment of fine-diced sautéed veggies. See recipe note below.)
  7. You can serve the rice immediately, or put the lid back on to keep it warm while you finish cooking the rest of your meal. Enjoy!

Notes

Recipe Variation: For a delicious Veggie Confetti Rice dish, heat a medium skillet over medium-high heat. Add a tablespoon or two of ghee (or butter) and sauté one-and-a-half cups of your favorite fine-diced veggies, such as onion, bell peppers, mushrooms, carrot and zucchini. Set aside. Prepare the cilantro rice according to recipe above. Then, toss in the sautéed veggies and combine as noted in step 6 of the recipe above. Absolutely delicious and nutritious!

3.1
https://thenourishinghome.com/2013/06/baja-style-cilantro-rice/

follow-me-on-pinterest-button

You Might Also Like:

How to Make Sweet Potato Buns {GF, Whole30}
How to Make Squash Pasta {Whole30}
Simple Grain-Free, Dairy-Free Tortillas


Filed Under: Sides ·

Garden Herb Biscuits (GF)

By Kelly · 49 Comments

Since it’s wintertime, I decided to cut back most of my herbs in my little container garden.
I chopped up about half and froze them like I normally do, but then decided to slowly air-dry out the rest to create a nice assortment of homemade dried herbs too. (I was inspired by this post on how to preserve fresh herbs over at Keeper of the Home.)

Once they were done drying, I was eager to try them out. So I decided to use an assortment of these fresh-dried herbs to make these delightful grain-free biscuits. I usually make them with fresh herbs (as shown in the photo), but I’m happy to report that they are just as tasty with dried herbs too!

These light and fluffy, yet filling, biscuits are just a simple twist on my popular Almond Flour Biscuits recipe. We find these savory little fellows to be the perfect accompaniment to hearty wintertime soups and stews, as well as roasted chicken. We hope you enjoy them too!

Print
Garden Herb Biscuits (GF)

Yield: 6 four-inch round biscuits

Garden Herb Biscuits (GF)

Ingredients

  • 2 1/2 cups blanched almond flour
  • 1/2 cup shredded grassfed cheddar cheese
  • 1 1/2 tsp finely minced fresh herbs, or 1/2 tsp dried herbs (I use a combo of thyme, parsley & rosemary)
  • 1/2 tsp baking soda
  • 1/4 tsp sea salt
  • 1/8 tsp garlic powder
  • 2 large eggs

  • 1/4 cup organic buttermilk (or coconut milk)

Instructions

  1. Preheat oven to 350 degrees. In a medium bowl, combine almond flour, cheddar cheese, herbs, baking soda, salt and garlic powder.
  2. In a small bowl, whisk together the eggs and buttermilk until well combined. Using a spoon, stir the wet mixture into the dry mixture until thoroughly combined.
  3. For quick and easy drop biscuits: Drop biscuit dough by large spoonfuls onto a parchment-lined baking sheet, placing the biscuits approximately two-inches apart.
  4. For classic-style rolled-looking biscuits: Scoop a large spoonful of batter into your hands and roll into a ball about the size of an apricot. Then place the dough balls on a parchment-lined baking sheet and gently flatten using the palm of your hand.
  5. Bake about 15 minutes, until golden brown on top and a toothpick inserted in middle comes out clean. Serve warm with butter. These make the perfect accompaniment to hearty soups and stews!
3.1
https://thenourishinghome.com/2013/01/garden-herb-biscuits-gf/

Do you have an herb garden? What are your favorite ways to use and preserve your fresh-grown herbs?

You Might Also Like:

Almond Flour Biscuits (GF, DF)
Grain-Free Classic Brown Bread & Rolls (GF, DF)
Lentils & Carrots with Swiss Chard (GF)

Filed Under: Muffins/Breads/Biscuits, Sides ·

Savory Herb Dressing (GF)

By Kelly · 19 Comments

Enjoy a healthier, savory dressing by making the bread cubes yourself using your favorite home-baked GF bread or healthier brand GF bread.

This recipe is always a huge hit no matter what the time of year! In fact, I often pair this dressing with some quick and easy Grilled Herb Turkey Breasts when we’re in the mood for the classic flavors of Thanksgiving without all of the fuss.

Ready to Go in the Oven: Perfect stuffing (a.k.a dressing) should be moist, but not soggy. If it’s not quite moist enough add a bit more milk, toss and let is sit for a minute. Then mix and check again. Once you have the right moisture, be sure to cover the dish and bake as directed in the recipe below.

Sharing delicious family recipes like this one, always reminds me that Thanksgiving is a holiday to be celebrated every day of the year!

 Time-Saving Tips: Make the GF croutons ahead of time and freeze them until you’re ready to use. You can also prepare the veggie-broth mixture for the stuffing/dressing the day before, see recipe instructions for prep-ahead details.

Many blessings to you and your family for a Happy Thanksgiving!

Joyfully (and thankfully) serving HIM, Kelly

Print
Savory Herb Dressing (GF, DF Options)

Yield: 8-10 servings

Savory Herb Dressing (GF, DF Options)

Ingredients

    Step One: Baking Homemade Croutons
  • 10 cups gluten-free or grain-free bread croutons, cut 3/4x3/4-inch in size
  • (approximately 1 to 1 1/2 loaves of your favorite GF bread; the better the bread, the better the stuffing)
  • Step Two: Preparing Stuffing
  • 3/4 cup finely diced organic celery
  • 3/4 cup finely diced organic carrot
  • 3/4 cup finely diced yellow onion
  • 5 tbsp butter (if DF, omit butter & increase olive oil to 1/3 cup)
  • 1/4 cup olive oil
  • 1 1/2 tsp dried poultry seasoning
  • 2 tsp sea salt
  • 1/2 tsp freshly ground pepper
  • 2 heaping tbsp minced fresh sage
  • 1/3 cup dried cranberries
  • 2 cups homemade chicken stock
  • 2 large eggs
  • 1/2 cup milk of your choice (I use unsweetened almond milk)

Instructions

    Step One: Baking Homemade Croutons
  1. Preheat oven to 190 degrees. Using large chef knife, stack the bread two to three slices high and cut into 3/4-inch cubes. (You want at least 10 heaping cups of bread cubes.)
  2. Arrange the bread cubes evenly on an ungreased baking sheet so they are not overlapping. Repeat process with remaining bread cubes. (You may not be able to fit all the bread cubes onto one baking sheet. So if you don’t have a second baking sheet, you will need to bake in batches.)
  3. Bake bread cubes for approximately 1-2 hours (or more), making sure to check them every 20-30 minutes, until they are dried out and firm (like a salad crouton).
  4. Once they are dry, remove from oven and allow to cool completely. Then proceed with making the stuffing. (See time and money saving tips below in the notes.)
  5. Step Two: Preparing Dressing
  6. Preheat oven to 350 degrees. Finely dice the celery, carrot and onion and set aside in medium bowl.
  7. Pluck leaves only from fresh sage and mince, set aside two heaping tablespoons (freeze the rest for future use).
  8. Preheat large skillet to medium-high; add butter and olive oil. Immediately add celery, carrot and onion. Sauté until onion is translucent and carrot begins to soften (about 5 minutes).
  9. Add poultry seasoning, salt, pepper, sage, cranberries and broth; bring to a slight simmer. Cook about 3-5 minutes, just until cranberries begin to plump. Turn off heat and remove skillet to a cool area of stovetop.
  10. In a small bowl, add milk and eggs and whisk to combine. Slowly pour a half cup of the hot veggie-broth mixture into the milk-egg mixture while rapidly whisking (this is done to temper the milk-egg mixture, so you don’t get scrambled egg pieces). Then, slowly add the milk-egg mixture to the veggie-broth mixture while rapidly stirring.
  11. In a large bowl, add your homemade croutons (dried bread cubes) and slowly pour the veggie mixture over them. Using a rubber spatula or your hands, gently combine until bread cubes are moistened. If still dry, you can add a bit more milk or chicken stock to moisten.
  12. Add mixture to a well-oiled 9x13-inch baking dish, cover with foil and bake at 350 degrees for 20-25 minutes, until completely heated through.
  13. Remove foil and bake another 8-10 minutes, until stuffing begins to turn slightly brown on edges. Enjoy!

Notes

Time-Saving Tip - Make the bread cubes for the stuffing ahead of time and freeze them until ready to use. You can also make the veggie-broth mixture a day ahead of time. Just follow steps 5-8 (no need to preheat oven) and place the veggie-broth mixture into the fridge up to one day ahead of time. Then, when you're ready to make the stuffing, remove the croutons from the freezer and the veggie-broth from the fridge and allow them to come to room temp. Then follow the remaining steps to incorporate the eggs and milk, and bake as directed.

Money-Saving Tip - Here's a frugal way to make croutons, simply save all of the heels from your favorite bread, making sure to place them in a big airtight bag in your freezer. Once the bag contains about 20 or so heels, let them defrost completely and then follow the baking instructions above to make croutons.

3.1
https://thenourishinghome.com/2012/11/savory-herb-stuffing-gf-df-options/

You Might Also Like:

Grain-Free Classic Brown Bread & Rolls (GF, DF)
Baja-Style Cilantro Rice
More Bacon, Peas!

Filed Under: Sides ·

  • « Previous Page
  • 1
  • …
  • 6
  • 7
  • 8
  • 9
  • 10
  • …
  • 13
  • Next Page »

My New Cookbook is Here!

Welcome to The Nourishing Home!

I’m so glad you’re here and want you to feel right at home! My heart in creating this blog is to help you by sharing helpful meal planning strategies and nourishing GF recipes that are healthy, easy and delicious with thanksgiving to God! [Read More …]


All content (recipes, photos, posts, etc.) on this site is the creative property of Kelly Smith. You are welcome to share a photo via social media, as long as it contains a link back to the corresponding recipe or post from this site. However, you may not republish a recipe in its entirety in any form. For questions, or for permission to use a photo or recipe, please contact me via email at [email protected]. Thank you!

Please Note: All content (recipes, photos, text, etc.) on this site is the creative property of Kelly Smith of The Nourishing Home. You are welcome to share a photo via social media, as long as it contains a link back to the corresponding recipe from this site. However, re-publishing a recipe in any form is strictly prohibited. Additionally, please refrain from adapting recipes without properly linking back to the original recipe, and keep in mind that simple substitutions do not constitute an adapted or original recipe. For details regarding recipe copyright law, please visit the Food Blog Alliance.
The Nourishing Home is a participant in the Amazon Services LLC Associates Program, an affiliate advertising program designed to provide a means for sites to earn advertising fees by advertising and linking to amazon.com.

Privacy Policy
DMCA.com

Copyright © 2026 · All Rights Reserved · The Nourishing Home · Artwork by Nancy Panaccione · Site Design by Deluxe Designs · Log in