“I Scream, You Scream! We All Scream for Ice Cream!” … especially when it’s fresh fruit covered in wholesome creamy goodness!
Making homemade frozen treats like these fabulous Fruit & Cream Bars is not only a healthy and delicious way to celebrate summer, it’s also a great way to keep the ice cream man at bay!!
And who hasn’t been tempted at one point or another by the ice cream man? I’d like to say that my kids have never succumbed to his wiles (or more accurately, that I’ve never caved in to their pleas for “just this one time”). But the truth is, we have done business with the ice cream man, and frankly my boys did enjoy the indulgence, while I wrestled with the thought of all those chemicals and preservatives entering into their little bodies.
That’s why, I set about on a mission to become The Ice Cream Mom! So each summer I take a little time to make the most fabulous frozen treats – so tempting and tasty that even the ice cream man doesn’t stand a chance!
P.S. Looking for even more fabulous frozen treats your family will love? Be sure to check out out my “Top 10 Ice Pop Making Secrets of Success” and just a friendly reminder that you can always download a FREE copy of my Healthy Ice Pops & Frozen Treats eBook, simply by becoming a subscriber to The Nourishing Home.
Joyfully Serving HIM, Kelly
Ingredients
- 1 pound fresh ripe organic strawberries
- 1 cup coconut milk or whole milk yogurt
- 2-3 tbsp raw honey (we prefer sage due to it's mild flavor)
- 1/8 tsp pure vanilla extract
Instructions
- Remove stems from strawberries.
- Finely dice four of the strawberries; set aside.Cut the remaining strawberries into halves and place them into your blender or Vitamix. Then, add the remaining ingredients to the blender, except for the finely diced strawberries. Blend until thoroughly combined.
- Next, add the finely diced strawberries and blend on low just a couple of seconds to mix together.
- Pour mixture evenly into six 3- or 4-ounce pop molds making sure to leave at least a half-inch of space at top for expansion that occurs during freezing. Freeze for at least 6-8 hours.
- When ready to serve, run the pop mold under warm water for a few seconds to loosen before removing the mold.
- What a fun and healthy way to enjoy summertime with your kiddos without compromising good nutrition.
Notes
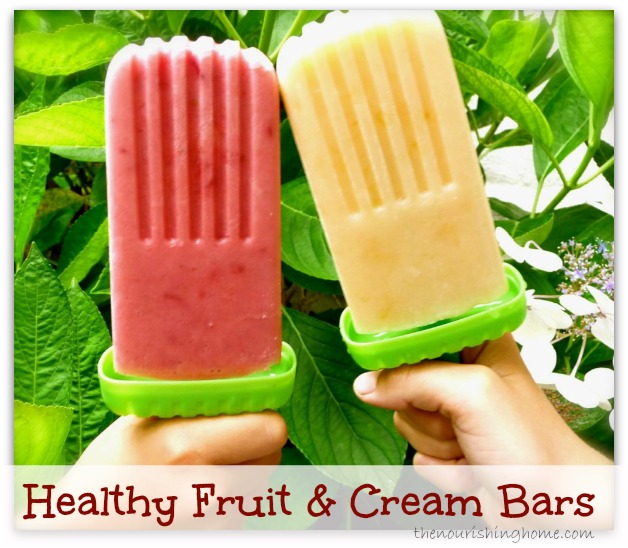
Wondering about the super cute pop molds shown in the photo? They're called Tovolo Groovy Ice Pops. They come in a set of six and are super durable and fun!
Please note: Ripe fruit is much sweeter and more flavorful. So be sure to use only fully ripened fruit in your ice pops for the best flavor. Also note: When fresh ripe fruit is not available, you can use frozen fruit to make ice pops. However, it's best to allow the frozen fruit to thaw first, before blending it. That's because you may need to add more liquid to get frozen fruit to blend properly and this will change the flavor and texture of your ice pop.
Ingredients
- 4 large fresh ripe organic peaches
- 1 cup organic whole milk yogurt (or coconut cream)
- 2-3 tbsp pure maple syrup (or raw honey)
- 1/8 tsp pure vanilla extract
Instructions
- Remove skins from peaches.
- Cut one peach in half. Finely dice the peach half; set aside. Cut the remaining peaches (including the leftover peach half) into slices. (Be sure to slice them right over your blender or Vitamix container to catch all of the juices in the container.) Then, add the remaining ingredients to the blender, except for the finely diced peach half. Blend until thoroughly combined.
- Next, add the finely diced peach half and blend on low just a couple of seconds to mix together.
- Pour mixture into pop molds and freeze for at least 6-8 hours.
- When ready to serve, run the pop mold under warm water for a few seconds to loosen before removing the mold.
- What a fun and healthy way to enjoy summertime with your kiddos without compromising good nutrition.
Notes
Wondering about the super cute pop molds shown in the photo? They're called Tovolo Groovy Ice Pops. They come in a set of six and are super durable and fun!
Please note: Ripe fruit is much sweeter and more flavorful. So be sure to use only fully ripened fruit in your ice pops for the best flavor. Also note: When fresh ripe fruit is not available, you can use frozen fruit to make ice pops. However, it's best to allow the frozen fruit to thaw first, before blending it. That's because you may need to add more liquid to get frozen fruit to blend properly and this will change the flavor and texture of your ice pop.
![]()

Oh my goodness, these sound fantastic. Pinning away :).
Thank you so much, Jenn! You are such a blessing! 🙂
Yum, those look so good and I have a bunch of ripe peaches right now, so I think I’ll start with those! Thanks for the delicious and healthy recipes. 🙂
Thanks so much, Krissa! Appreciate your kind words. The peach ones are my personal favorite! I love sweet ripe summer peaches!! YUM!! 🙂
Believe it or not, my kids have been BEGGING for fruit pops! I’ve got lots of fruit puree available, so I was thinking about doing a nectarine pop with yogurt and a bit of honey to smooth out the tang. Thank you for the inspiration (and the tutorial, because I’ve never made them before!) Kelly! xo, Tiff
My pleasure! It’s truly a fun tradition we have during summer. Hope you and your kiddos have fun making these too!! Can’t wait to hang out with you sometime soon, Lord willing! Blessings, Kelly 🙂
Hey Kelly, Does each recipe make a half dozen of the molds you have pictured?
Hi, Katie! Good question, I just realized I didn’t add the yield. Yes, each recipe should fill 6 pop molds depending on the size of the mold. The groovy pop molds shown in the photo hold about 4 ounces, just remember to leave a half-inch of space at the top for expansion that occurs during freezing. Thanks for letting me know I forgot to add this info. Blessings, Kelly 🙂
So I am struggling with how to set limits on these type of nourishing treats with my 3 year old. We will mention having ice cream/other after dinner & the whole dinner, she will talk about it & not want to eat her dinner. Any tips would be very appreciated!! Thank you!
Hi, Lisa. With most kids this age, they can’t see past their nose so to speak, so when you mention dessert, they’re already there and they don’t have an appreciation for a later time period for it being served. LOL! I personally recommend not using dessert as a means to get kids to eat. I find it backfires much more often than it actually works. I would instead remove dessert all-together as an after dinner option, if this is an ongoing issue. You can instead move a healthy treat to another part of the day, like mid-day (a couple hours after lunch, but a couple hours before dinner). That’s about the time the ice cream man typically visits, which makes it easier to bypass him. LOL! And it’s also the time when most of us could use a little afternoon treat/snack. 🙂
Thanks, Kelly! I agree with you completely!!
What is the sage that your are referring to in the strawberries and cream bars?
Thanks!
Hi, Quinn. I am referring to sage honey, clover honey is another excellent option. Bees that feed on sage or clover produce honey that is much milder in flavor. I never use orange blossom or other heavy floral honeys as I personally find that they overpower the recipe. Hope this helps to clarify. Blessings, Kelly 🙂
Awesome! Sounds and looks divine! We make a similar concoction using sour cream in place of the yogurt, I blogged about it here:
http://thisonegoodlife.blogspot.com/2013/06/berry-sourbet.html
Thanks for sharing. Blessings, Kelly 🙂
I made the strawberry cream bars and ate one after a run in the hot sun yesterday. It cooled me off and tasted great. Thanks for the healthy recipe!
Hi, Tina! So glad you enjoyed these. Thanks for taking the time to leave a kind note. I took a peek at your blog – awesome! I wish I loved exercising as much as you do 🙂