The Nourishing Home

living healthier lives in service to the King!

  • Home
  • About
    • About TNH
    • Contact
  • Meal Planning
  • Health & Wellness
    • Real Food Basics
  • Whole30
  • GF Recipes
    • Whole30
    • Breakfast
    • Lunch
    • Entrées
    • Slow Cooker
    • Soups & Stews
    • Sides & Salads
    • Snacks
    • Desserts
    • Kids in the Kitchen
  • My Cookbook
  • Subscribe

Search Results for: jam

Perfectly Easy Peach Preserves (GF)

By Kelly · 18 Comments


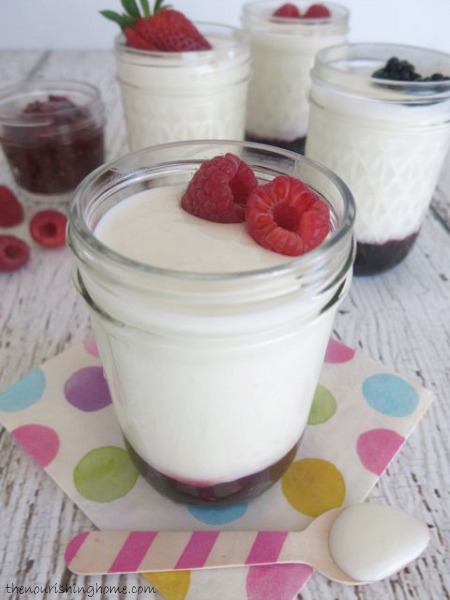
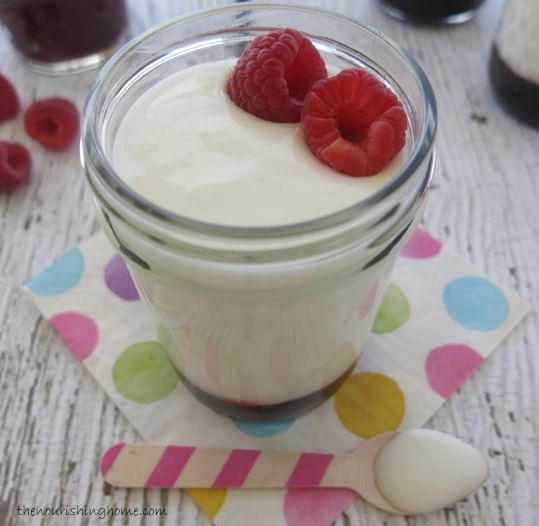
This honey-sweetened all-peach freezer jam is a delicious way to enjoy the fresh, sweet flavors of summer anytime of year! Not only is it great on top of a hot-outta-the-oven biscuit, but you can also use it to make your own homemade fruit-on-the-bottom peach yogurt, and as the base for a delicious barbecue glaze for Sweet-n-Spicy Grilled Chicken.

Peaches won’t be in season much longer, so why not store-up some delicious peach flavor to last you all year long! All it takes is a few simple ingredients and a little bit of time to create your own homemade all-fruit preserves.

Print
Perfectly Easy Peach Preserves (GF)

Yield: five 8-ounce jars

Perfectly Easy Peach Preserves (GF)

Ingredients

  • 6 medium-to-large fresh, ripe organic peaches
  • 1/4 cup fresh-squeezed lemon juice
  • 1/8 tsp pure vanilla extract
  • 3/4 cup pure honey (I prefer sage honey due to its mild flavor)
  • Pomona's Universal Pectin (see *note below)

Instructions

  1. Peel and cut the peaches into quarters, discarding pits. (See **note below for peach peeling tip.)
  2. Place peach quarters into a food processor and pulse to coarsely chop to desired consistency, or you can mash by hand using a potato masher. (I prefer my preserves to have some small bits of fruit pieces.)
  3. Measure out 4 cups of mashed peaches and place into a saucepan. (Save any leftover mashed peaches for adding as a topping to yogurt, oatmeal, ice cream, etc.) Add lemon juice, vanilla extract and 4 tsp of calcium water (see *note below). Stir well to combine.
  4. Next, in a small bowl, combine 3/4 cup of honey with 2 1/2 tsp of Pomona's pectin powder and stir well to thoroughly combine. Set aside.
  5. Heat saucepan containing peach mixture over medium-high heat, bringing the mixture to a full boil, while stirring frequently. Boil for one minute while continuing to stir frequently. Then, slowly drizzle in the honey-pectin mixture, stirring vigorously for 1-2 minutes to combine, making sure the mixture returns to a boil and then remove from heat.
  6. Use a ladle to divide the jam among five 8-ounce canning jars, leaving at least 1/4 inch of space between the top of the jam and the top of the jar (this space allows the jam to expand as it freezes).
  7. Cover with lids and let the jam stand at room temperature until cool. (Jam will thicken as it cools.)
  8. Then refrigerate up to three weeks, or freeze for up to one year. (Defrost frozen jam in the refrigerator.)

Notes

*Pomona's Universal Pectin is a wonderful no-sugar pectin that makes thick jam and jelly with full, rich flavor without the use of sugar. It's jelling power is activated by calcium, not by sugar. The calcium powder is included in the box along with the pectin powder.

To get started making jam, you'll first need to follow the directions on the package to make calcium water. It's super easy (just mix the calcium powder with water). It can be stored in your frig for several months, allowing you to make many different kinds of homemade jam. Once you have the calcium water prepared, you're ready to make homemade peach preserves (as well as other delicious all-fruit spreads)!

With your box of Pomona's pectin, you'll receive a little packet full of jam recipes. Personally, I've found that a few of the recipes call for too much pectin, which makes the jam really jell-up. Since I prefer my jam to be a bit looser, not so jelly-like, I use less pectin. The set also depends on the type of fruit, as well as the volume of fruit used and how chunky or smooth your fruit puree is. So I recommend making a half-batch of a recipe and see how it sets-up and if you like the set. Then you can go from there adding less or more pectin. Happy jam making!

** A quick and easy way to peel peaches: Bring a stockpot of water to a rolling boil. Add whole peaches and cook for one minute. Remove peaches from boiling water, using tongs, and place in a cold water bath. Once cooled to touch, peel off skins.

3.1
https://thenourishinghome.com/2012/08/perfectly-easy-peach-preserves-gf/

You Might Also Like:

Fresh Pineapple Salsa (GF, DF, Whole30)
How to Make Your Own Breadcrumbs and Croutons (GF Option)
Homemade "Emeril's Essence" Seasoning Blend

Filed Under: Condiments · Tagged: peach jam, peach preserves

Fabulous Fruit-Filled Crepes (GF)

By Kelly · 26 Comments


These slightly sweet, fruit-filled crepes may be small and delicate, but they pack a solid nutritional punch! That’s because they’re made with high-protein, high-fiber coconut flour along with lots of other delicious, wholesome ingredients!

As shown in below, we like to fill our crepes with homemade whipped cream and fresh organic berries. However, when cherry season arrives, you’ll find us with cherry-stuffed crepes drizzled with fresh cherry puree! Mmm!

Filling a crepe is as easy as 1, 2, 3 …


1. Once the crepes have cooled, add a small amount of fresh whipped cream along the center of each crepe. (If you’re dairy-free, substitute with whipped coconut cream, or spread a thin layer of all-fruit jam on the crepe.)


2. Add a small amount of mixed berries, or fresh fruit of your choice.


3. Then, gently roll each crepe. To keep the crepe rolled up, use a toothpick in the center to secure it. (Just don’t forget it’s there when you go to eat it!) Then, drizzle the crepe with fresh fruit puree and top with a dollop of whipped cream. Beautiful and delicious!


My youngest shows us how he does it, with his favorite summer fruit  – fresh ripe cherries! Yum!


Time-saving tip:
Using a griddle, rather than a small skillet, allows you to cook more crepes in less time. “But what about that pan-swirling thing?” you might ask … By simply using the back of a spoon, and working from the center outward, you can gentle spread the batter into a nice round shape without having to perfect the more difficult technique of swirling a hot pan around in a circular motion.

Print
Fabulous Fruit-Filled Crepes (GF)

Yield: 8 five-inch crepes

Fabulous Fruit-Filled Crepes (GF)

Ingredients

    Crepes
  • 3 tbsp organic coconut flour
  • 1 tsp arrowroot powder
  • 1/2 tsp sea salt

  • 1/8 tsp ground cinnamon
  • Pinch of ground nutmeg
  • 3 large eggs
  • 1/3 cup raw whole milk (or unsweetened almond milk)
  • 1 tsp pure honey (I prefer sage honey due to its mild flavor)
  • 1/4 tsp pure vanilla extract
  • Crepe Filling
  • 2 cups of your favorite fresh fruit, such as ripe berries, cherries, peaches or banana slices
  • 2 cups fresh whipped cream (If you're dairy-free, substitute with whipped coconut cream or all-fruit jam, as noted below.)
  • Fruit Puree Topping
  • 1 cup diced organic strawberries (or fruit of your choice)
  • 2 tsp pure honey

Instructions

    Step One: Make Fruit Puree Topping
  1. Place strawberries (or fruit of choice) into a blender or VitaMix and drizzle with honey. Blend until pureed. Place puree in a small bowl and refrigerate until ready to use.
  2. Step Two: Make Fresh Whipped Cream
  3. I recommend my quick and easy honey-sweetened fresh whipped cream recipe. (If you're dairy-free, see step 10 below.)
  4. Step Three: Make Crepes
  5. In a small bowl, mix together the coconut flour, arrowroot powder, salt and spices.
  6. In a medium bowl, whisk together the eggs, milk, honey and vanilla extract until well blended and slightly foamy.
  7. Add the dry ingredients to the wet and whisk well until no lumps remain.
  8. Set batter aside, so coconut flour can absorb some of the liquid, while you preheat a small skillet over medium heat. For quicker turn-around time, I like to use a griddle for making crepes. Whichever you opt to use, for best results, it’s important to be sure your cooking device is thoroughly preheated.
  9. Once your skillet (or griddle) is hot, lightly butter the surface (or use coconut oil). The butter should bubble and sizzle if your skillet/griddle is preheated well.
  10. Then, whisk batter again and add a large spoonful or two to the griddle. Using the back of the spoon, and working from the center outward, gently spread the batter into a thin, even layer to form a 5-inch round crepe.
  11. Cook crepe about 1-2 minutes until it begins to firm up. Then carefully slide a spatula under the crepe and gently flip it over. Cook on the second side for about a minute. Place crepes on wire rack to cool, while continuing to make the remaining crepes.
  12. Step Four: Filling Crepes (and eating them!)
  13. Once the crepes have cooled, add a small amount of fresh whipped cream along the center of each crepe. (If you're dairy-free, substitute with whipped coconut cream or simply spread a thin layer of all-fruit jam on the crepe.)
  14. Add a small amount of mixed berries or your favorite fresh fruit such as ripe cherries, peaches, banana slices, etc.
  15. Then, gently roll each crepe. To keep the crepe rolled up, use a toothpick in the center to secure it. (Just don’t forget it’s there when you go to eat it!)
  16. *Drizzle crepe with fresh fruit puree and top with a dollop of whipped cream. Beautiful and delicious!

Notes

*You can drizzle the fresh fruit puree using a small spoon, or by placing the puree into a small ziplock baggie, snipping one end just a bit, to create a pastry-style bag.

3.1
https://thenourishinghome.com/2012/06/fabulous-fruit-filled-crepes-gf-2/

This recipe was shared at: Homestead Barn Hop, Better Mom Mondays, Welcome Home Mondays, Modest Mondays, Monday Mania,  Made from Scratch Mondays, Soli Deo Gloria, Titus 2sdays, Domestically Divine, Titus 2 Tuesdays Link Party, On Your Heart Tuesdays, Traditional Tuesdays, Tempt My Tummy Tuesdays, Tuesdays at the Table, Fat Tuesdays, Hearth & Soul, Kids in the Kitchen Link-Up, Living Well Wednesdays, Homemaking Link-Up, Allergy-Free Wednesdays, Gluten-Free Wednesdays, Pennywise Platter, Simple Lives Thursdays, Big Family Fridays, Fresh Bite Fridays, Feasting in Fellowship Fridays, Ingredient Spotlight

You Might Also Like:

Teaching Kids Where Real Food Comes From {and 20+ Strawberry Recipes}
Sweet Vanilla Glaze (GF, DF)
Spicy Tropical Fruit Skewers {Grilled}

Filed Under: Other Desserts ·

Fruit-on-the-Bottom (and top) Yogurt Cups

By Kelly · Leave a Comment

Healthy Homemade Fruit-on-the-Bottom Yogurt Cups
This healthier version of the popular commercial brand fruit-on-the-bottom yogurt is packed with greater nutrition because it’s made with homemade yogurt, honey-sweetened jam and fresh organic berries.

And it’s so simple to make! Just add a tablespoon or two of your favorite jam to a small mason jar and top with fresh homemade yogurt and a handful of berries.

Fruit on Bottom Yogurt Close Up

Making your own yogurt is not only easy and more nutritious, it’s a great way to save money too! And there are so many delicious ways to use it – from fruit & yogurt parfaits to creamy homemade salad dressings – the ideas are endless!

Print
Fruit-on-the-Bottom (and top) Yogurt Cups

Yield: 1 serving

Fruit-on-the-Bottom (and top) Yogurt Cups

Ingredients

  • 3/4 cup homemade dairy or non-dairy yogurt
  • 1-2 tbsp of homemade honey-sweetened fruit preserves (or your favorite all-fruit organic jam)
  • 1/4 cup fresh organic berries

Instructions

  1. Add fruit preserves to a half-pint mason jar or small bowl. Then top with plain yogurt and a sprinkling of fresh berries.
  2. If you like a little crunch, add some chopped crispy nuts (like walnuts) or a sprinkling of homemade grain-free granola to the top. So easy and so yummy!
3.1
https://thenourishinghome.com/2012/03/fruit-on-the-bottom-and-top-yogurt/

You Might Also Like:

Healthier Flavored Yogurt (GF)
Mixed Berry Muffins (GF)
Lemon Poppy Mini-Muffins (GF)

Filed Under: Breakfast, Other Breakfast Foods ·

  • « Previous Page
  • 1
  • …
  • 6
  • 7
  • 8
  • 9
  • Next Page »

My New Cookbook is Here!

Welcome to The Nourishing Home!

I’m so glad you’re here and want you to feel right at home! My heart in creating this blog is to help you by sharing helpful meal planning strategies and nourishing GF recipes that are healthy, easy and delicious with thanksgiving to God! [Read More …]


All content (recipes, photos, posts, etc.) on this site is the creative property of Kelly Smith. You are welcome to share a photo via social media, as long as it contains a link back to the corresponding recipe or post from this site. However, you may not republish a recipe in its entirety in any form. For questions, or for permission to use a photo or recipe, please contact me via email at [email protected]. Thank you!

Please Note: All content (recipes, photos, text, etc.) on this site is the creative property of Kelly Smith of The Nourishing Home. You are welcome to share a photo via social media, as long as it contains a link back to the corresponding recipe from this site. However, re-publishing a recipe in any form is strictly prohibited. Additionally, please refrain from adapting recipes without properly linking back to the original recipe, and keep in mind that simple substitutions do not constitute an adapted or original recipe. For details regarding recipe copyright law, please visit the Food Blog Alliance.
The Nourishing Home is a participant in the Amazon Services LLC Associates Program, an affiliate advertising program designed to provide a means for sites to earn advertising fees by advertising and linking to amazon.com.

Privacy Policy
DMCA.com

Copyright © 2026 · All Rights Reserved · The Nourishing Home · Artwork by Nancy Panaccione · Site Design by Deluxe Designs · Log in