The Nourishing Home

living healthier lives in service to the King!

  • Home
  • About
    • About TNH
    • Contact
  • Meal Planning
  • Health & Wellness
    • Real Food Basics
  • Whole30
  • GF Recipes
    • Whole30
    • Breakfast
    • Lunch
    • Entrées
    • Slow Cooker
    • Soups & Stews
    • Sides & Salads
    • Snacks
    • Desserts
    • Kids in the Kitchen
  • My Cookbook
  • Subscribe

Search Results for: jam

Jam-n-Muffins (GF)

By Kelly · 8 Comments


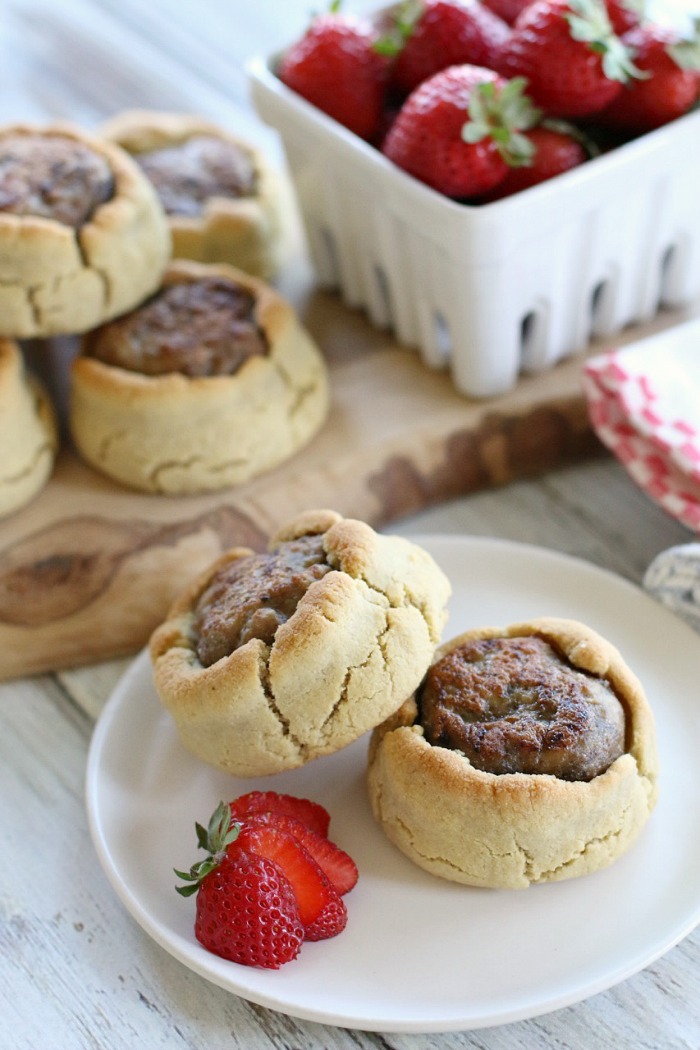
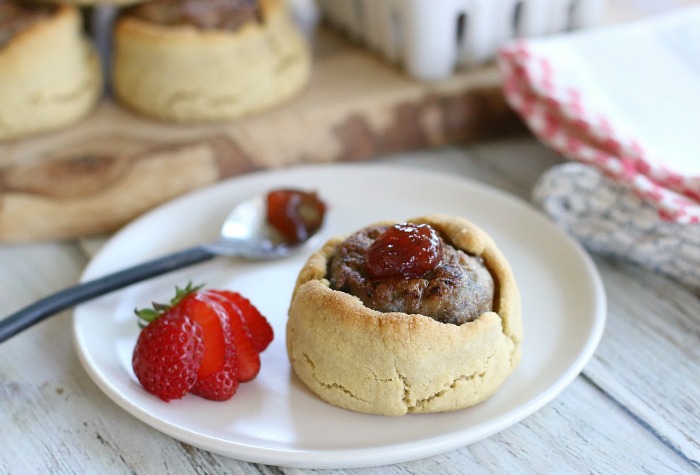
Step one, jam the muffin into your mouth until you reach the center of the muffin. Step two, bite down and discover a sweet surprise. Step three, wipe your face and repeat. YUM!

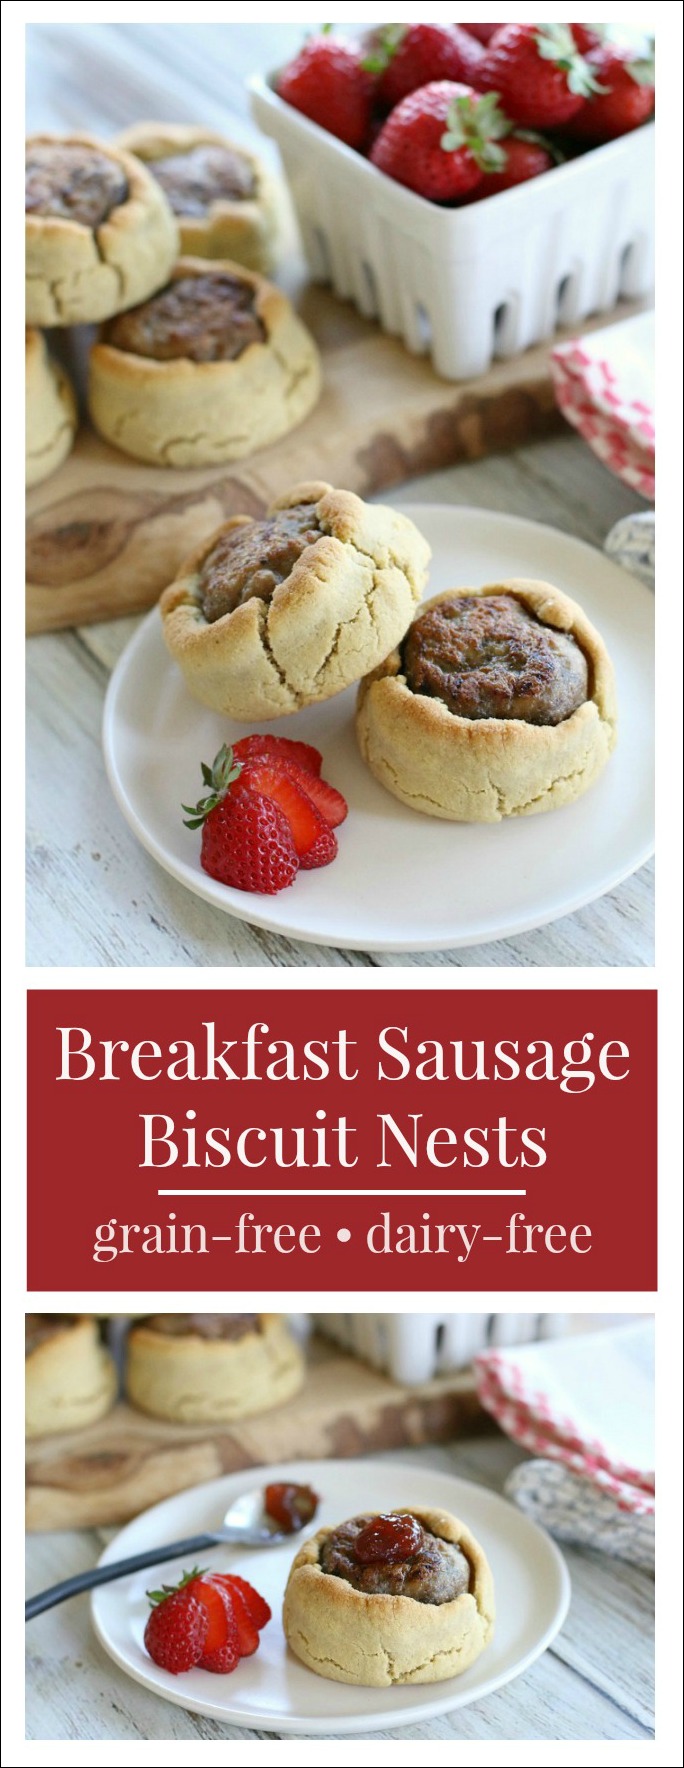
You can make these delicious jam-filled muffins using either coconut flour or blanched almond flour, as I’ve provided a recipe for either option below. And you can use any jam-fruit combo you choose … like raspberry jam centers with fresh raspberries on top, or blueberry jam centers with fresh blueberries on top. Enjoy!

Print
Almond Flour Jam-n-Muffins (GF)

Yield: 10

Almond Flour Jam-n-Muffins (GF)

Ingredients

  • 2 large eggs
  • 1/3 cup plain whole milk yogurt (or kefir)
  • 1/4 cup pure maple syrup (see note below)
  • 1 tsp pure vanilla extract
  • 2 1/2 cups blanched almond flour
  • 1/4 tsp sea salt
  • 1/2 tsp baking soda
  • Organic strawberry all-fruit jam
  • Fresh diced strawberries

Instructions

  1. Preheat oven to 315 degrees. Place 10 paper liners in a 12-cup muffin tin; set aside. In a large bowl, whisk together the eggs, yogurt, maple syrup and vanilla until well blended. Using a spoon, stir in the almond flour, salt and baking soda until well incorporated.
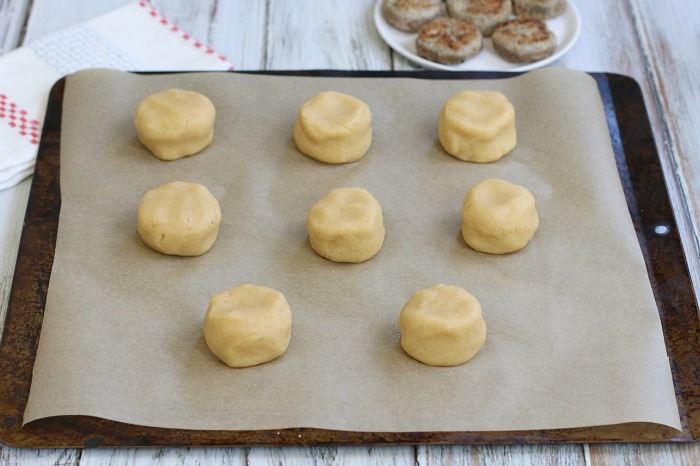
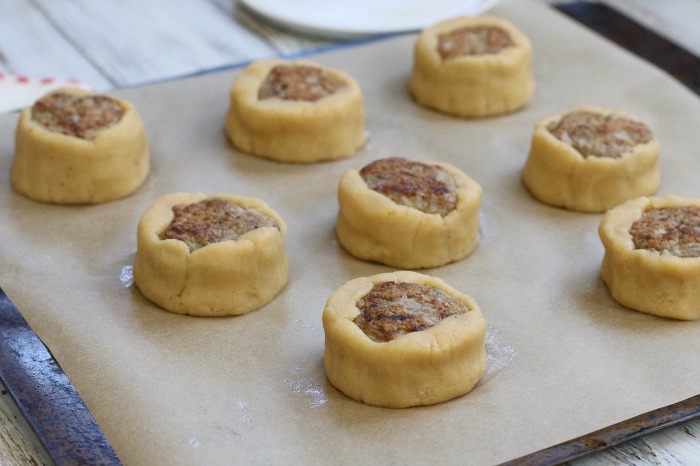
  2. Add a spoonful of the muffin batter to each of the lined muffin cups making sure to fill no more than 1/3 of the muffin liner. Using both hands, lift the muffin tin evenly tap the bottom on the counter to evenly distribute the batter in the bottom of the muffin cups.
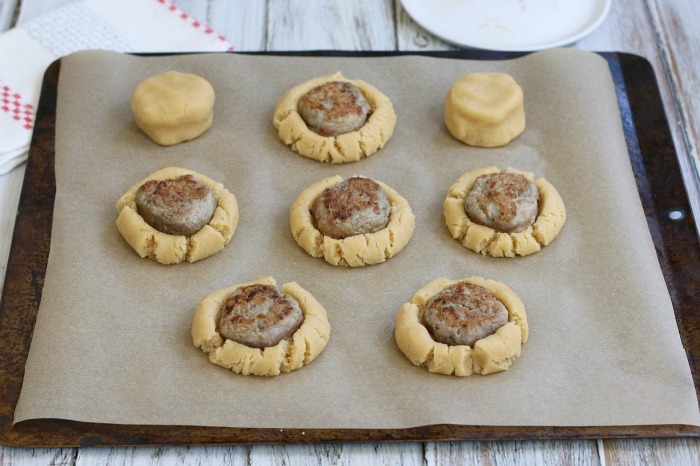
  3. Place a one teaspoon-full of strawberry jam in the center of each muffin, as shown in the photo below. Evenly divide remaining batter among the tops of each muffin. Then, top with a sprinkling of diced fresh strawberries.
  4. Bake for approximately 28-30 minutes, until edges begin to turn a golden brown and a toothpick placed in the center comes out clean. Allow to cool in the pan for at least 10 minutes; then enjoy!. (Please do not eat them before they're cool to touch, as it could result in a burn due to the jam being very hot. )

Notes

Do not substitute the maple syrup with honey, or your muffins will be dry and have over-browned bottoms.

3.1
https://thenourishinghome.com/2012/03/jam-n-muffins-gf/

Print
Coconut Flour Jam-n-Muffins (GF)

Yield: 8

Ingredients

  • 1/2 cup coconut flour
  • 1/2 tsp baking soda
  • 1/4 tsp sea salt
  • 4 large eggs
  • 1/3 cup plain organic whole milk kefir (or yogurt)
  • 1/3 cup pure maple syrup
  • 2 tbsp unsalted butter, melted
  • 1 tsp pure vanilla extract
  • Organic strawberry all-fruit jam
  • Fresh diced strawberries

Instructions

  1. Preheat oven to 350 degrees. Line a 12-cup muffin pan with 8 paper liners. In a small bowl, mix together the coconut flour, baking powder and salt. In a large bowl, whisk together the eggs, kefir, maple syrup, butter and vanilla extract. Add the dry ingredients to the wet and whisk well to combine until no lumps remain and batter is thick.
  2. Add a large spoonful of the muffin batter to each of the lined muffin cups making sure to fill no more than 1/3 of the muffin liner. Using both hands, lift the muffin tin evenly tap the bottom on the counter to evenly distribute the batter in the bottom of the muffin cups.
  3. Place one teaspoon-full of strawberry jam in the center of each muffin, as shown in the photo below. Evenly divide remaining batter among the top of each muffin. Then, top with a sprinkling of diced fresh strawberries.
  4. Bake for approximately 22-25 minutes, until top and edges begin to turn a light golden brown. Allow muffins to cool in the pan for at least 10 minutes; then enjoy!. (Please do not eat them before they're cool to touch, as it could result in a burn due to the jam being very hot. )
3.1
https://thenourishinghome.com/2012/03/jam-n-muffins-gf/

You Might Also Like:

Cherry-Almond Muffins (GF, DF)
Cinnamony Apple Pie Muffins(GF)
Cinnamon Streusel Muffins (GF)

Filed Under: Breakfast, Muffins/Breads/Biscuits ·

From Freezer to Table: Slow Cooker Sweet & Spicy Chicken

By Kelly · 4 Comments

This easy and flavorful Slow Cooker Sweet & Spicy Chicken is a healthier and tastier alternative to take out, and even better – it’s no fuss!

Slow Cooker Sweet & Spicy Chicken! Simply toss this tasty freezer meal right into your slow cooker and enjoy a super-easy home-cooked meal!

Finding ways to save time, money and stress while eating healthier is definitely a passion I love sharing! That’s why I’m excited to share an updated version of one of my favorite slow cooker meals, which just so happens to be featured in the new cookbook, From Freezer to TableSlow Cooker Sweet & Spicy Chicken! Simply toss this tasty freezer meal right into your slow cooker and enjoy a super-easy home-cooked meal!, by my dear friends Polly and Rachel at Thriving Home.

My new-and-improved Slow Cooker Sweet & Spicy Chicken is a definite family favorite. The all-natural sweetness of apricot jam combined with a flavorful array of seasonings results in a sweet-n-spicy sauce perfect with slow-cooked chicken and veggies. Simply serve over a bed of basmati rice or cauli-rice for a quick and healthy meal!

Slow Cooker Sweet & Spicy Chicken! Simply toss this tasty freezer meal right into your slow cooker and enjoy a super-easy home-cooked meal!

It’s not only a healthier option to typical take-out – it’s also no-fuss! Simply prep the ingredients ahead of time and place them in the freezer. Then, when you know you’re going to have one of those days where there’s just no time to cook, you can simply toss this tasty freezer meal right into your slow cooker and enjoy a super-easy home-cooked meal! (See note in recipe below for details.)

Slow Cooker Sweet & Spicy Chicken! Simply toss this tasty freezer meal right into your slow cooker and enjoy a super-easy home-cooked meal!As a busy mom like you, I know it can be a real challenge to get a healthy meal on the table, which is why I’m so excited that my talented friends Polly and Rachel decided to combine all of their freezer meal expertise into a helpful new cookbook, From Freezer to TableSlow Cooker Sweet & Spicy Chicken! Simply toss this tasty freezer meal right into your slow cooker and enjoy a super-easy home-cooked meal!. Their beautiful book contains 75+ delicious whole food recipes and how-to-strategies for creating easy, family-friendly meals that can go from the freezer to the table in a snap!

P.S. If you’re gluten-free like me, you’ll be happy to hear that 20+ of the recipes are gluten-free (including my recipe featured in the book, which I’m sharing below). A few of my favorite gluten-free/grain-free freezer meals from the book include: Lemon-Garlic Chicken (p. 88); Flank Steak with Chimichurri (p. 101); Totally Tasty Taco Kit (p. 108), Zesty Marinated Shrimp (p. 137); Chili-Rubbed Beef Brisket (p. 195) and there’s so many more!

Of course, many of the grain-based recipes in the book can easily be adapted to be gluten-free and grain-free meals by simply substituting with zucchini noodles or cauli-rice instead. Burgers and sandwiches calling for a bun can easily be wrapped in lettuce instead, or served on a sweet potato bun.

And last but not least, I love that Polly and Rachel share step-by-step freezer cooking basics, and their awesome how-to tips for planning Freezer Cooking PartiesSlow Cooker Sweet & Spicy Chicken! Simply toss this tasty freezer meal right into your slow cooker and enjoy a super-easy home-cooked meal! with friends and family. They have so many helpful, practical ideas for stocking your freezer with lots of simple, healthy meals to make it easier and more enjoyable to gather around the table with those you love, even on the busiest days!

Slow Cooker Sweet & Spicy Chicken! Simply toss this tasty freezer meal right into your slow cooker and enjoy a super-easy home-cooked meal!

Print
Slow Cooker Sweet & Spicy Chicken (GF, DF)

Ingredients

  • 3 lbs boneless, skinless chicken thighs
  • 1 red bell pepper, seeded and sliced
  • 1 yellow bell pepper, seeded and sliced
  • 3 cups broccoli florets
  • For the sweet & spicy sauce:
  • 2 cups all-fruit apricot jam
  • 2 cloves garlic, minced
  • 2 Tbsp coconut aminos
  • 2 tsp dry mustard
  • 2 tsp dried minced onion
  • 2 tsp sea salt
  • 1/2 tsp ground ginger
  • 1/2 tsp red pepper flakes (use more for a spicier sauce)
  • 2 Tbsp arrowroot powder (for thickening sauce)

Instructions

  1. Cut chicken thighs into bite-size chunks and place into a 6-quart slow cooker.
  2. Cut the veggies as noted above. Place in a bowl and refrigerate until ready to use, as noted below.
  3. In a medium bowl, whisk together the apricot jam, garlic, soy sauce or coconut aminos, mustard, onion, salt, ginger, and red-pepper flakes. Pour over the chicken.
  4. Cover and cook on low for 4 to 5 hours. Check chicken at the 4-hour mark, if it's not cooked through, continue cooking. Once the chicken is cooked through, add the sliced bell peppers and broccoli florets. Then, continue cooking on low until veggies are al dente (about 30-45 minutes).
  5. Use a slotted spoon to remove chicken and veggies from slow cooker and place in a serving dish. Whisk in the arrowroot powder to thicken the sauce, if desired.
  6. To serve, ladle the sauce over the chicken and veggies. Serve over basmati rice or cauli-rice.
  7. To Freeze: Place the veggies into a freezer-safe container and freeze. Add the diced chicken to a separate freezer-safe container, top with the sweet-n-spicy sauce, and freeze.
  8. To Prepare: Thaw the chicken mixture and veggies in the refrigerator overnight. When ready to cook, follow the instructions above beginning in Step 4. Easy and delicious!
3.1
https://thenourishinghome.com/2017/10/slow-cooker-sweet-spicy-chicken/

You Might Also Like:

Slow Cooker Italian Beef & Swiss Chard Ragu {Plus, Bonus Soup Recipe}
Sweet-n-Spicy Grilled Chicken (GF)
Easy Grilled Herb Turkey Breasts {Whole30}

Filed Under: Poultry, Slow Cooker ·

Sausage Biscuit Nests {Grain-Free, Dairy-Free}

By Kelly · 34 Comments

Tasty little sausage patties nestled in delicious grain-free biscuits!

These Sausage Biscuit Nests are a ready-made breakfast sandwich that can easily be enjoyed at the table – or for busy mornings – as breakfast on-the-run}!

Thinking about a fun way to wake-up the sleepy heads in my home, I decided to combine a favorite classic into a ready-made breakfast sandwich that can easily be enjoyed at the table {or for busy mornings, as breakfast on-the-run}! 

The beauty of these adorable little Sausage Biscuit Nests is you can make them using any homemade biscuit dough you fancy! Of course, we’re partial to my popular Almond Flour Biscuits.

Another plus is that they freeze well! So when the crazy back-to-school season arrives, you can bet I’ll be assembling these in bulk and freezing the uncooked nests for future breakfasts. {Just thaw overnight in the fridge and bake in the oven as directed in the recipe below.}

These Sausage Biscuit Nests are a ready-made breakfast sandwich that can easily be enjoyed at the table – or for busy mornings – as breakfast on-the-run}!

If your family enjoys sausage biscuits, they’re certain to find this ready-to-pop-in-your-mouth version even more fun (and delicious)!

How to Make Sausage Biscuit Nests …

Two ingredients is all that’s required – homemade biscuit dough and fully-cooked sausage patties. Then, follow the simple steps below to assemble and bake these adorable little Sausage Biscuit Nests for a perfectly tasty {and healthy} breakfast on the go! Yum!

These Sausage Biscuit Nests are a ready-made breakfast sandwich that can easily be enjoyed at the table – or for busy mornings – as breakfast on-the-run}! 

Step One: Make homemade biscuit dough and cook your sausage patties!

The key to making flavorful {and healthy} Sausage Biscuit Nests is using homemade whole food ingredients! As shown in the photos, I love using my scrumptious Almond Flour Biscuit dough from my published cookbook. It’s one of the most popular recipes on the blog. However, you can use any homemade biscuit dough you’d like with great results!

And when it comes to sensational sausage patties, if you haven’t tried my easy Turkey Breakfast Sausage Patties yet, I highly recommend cooking some up. They’re so flavorful and satisfying, I promise your family will love them! {They’re my kids favorite!}

These Sausage Biscuit Nests are a ready-made breakfast sandwich that can easily be enjoyed at the table – or for busy mornings – as breakfast on-the-run}! 

Step Two: Place and press a fully-cooked sausage patty into the center of each biscuit!

It’s important to use fully-cooked sausage patties, as the short time in the oven to cook the biscuits does not allow enough time to cook raw sausage. (Also the excess fat released from the sausage patties during the cooking process would make for a very soggy biscuit.)

Once you’ve cooked your sausage patties (or if using pre-packaged fully-cooked patties), make sure to bring them to room temperature. Also, be sure to use a paper towel to dab off any excess moistness. Then place one fully-cooked sausage patty into the center of each uncooked biscuit dough round, and gentle press them down into the dough, as shown above.

These Sausage Biscuit Nests are a ready-made breakfast sandwich that can easily be enjoyed at the table – or for busy mornings – as breakfast on-the-run}! 

Step Three: Nestle the biscuit dough around the sausage patties

Once you’ve placed and pressed the fully-cooked sausage patties into the biscuit dough, it’s time to nestle the dough around the sausages. Simply use your hands to shape the dough around the sausages.

These Sausage Biscuit Nests are a ready-made breakfast sandwich that can easily be enjoyed at the table – or for busy mornings – as breakfast on-the-run}! 

Step Four: Bake & enjoy!

Bake the Sausage Biscuit Nests according to the instructions in the biscuit recipe you’re using. You may find that you need to bake the biscuits a little longer than the instructions indicate, depending on the biscuit recipe you’re using. You’ll know they’re done when the biscuits are golden brown on top and a toothpick inserted to the side of the sausage patty comes out clean.

These Sausage Biscuit Nests are a ready-made breakfast sandwich that can easily be enjoyed at the table – or for busy mornings – as breakfast on-the-run}! 

Our favorite way to enjoy these tasty little breakfast sandwiches is with a dollop of Homemade Strawberry Preserves, or quick-n-easy Strawberry Chia Seed Jam. The addition of sweet strawberry jam really complements the savory flavors of these hearty sausage biscuits!

These Sausage Biscuit Nests are a ready-made breakfast sandwich that can easily be enjoyed at the table – or for busy mornings – as breakfast on-the-run}! 

You Might Also Like:

Strawberry Shortcake Biscuits
Pumpkin Pie Muffins {Grain-Free, Dairy-Free}
Jam-n-Muffins (GF)

Filed Under: Muffins/Breads/Biscuits ·

  • « Previous Page
  • 1
  • 2
  • 3
  • 4
  • …
  • 9
  • Next Page »

My New Cookbook is Here!

Welcome to The Nourishing Home!

I’m so glad you’re here and want you to feel right at home! My heart in creating this blog is to help you by sharing helpful meal planning strategies and nourishing GF recipes that are healthy, easy and delicious with thanksgiving to God! [Read More …]


All content (recipes, photos, posts, etc.) on this site is the creative property of Kelly Smith. You are welcome to share a photo via social media, as long as it contains a link back to the corresponding recipe or post from this site. However, you may not republish a recipe in its entirety in any form. For questions, or for permission to use a photo or recipe, please contact me via email at [email protected]. Thank you!

Please Note: All content (recipes, photos, text, etc.) on this site is the creative property of Kelly Smith of The Nourishing Home. You are welcome to share a photo via social media, as long as it contains a link back to the corresponding recipe from this site. However, re-publishing a recipe in any form is strictly prohibited. Additionally, please refrain from adapting recipes without properly linking back to the original recipe, and keep in mind that simple substitutions do not constitute an adapted or original recipe. For details regarding recipe copyright law, please visit the Food Blog Alliance.
The Nourishing Home is a participant in the Amazon Services LLC Associates Program, an affiliate advertising program designed to provide a means for sites to earn advertising fees by advertising and linking to amazon.com.

Privacy Policy
DMCA.com

Copyright © 2026 · All Rights Reserved · The Nourishing Home · Artwork by Nancy Panaccione · Site Design by Deluxe Designs · Log in