The Companion Guide to Everyday Grain-Free Baking was a FREE bonus gift eBook that was specifically designed to be used side-by-side with my published cookbook. This exclusive Companion Guide eBook was made available in 2016 when my cookbook hit bookstands as a special bonus to subscribers. My apologies that this ebook is no longer available. However, you can still find my published cookbook available on Amazon and other online book retailers.
Thank you again for your sweet support! Happy baking!
With blessings and gratitude, Kelly


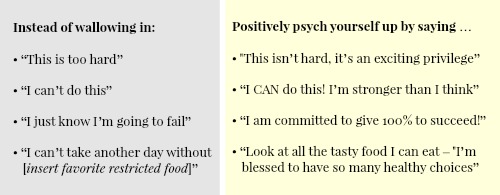
 program not only a whole lot easier for you to stay on target and keep that positive motivation flowing, but it will also make it a whole lot more FUN!
